Search history
Clear

- Topics
X-Sign User Manual
In this section, we'll explain how to manage content in X-Sign, control the player, and set up playlists.
X-sign 2.0 / X-sign User manual / Interactive (Premium)
Viewing the structure of an Interactive Template
2020 / 08 / 25
You can use Interactive Templates in X-Sign Designer to create interactive projects for your touchscreen display. The following is an introduction to working with Interactive Templates. Click here to watch the demonstration video.
Note: This feature is for BenQ members who have purchased a Premium License only. To open an Interactive Template in X-Sign Designer:
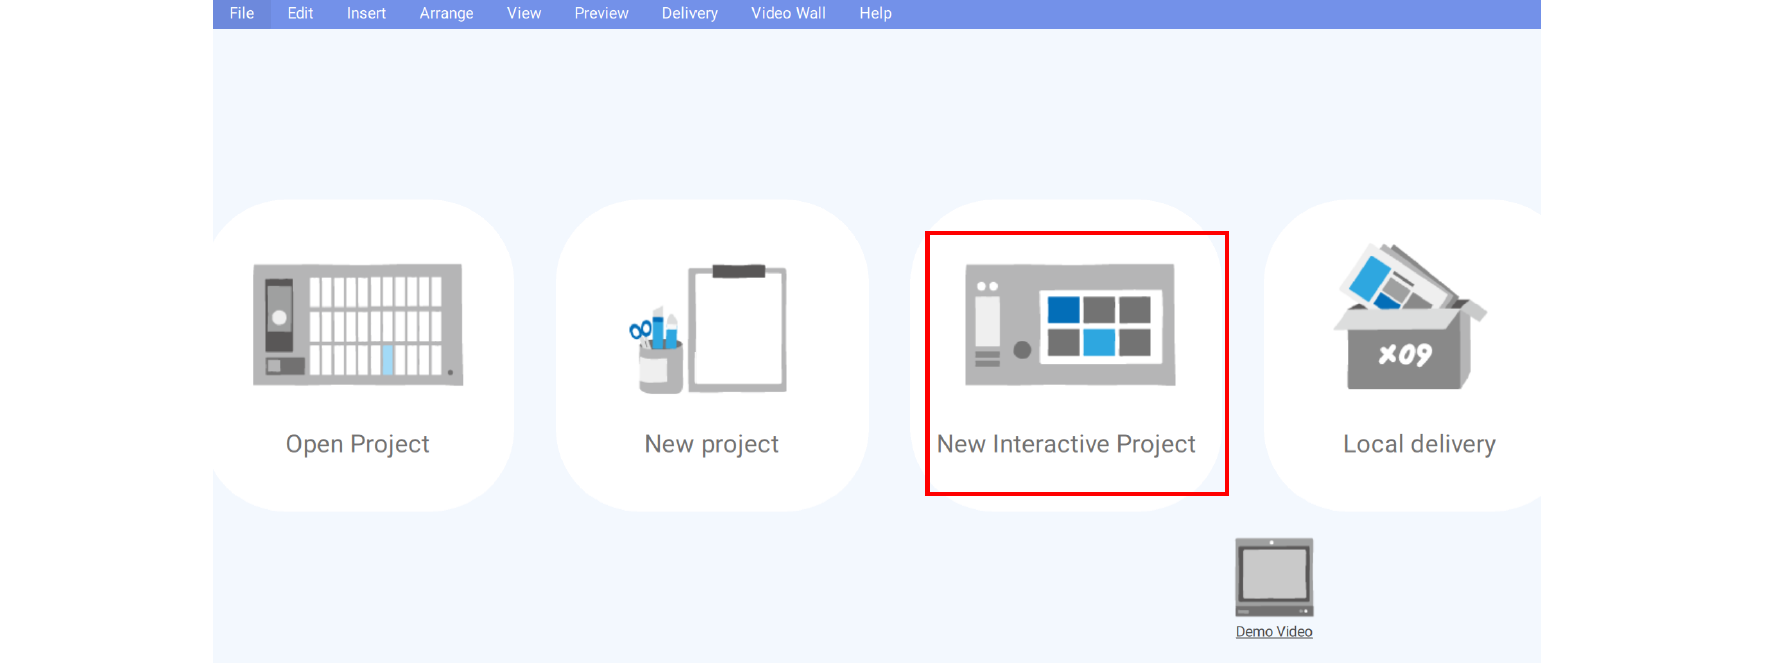
1. Launch the software and click New Interactive Project.
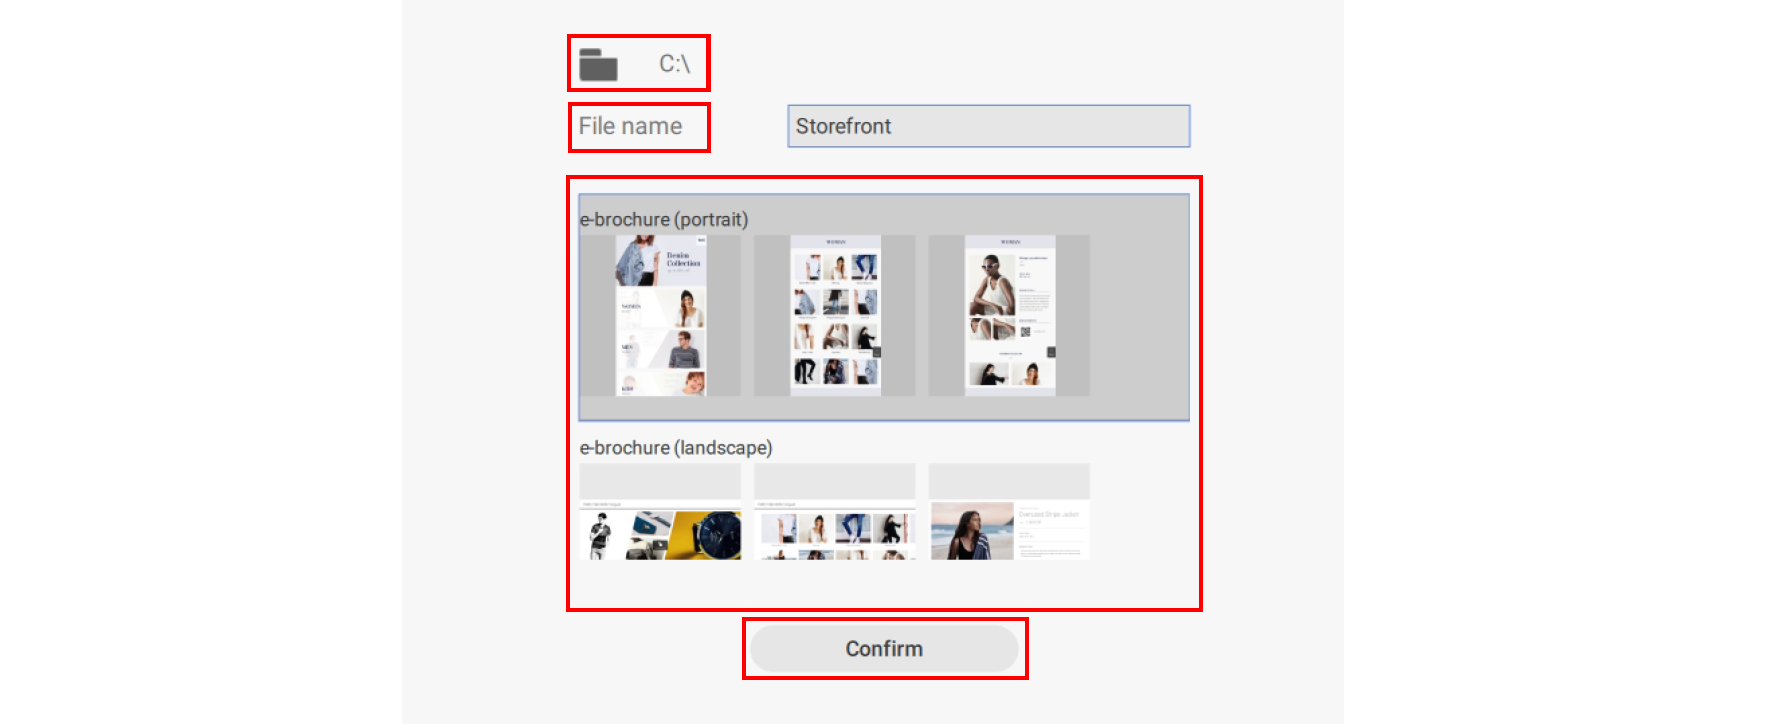
2. Choose a location on your hard drive to save the project and create a File name. Select the e-brochure template you want to use and click Confirm.
3. You can preview the layout of the Interactive project by clicking on Map View.

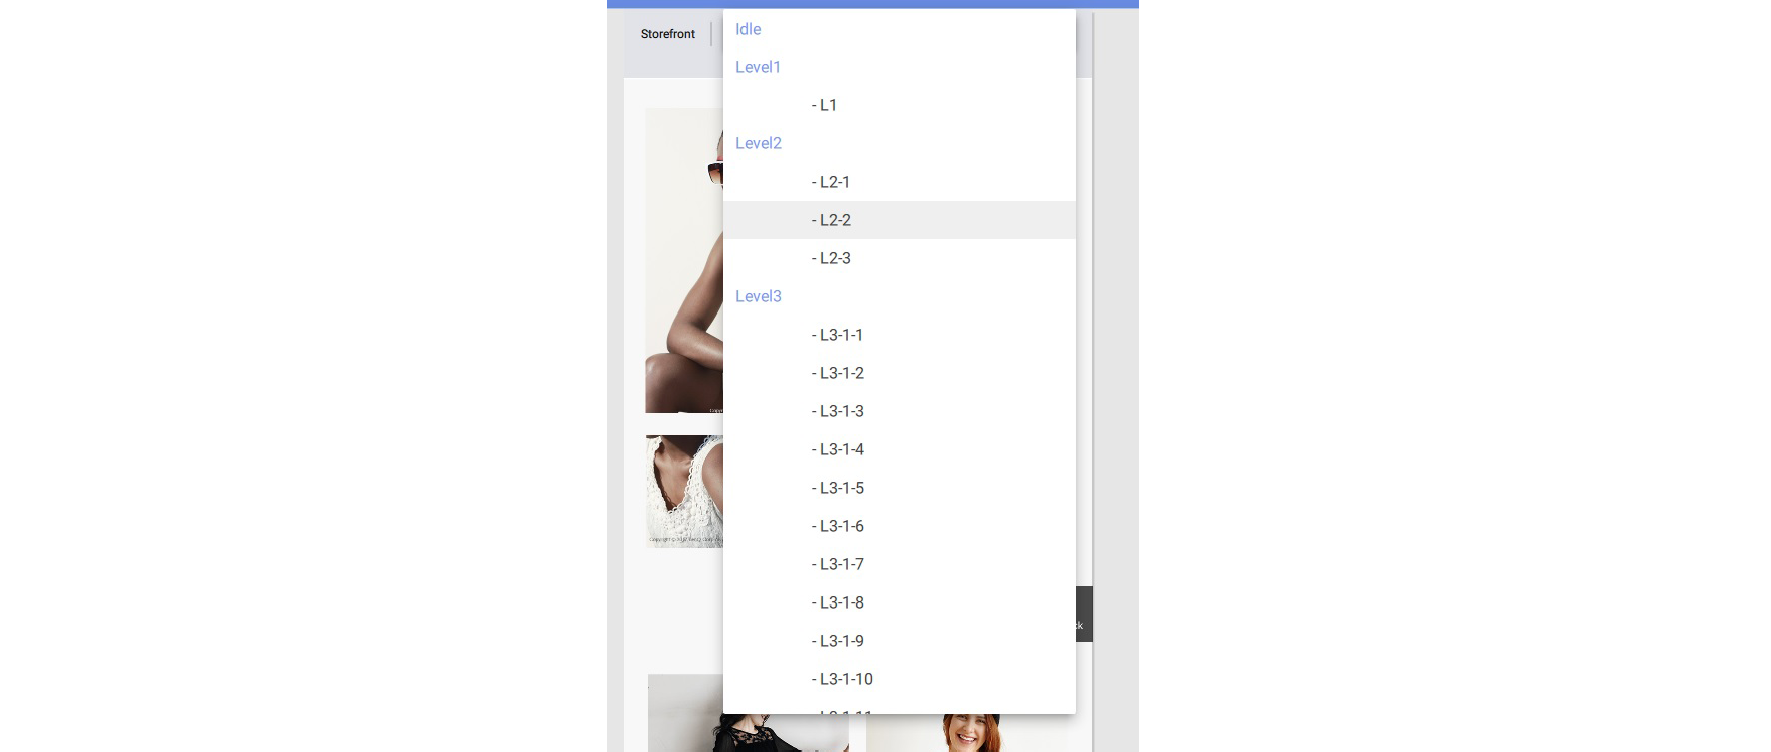
4. Each interactive project consists of 3 Levels, and each level consists of a Template Page and Content Pages:

A. To preview a specific Content Page, click on its icon on the right side. To edit the selected Content Page, double-click the icon.
B. To edit a Template Page (which will affect the layout of your Content Pages), click the Edit button next to the Level you want to adjust.
5. You can also navigate to each Template Page and Content Page by clicking the button at the top of the canvas and selecting the page from the drop-down list.
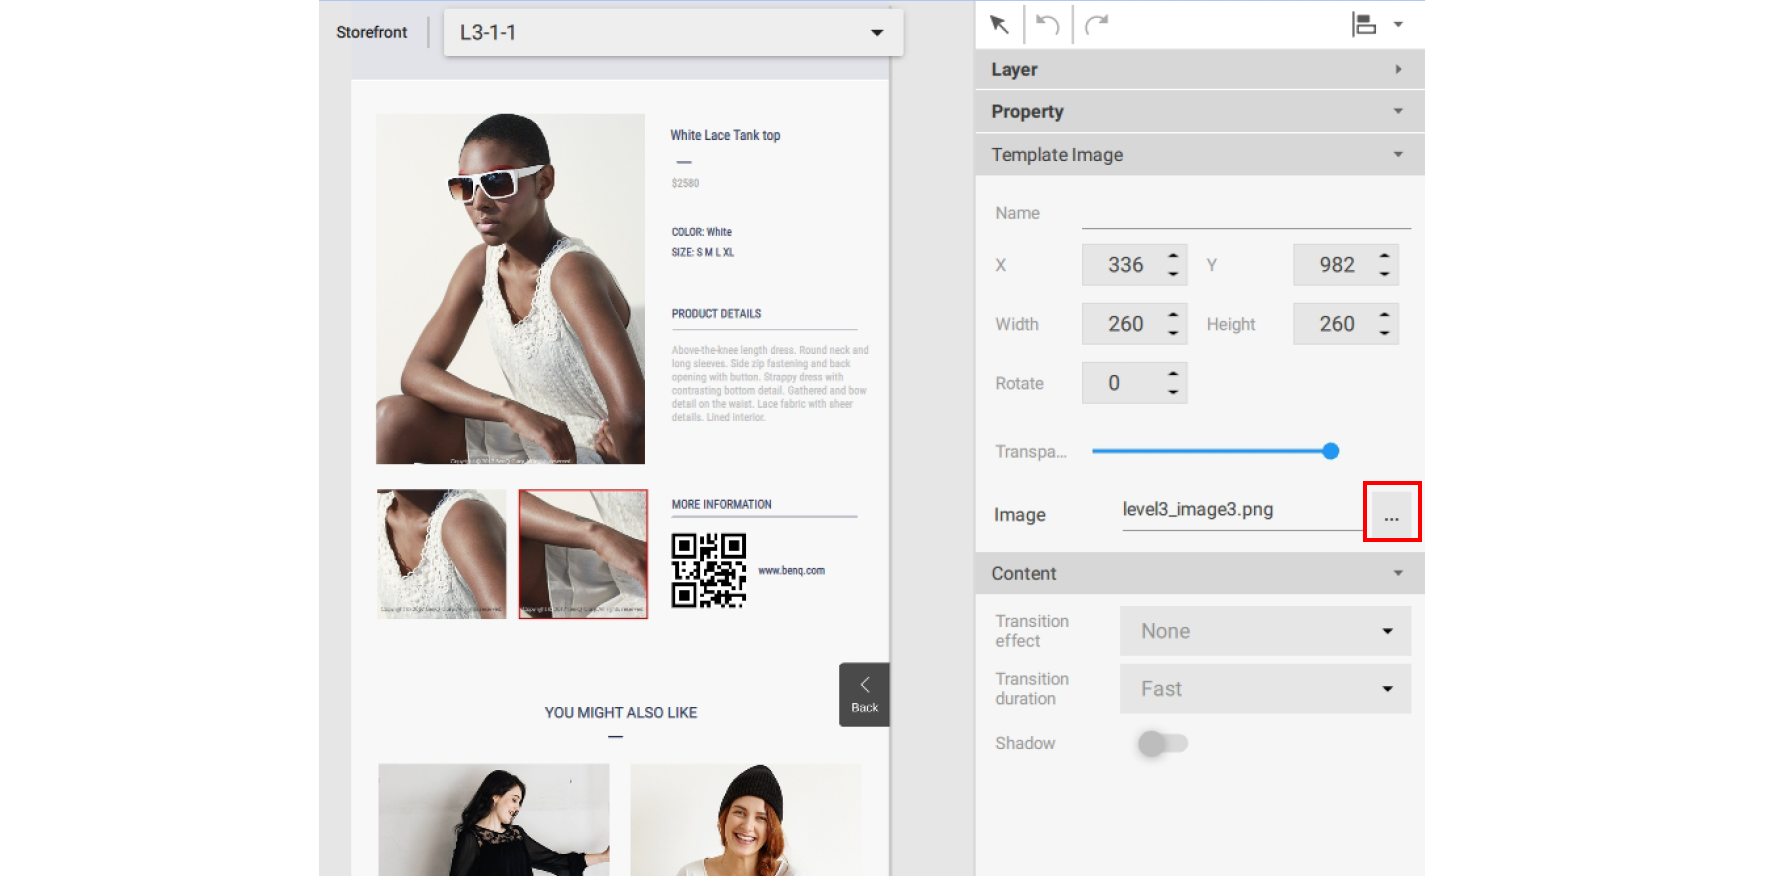
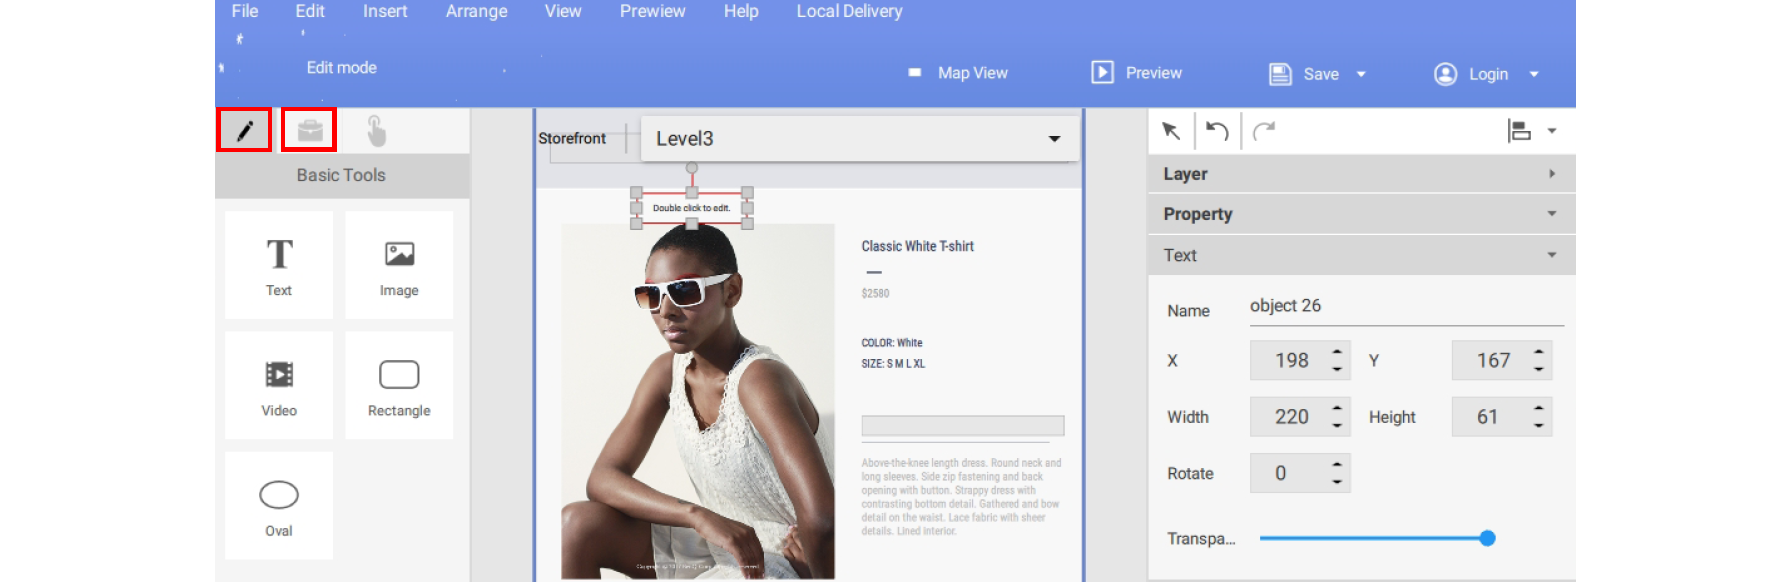
To customize a Content Page in Level 3:
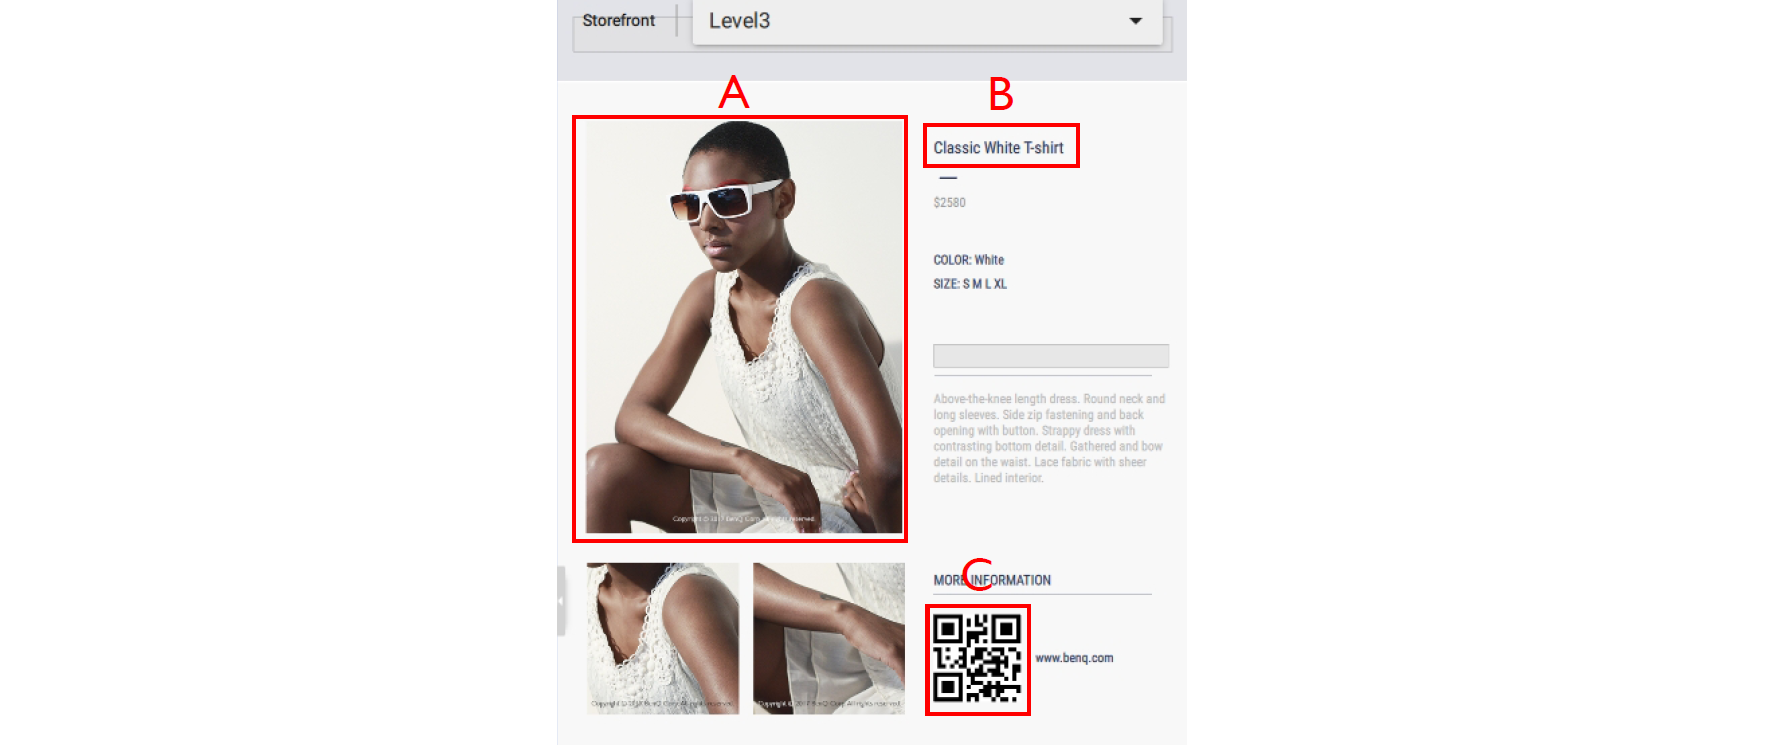
1. You can change each image displayed in a Content Page by selecting it in the canvas, then going to the Template Image panel on the right and click the … button.
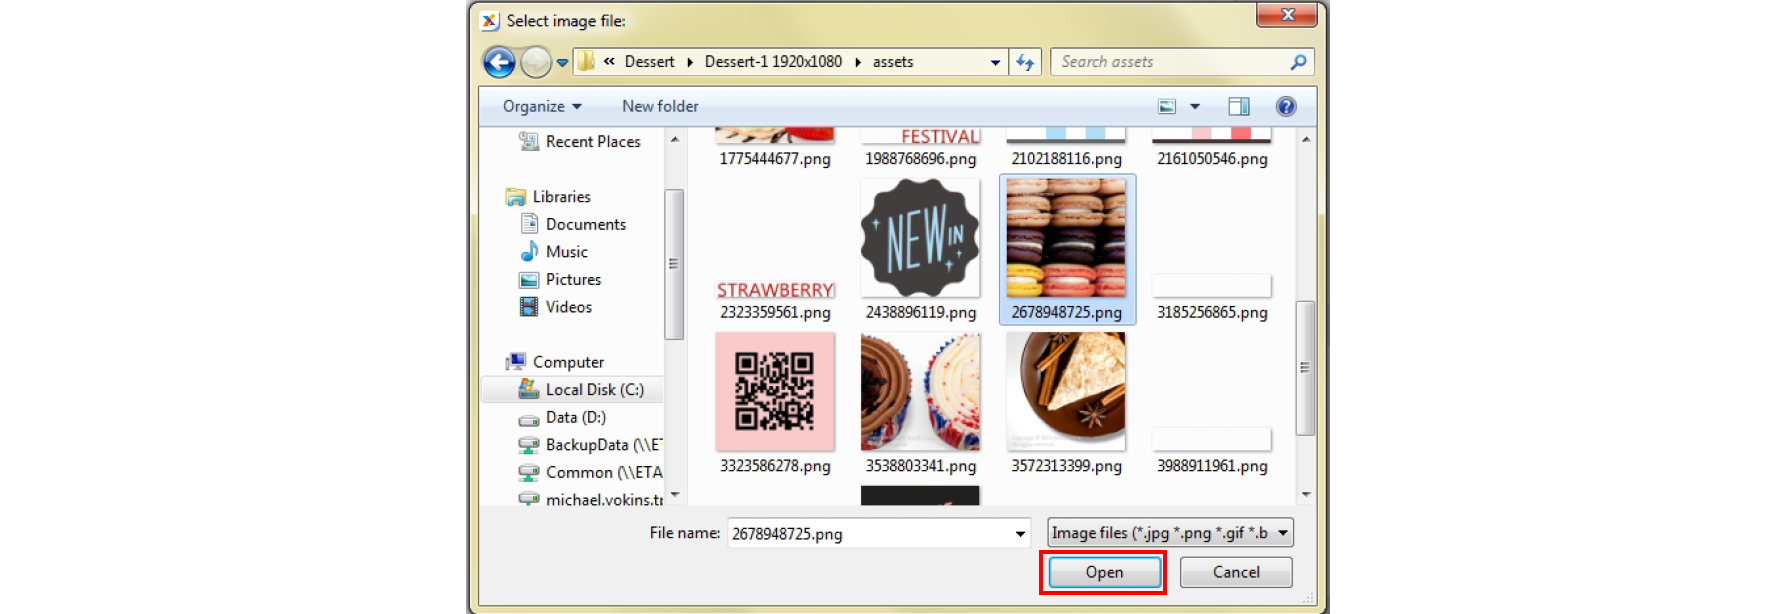
2. Choose the image you want to use from your hard drive and click Open.
3. You can change the text displayed in a Content Page by double-clicking it in the canvas, and then typing in your own text.
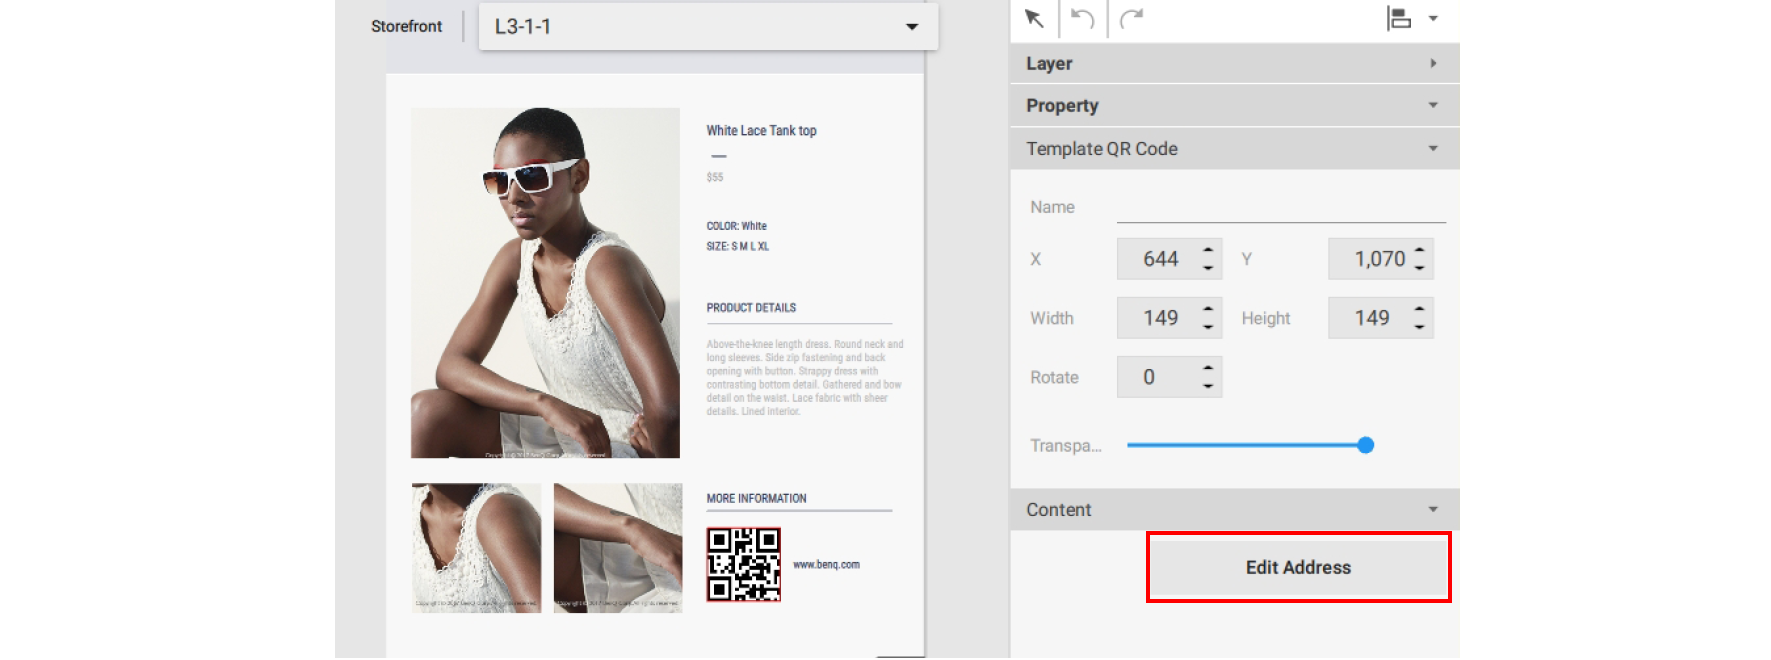
4. You can edit the URL for a QR code in a Content Page by selecting it in the canvas, then going to the Content panel on the right and clicking Edit Address. Enter the QR code link and click Confirm.
To customize a Template Page in Level 3:
1. You can customize the layout of a Template Page for Level 3 by selecting any of the following items in the canvas:
A. Template Image – Select the image in the canvas and then customize the settings in the Template Image panel and the Content panel.
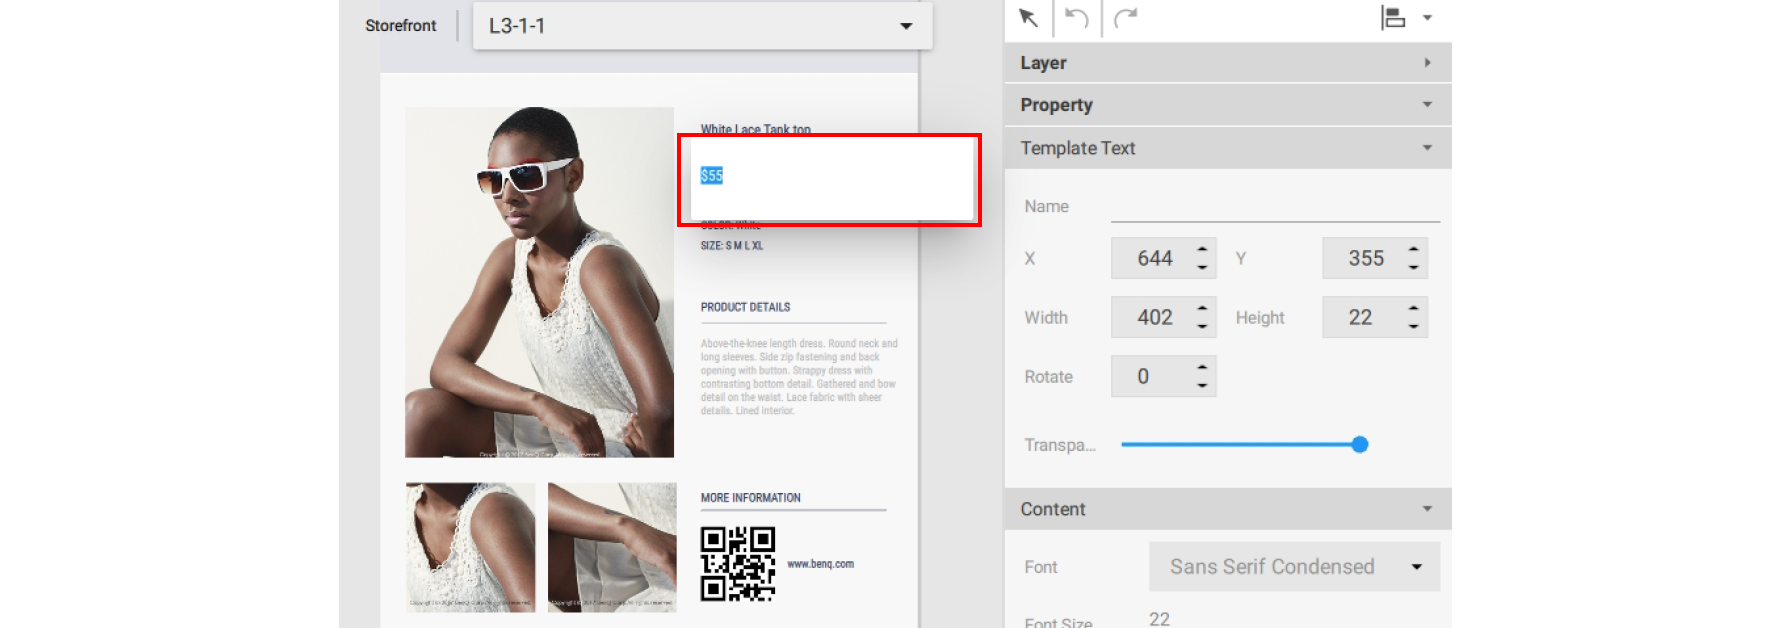
B. Template Text – Select the text in the canvas and then customize its settings in theTemplate Text panel and the Control panel.
C. Template QR Code – Select the QR code in the canvas and then customize its settings in the Template QR Code panel and the Control panel.
2. If you want to delete any Template images or text from the Template page, select the item in the canvas and press delete. A warning message will appear, click Yes to delete or No to exit.

3. You can add new images, text or widgets to the Template Page by using either the Basic tool or Widget panel. Click the pen button to access the Basic tool panel or click the other icon to access the Widget panel. Refer to Creating content in X-Sign Designer for more information about using these tools.
For Level 1 and Level 2 Template Pages and Content Pages, you can add or delete pages, and customize images and text in the Category Generator window. To access the Category Generator window:
1. Navigate to the desired Content Page in Level 1 or Level 2, and then double-click the Category window in the canvas.

2. You can edit the following items in the Category Generator window:
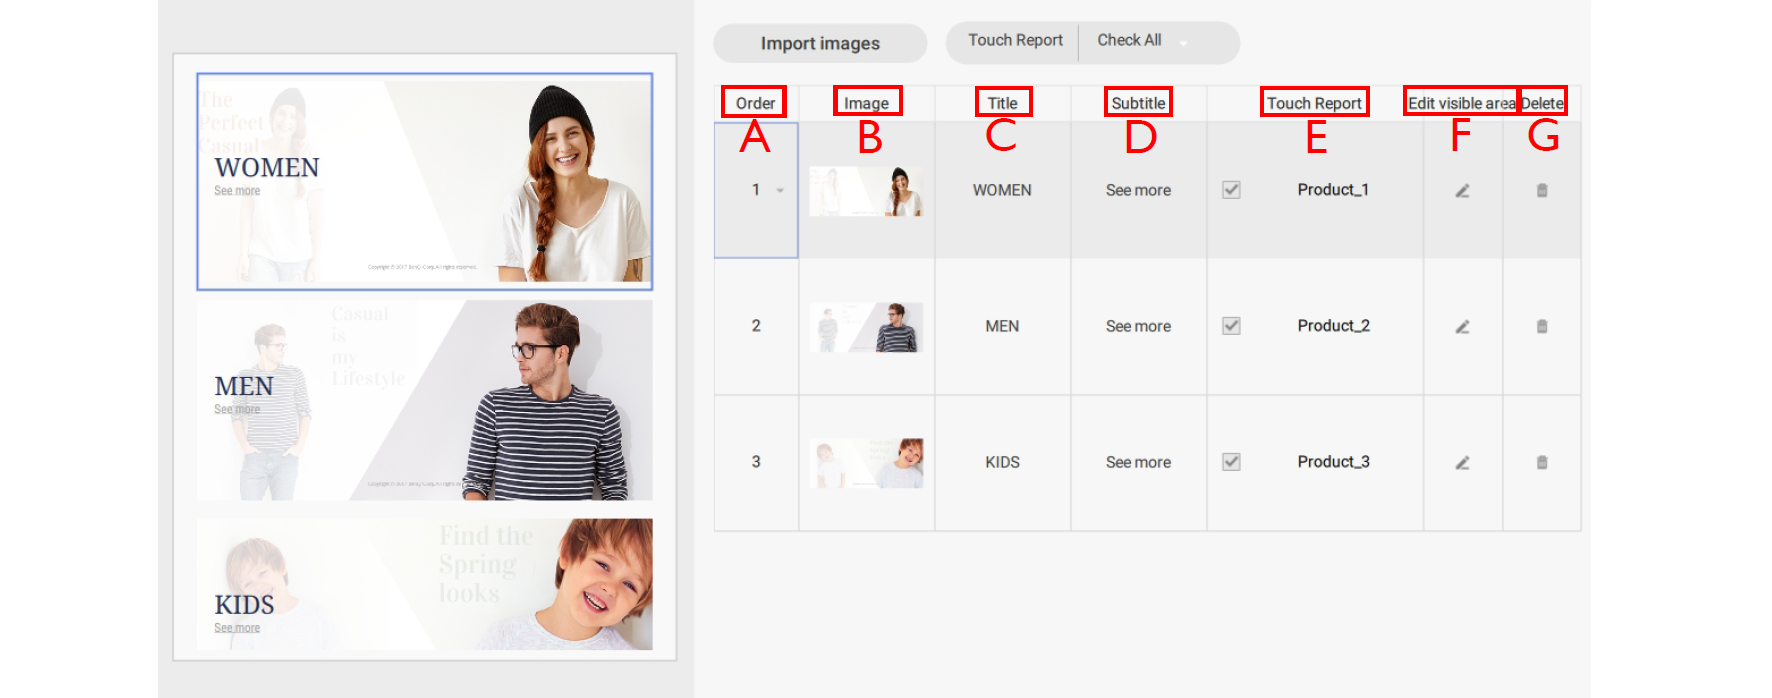
A. Order – Click and hold, then drag a category row upwards or downwards to change the order of the items.
B. Image – Click the image icon and choose a new image from your hard drive. Click Open when finished.
C. Title – To change the Title text, select the text in the category row and type in your new text.
D. Subtitle – To change the Subtitle text, select the text in the category row and type in your new text.
E. Touch Report – Touch Report allows you to track the touchscreen data of specific pages or categories. Check the box to generate Touch Report data for the category.
F. Edit Visible Area – Click the icon to change the positioning of the category image.
G. Delete – Click the icon to delete the category and all its sub-pages.
3. You can add new Category pages by clicking Import images.
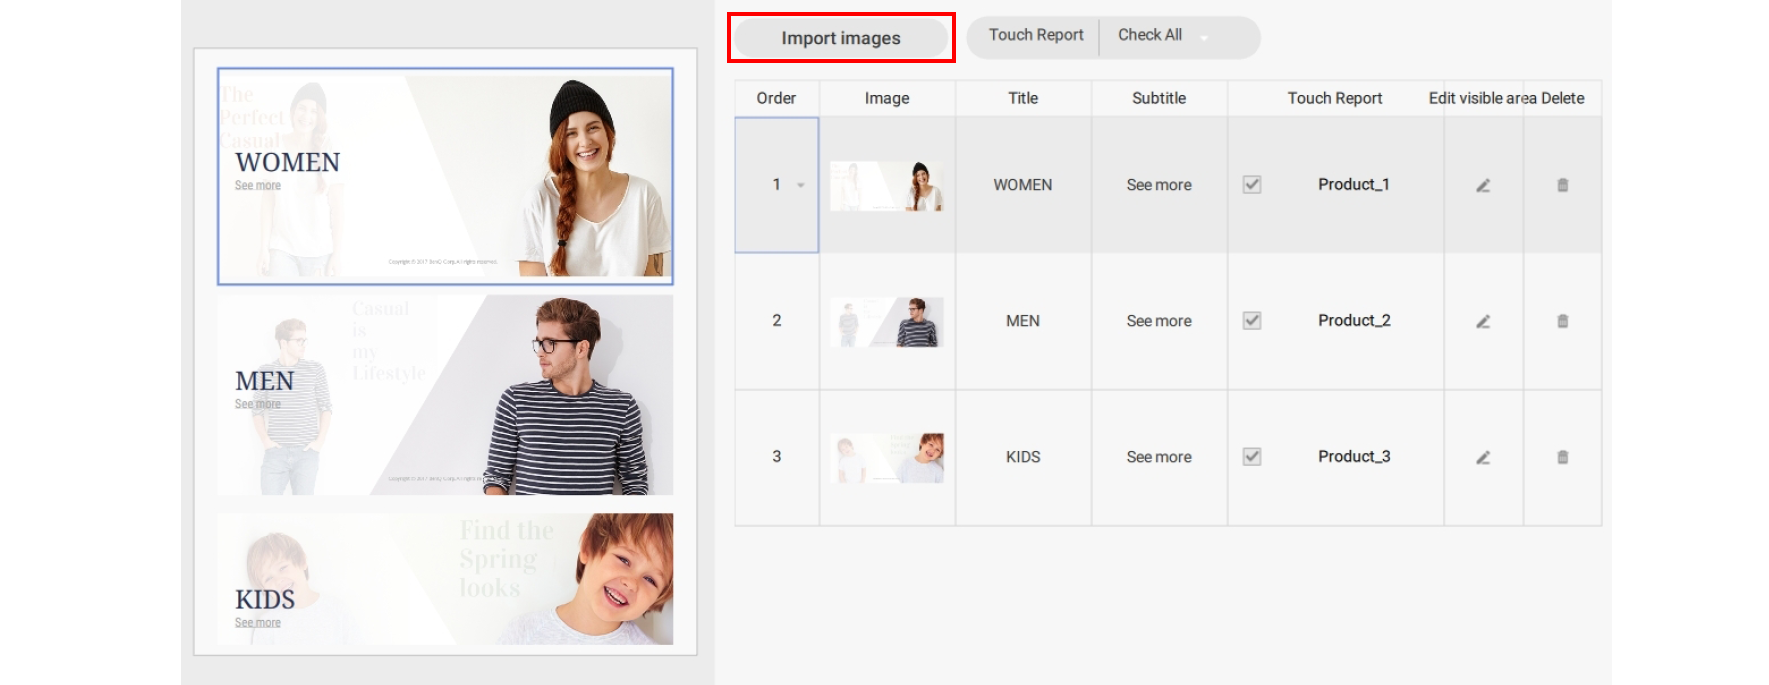
4. Select the image from your hard drive and click Open.

5. You can change the Touch Report settings for all categories by clicking the check icon. Refer to Enabling Interactive Statistics for more information.
TOP