{{item.name}}
Price: {{currency}}{{item.price| numberThousandsCommas | numberDecimalPoint}}
Qty: {{item.amount}}
By Series
4K Gaming Projectors Home Cinema Series TV Projector Series Portable Projectors Golf Simulator ProjectorsBy Feature
Home Entertainment Best 4K Projectors Best Gaming Projectors Up to 20% World Soccer Promo GV Series Portable Ceiling Projectors House Mapping ProjectorsBy Trending Word
4K UHD (3840×2160) Short Throw 2D, Vertical/Horizontal Keystone LED Laser With Android TV With Low Input LagExplore Commercial Projector
Professional Installation Simulation Projection Small Business Corporation K12 & Higher EducationBy Feature
Photographer Monitors Designer Monitors Best 4K Monitors Best Monitors for MacBook Pro & Mac Best Monitors for Versatile MacBook Users Best Monitors for ProgrammingRemote Work & Learning
Explore treVolo Speaker
Dialogue Speaker for Learning Electrostatic Bluetooth Speaker Carry Case & StandProjectors
Monitors
Lighting
Remote Work & Learning
Interactive Displays | Signage
Store
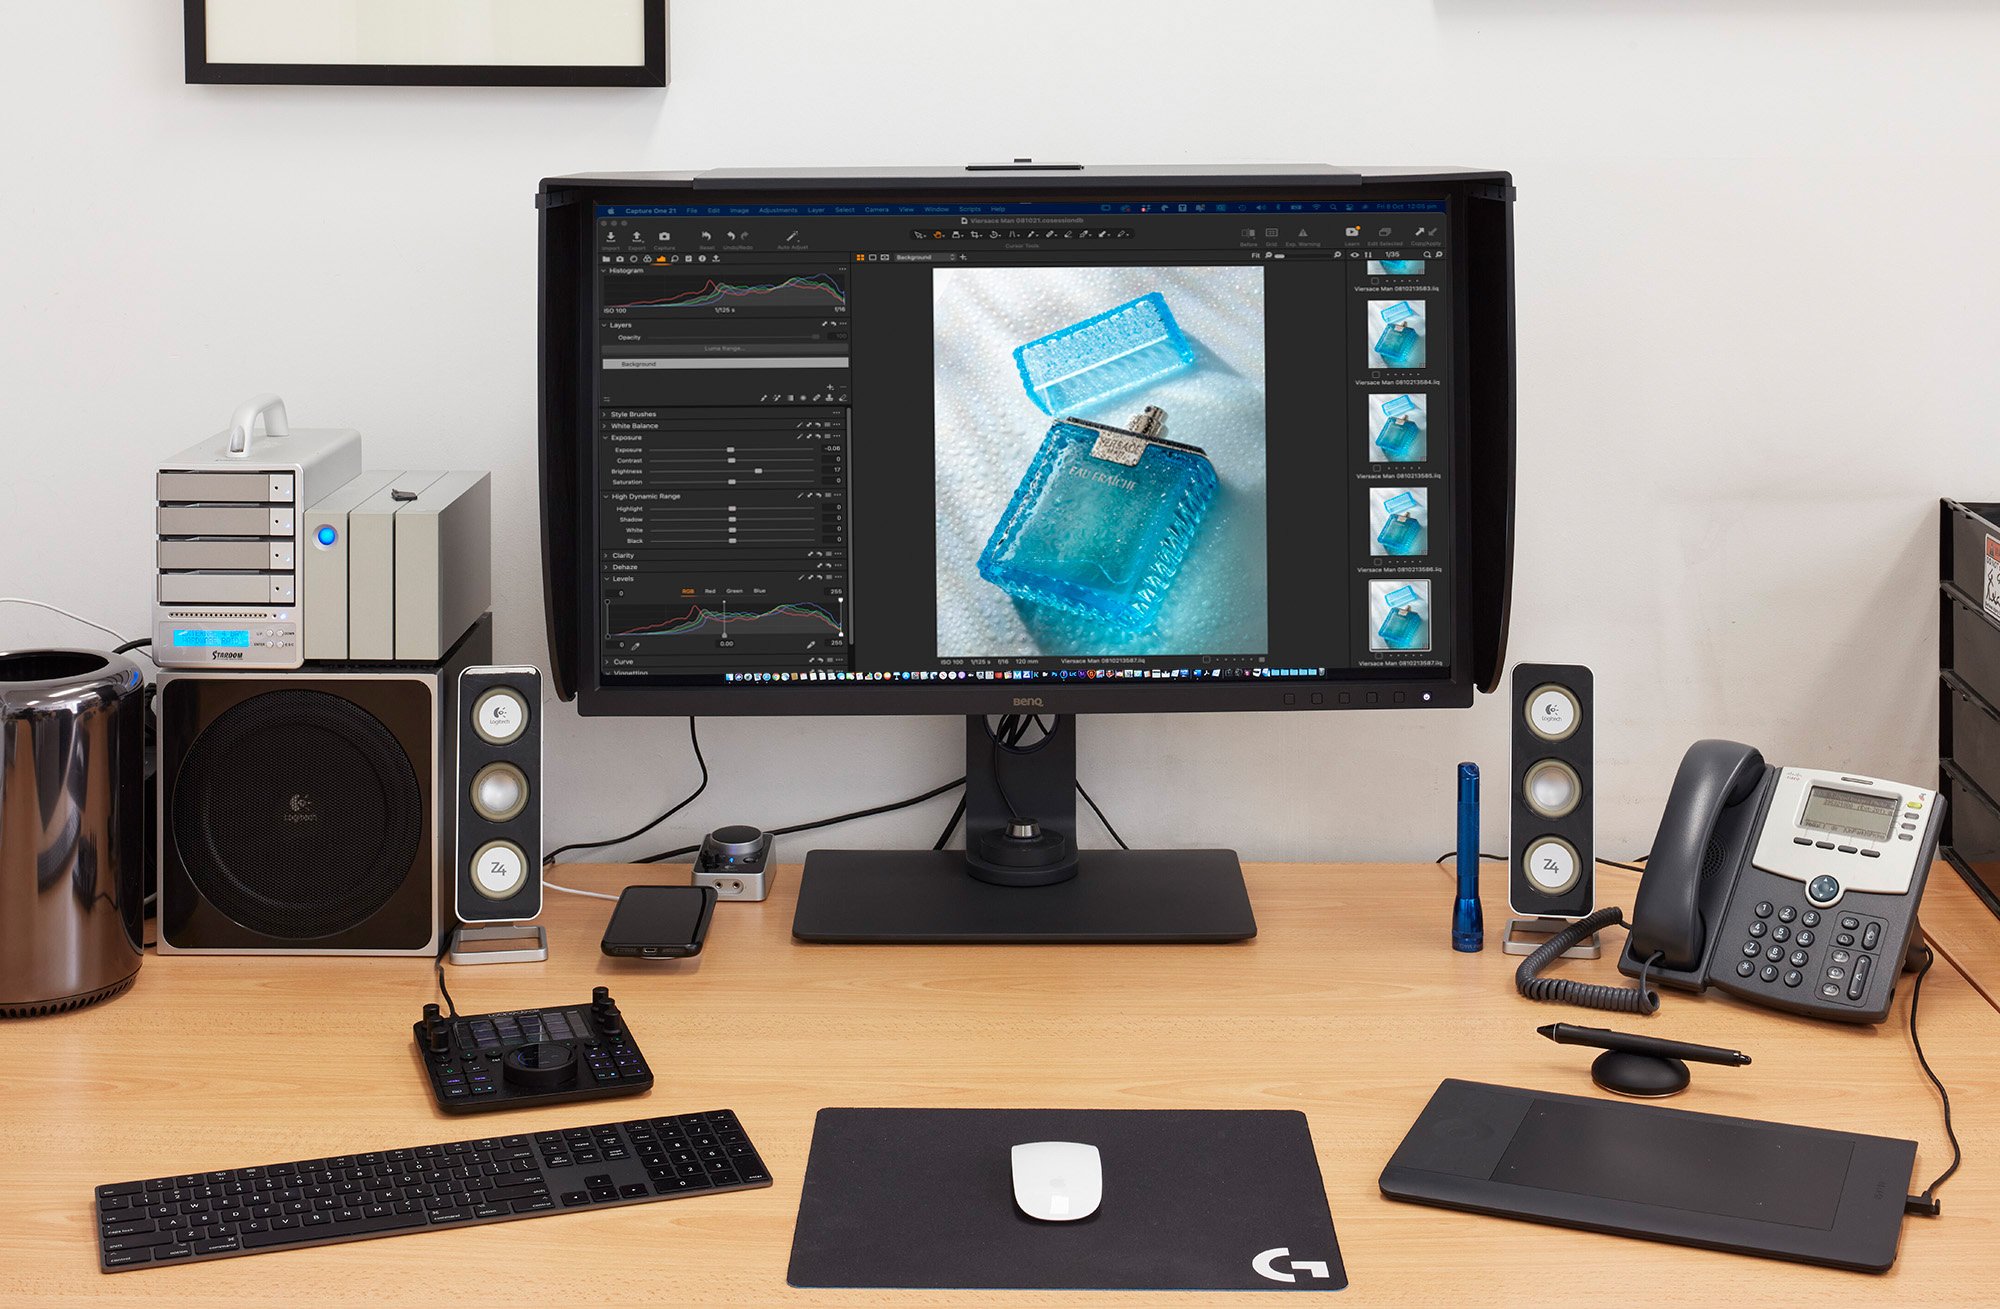
My Studio set up – BenQ SW320C & MacPro
As a commercial photographer for over 35 years, I often look for little tweaks that can help to improve my workflow and productivity. Recently with plenty of time up my sleeve due to the pandemic and its resulting lockdowns, and also spending the past 20 years tethering to a computer workstation on a fixed desk within my studio, I decided there had to be a better option. Of course, the desk is an integral part of my image editing workflow in many scenarios and will remain so when it suits, but recently while shooting a range of small beauty products, I found that I was spending way too much valuable time walking between the photo set and the computer to check the images on a colour managed screen, make adjustments and then return to the set. As someone who needs to get it right in camera instant feedback is invaluable so what I really needed was for the computer to be more mobile so I could easily move it closer to the set.
At first, I considered a more mobile desk, but these were big and bulky and, in my opinion, just weren’t a suitable option for me. With my studio already equipped with 3 Mac Pros, I didn’t really want to invest in another computer either. What I needed to do was utilise the 15” MacBook Pro that I already own and use for my location work.
Already 4 years old this is still an awesome computer, and it still easily handles my tethering requirements with total ease, even when using my 150mp Phase One camera and its huge files. As good however as it is, its display leaves a lot to be desired when it comes to colour accuracy, and being only 15” in size doesn’t offer a lot of space for all the tools I use in the host Capture One Pro software. What I needed was a simple system that allowed a seamless connection to my MacBook Pro.
Already running the excellent 2K BenQ SW270C at home very successfully I knew that a monitor with USB-C compatibility that supports Thunderbolt 3 is what I needed. The benefits of this are that I can quickly connect to a colour managed workflow very simply with just one small USB-C cable and switching between my home and studio screens will be effortless.
This simple but powerful connection provides power to the laptop, sound, and a video signal to the monitor for the display. The monitor has a couple of built in USB ports and an SD card reader that also connect through this one cable. This method can convert your laptop into a two screen set up or with the addition of a mouse and keyboard you can even leave the MacBook Pro closed and turn it on via the monitors power button as I do in my home set up. This system will also provide a far safer working environment in the studio with reduced tripping hazards as there will only be one AC power cable required to power the entire set up.
Already being a BenQ convert for some years now I decided the newly released SW271C was my preferred way to go. This new model is awesome and has all the features of the SW270C that I use and love at home but with the added benefit of a higher 4K resolution.
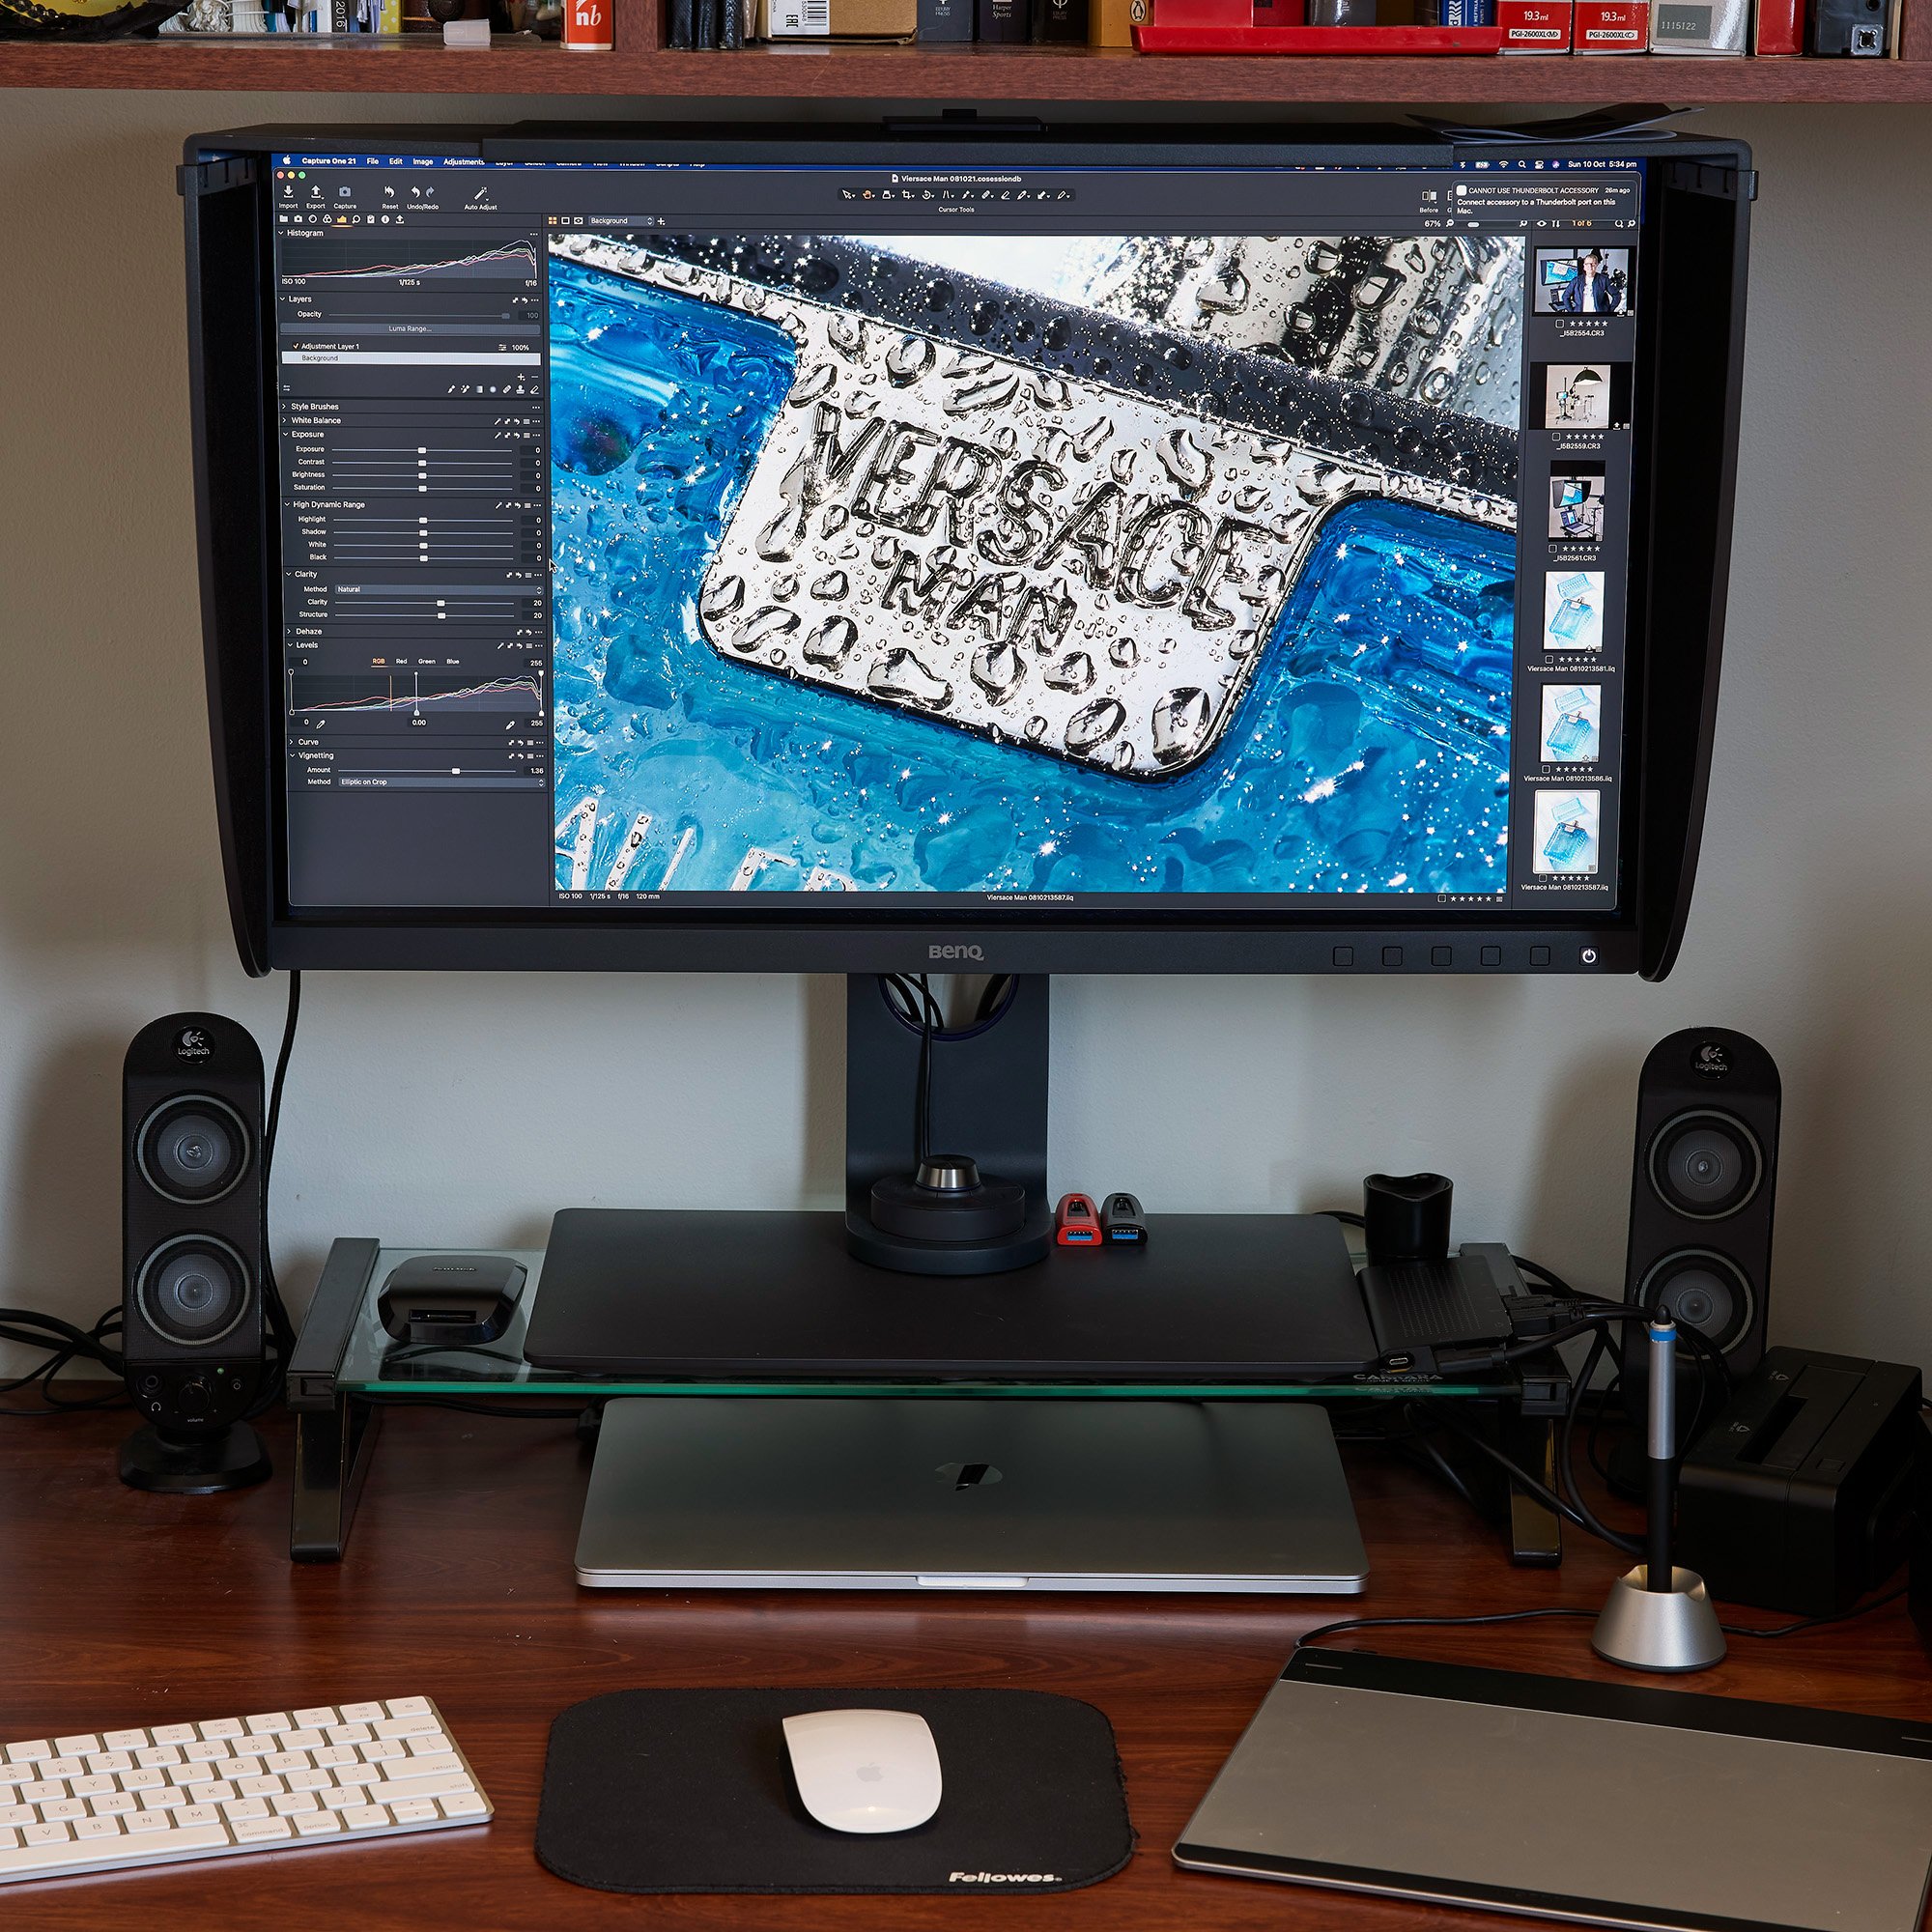
My home Set Up – BenQ SW270C & MacBook Pro 15”
Note: the MacBook is actually closed and neatly stored under the monitor
The BenQ PhotoVue SW271C BenQ have made a considerable effort in recent years to design and produce a range of affordable monitors that are very well built but, more important are specifically designed for us photographers.
The PhotoVue range of monitors offer all the features a photographer needs and the big plus here is that they are very reasonably priced when compared to similarly featured displays from other manufacturers, so they are not only accessible to the professional but also the amateur photographer who understands that colour management is an integral part of a good and reliable imaging workflow.
The new SW271C is no exception and is a feature packed 27” screen with high 4K resolution which is endorsed by leading world colour organisations, being Calman verified and Pantone validated.
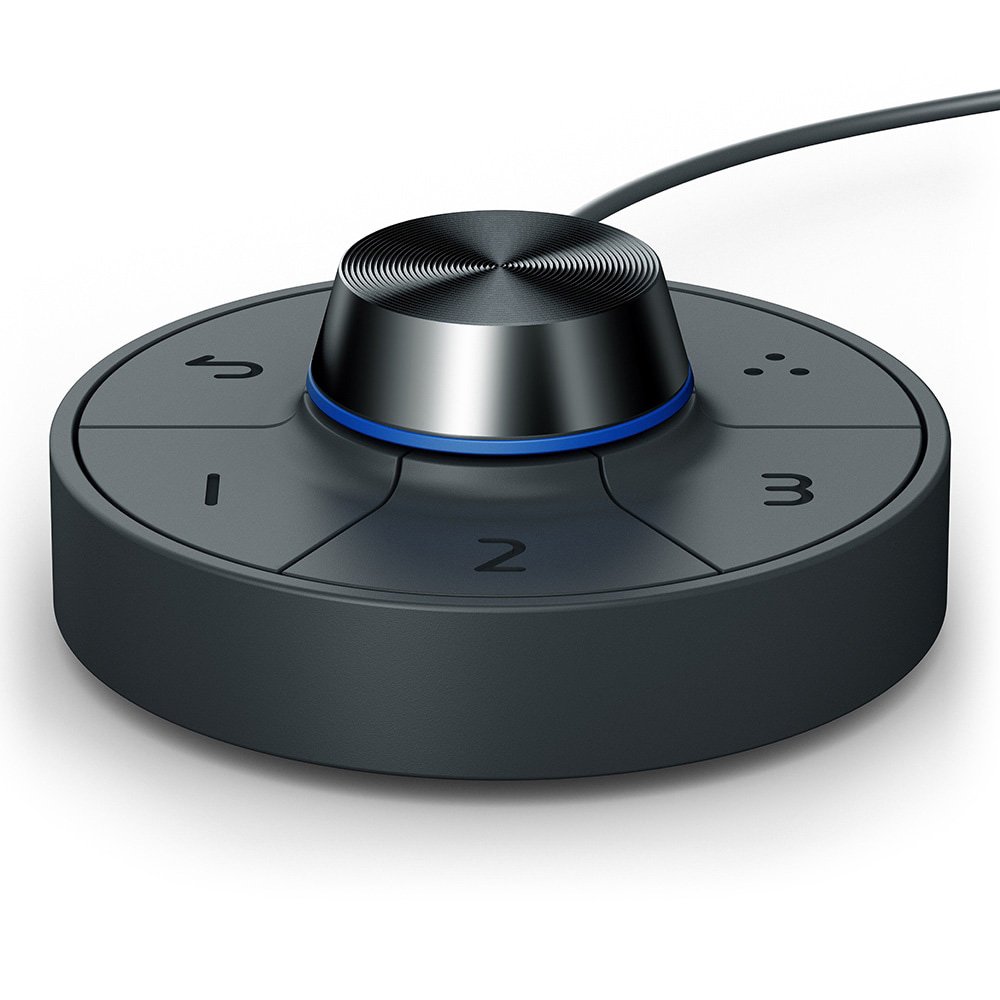
The included viewing hood prevents unwanted stray light from hitting the screen and affecting the perception of the image colour and density, and the Hot Key Puck ensures access to the monitor settings and modes are just a fingertip away.
The Hot Key Puck, full control at your fingertips
As with all PhotoVue monitors, colour management is handled by hardware calibration using the bundled Palette Master Elements software and a third party colorimeter such as the ever reliable X-Rite i1 Display Pro. Hardware calibration is the optimum way to control monitor colour as it ensures greater colour accuracy than software colour management where the signal from the computers video card is modified to make the colour corrections.
The amount of colour that a monitor can display is also a vital factor and like all PhotoVue monitors the SW271C can display 99% of the Adobe RGB colour space in 10 bits, for the smoothest colour gradations, and also using 14 Bit look up tables provide superior RGB colour blending with a DeltaE less than 2. What this means in layman’s terms is if you are photographing in the larger colour space of Adobe RGB the SW271C can display 99% of that colour and provide the most accurate representation of the colour contained within the original file. This representation is also true for those working in the smaller sRGB colour space.
The list continues with features such as the ability to seamlessly switch between Adobe RGB, sRGB and B&W modes by the simple press of a button on the Hot Key Puck or even view an image simultaneously in two different colour spaces using GamutDuo mode. Finally, the SW271C includes Uniformity Technology ensuring accurate colour across the entire screen so your images will be colour accurate and look great regardless of what part of the screen you are viewing them on
Support - Completing the Picture With the monitor now sorted my next hurdle was to find a way to tie the whole system together and make it work in a way that could be easily moved around the studio and positioned as close as possible to my camera set up.
photography scene here in Australia and one not readily identified by many photographers, but to those in the know, KUPO Grip is a company that is taking Hollywood by storm providing all the grip needs the photography and film industries require, and just like BenQ at a more reasonable price point than many competitors that provide products of comparable high quality.
“Grip” is a term used in the film industry to describe all the items we use to hold everything together or in place such as light stands, C-stands, booms, clamps and much more.
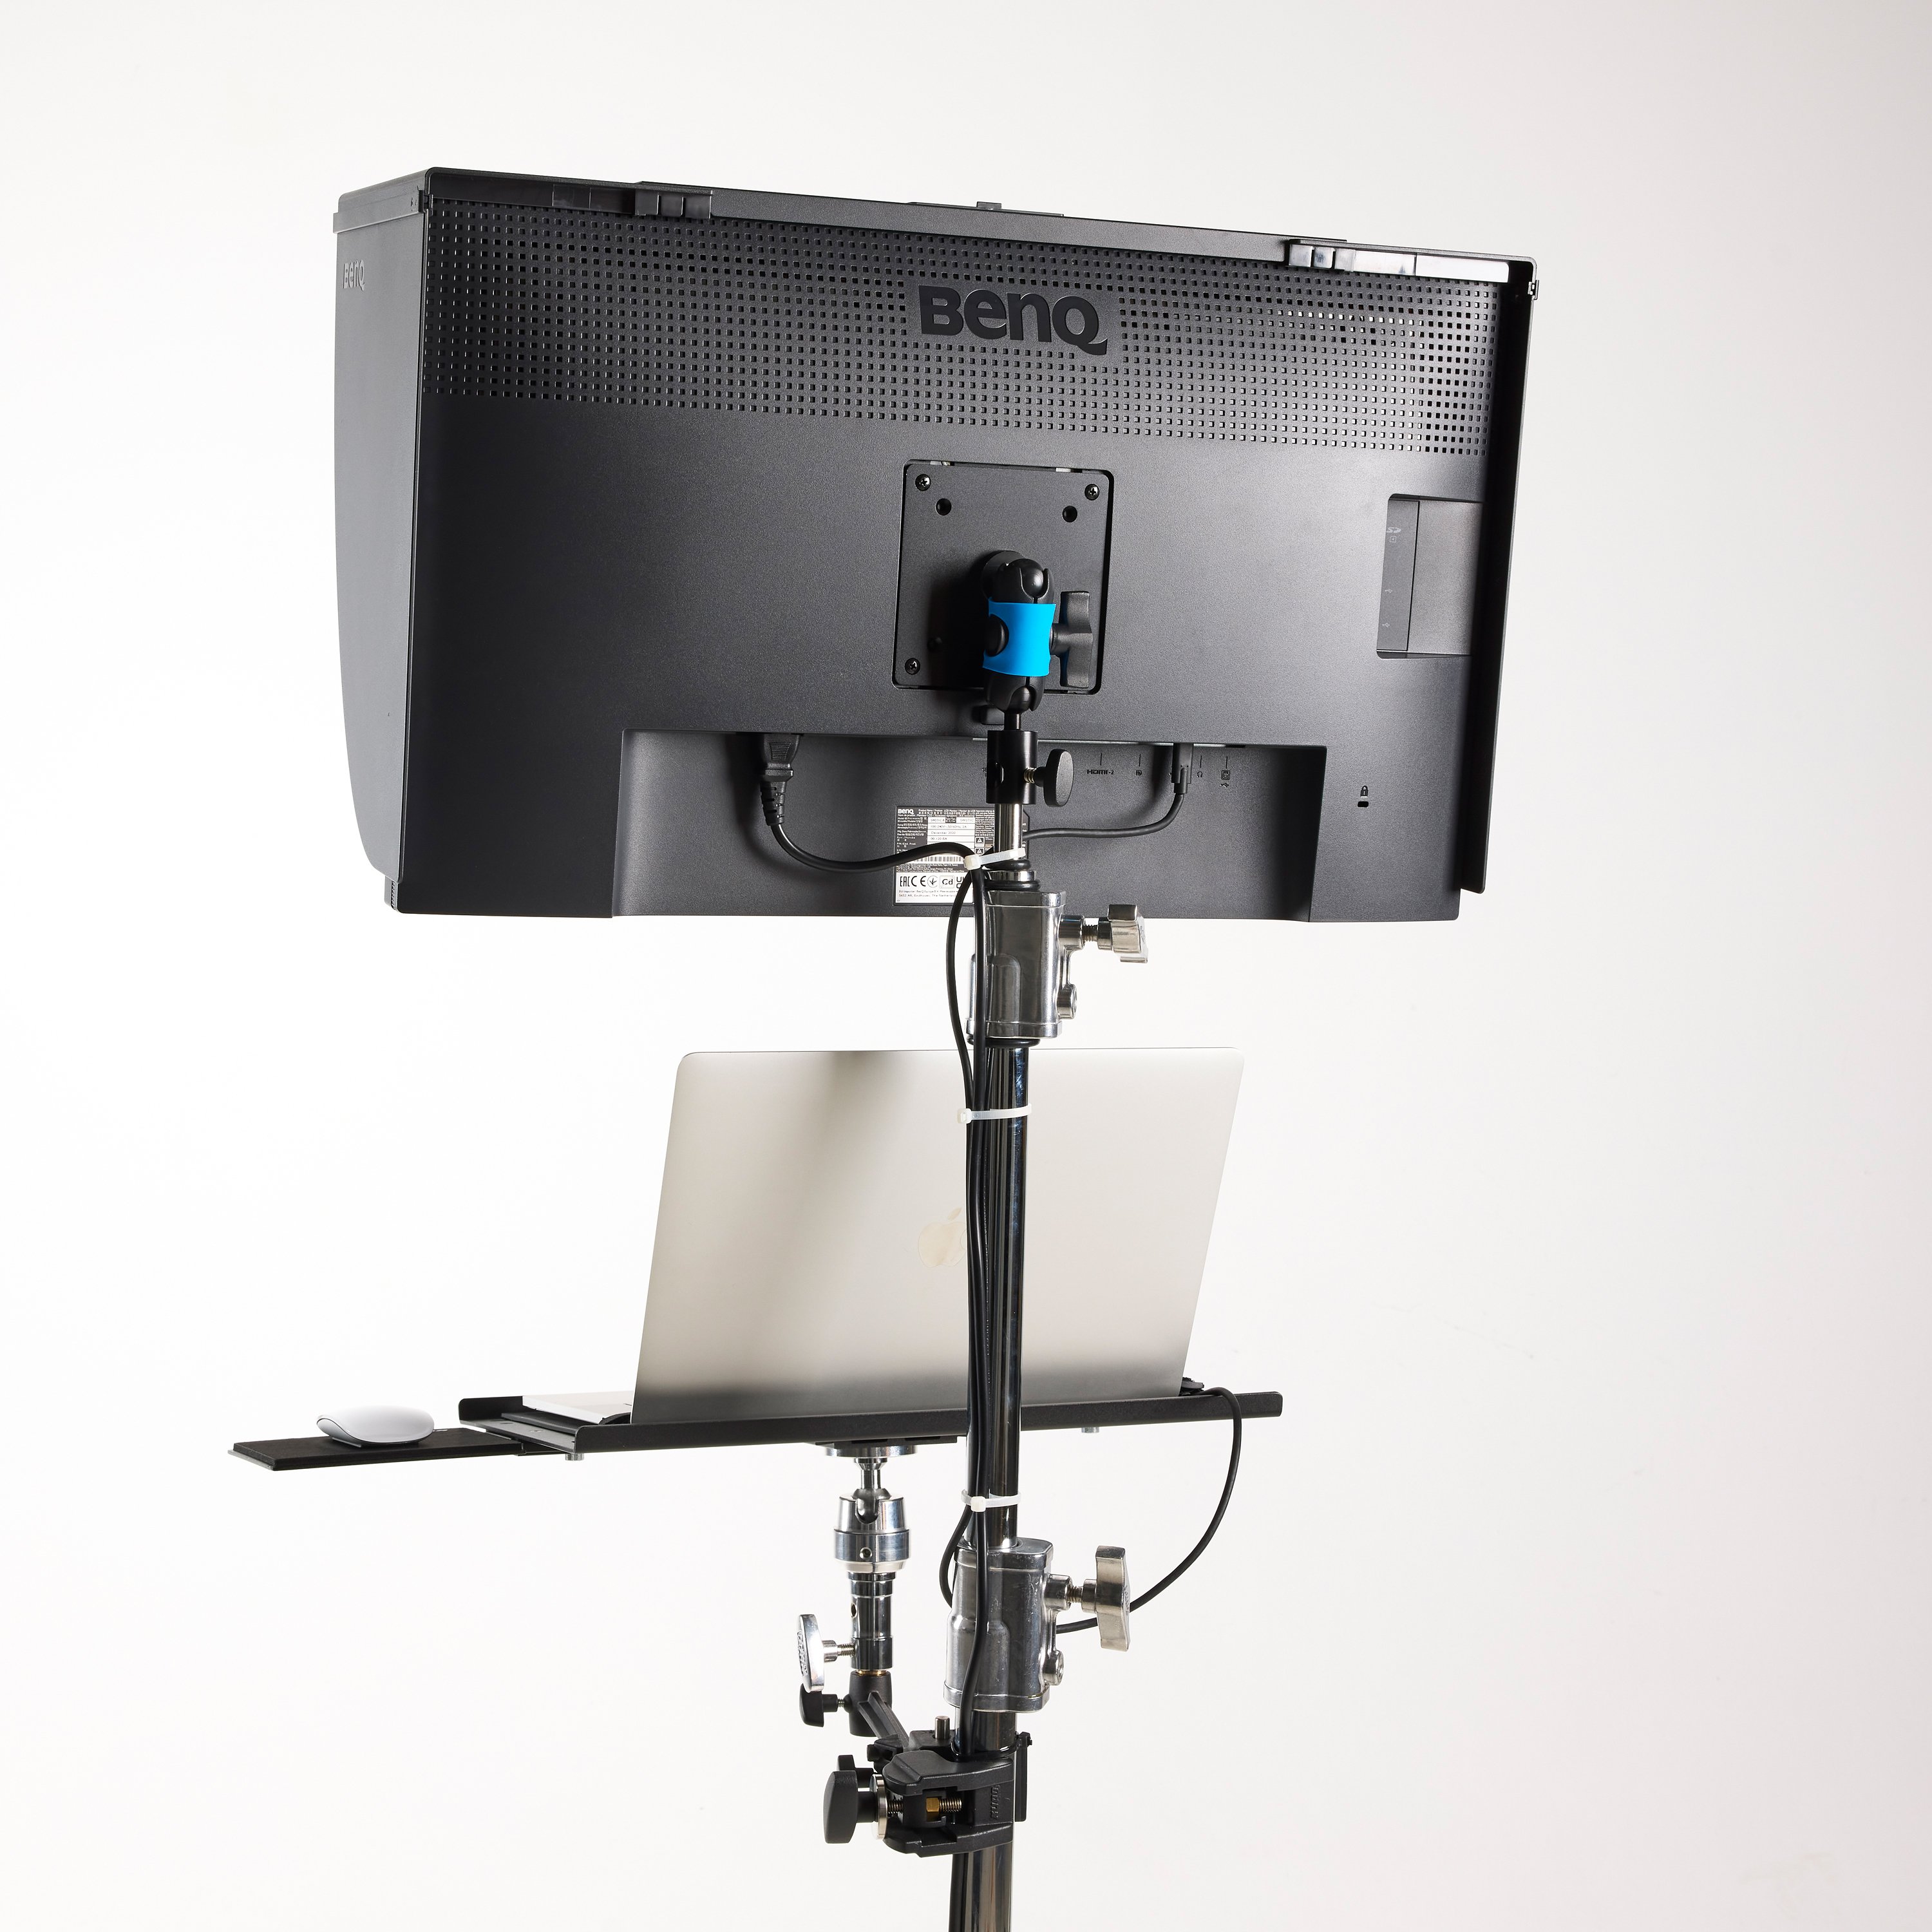
The SW271C attached to the 320M stand using the VESA mount and the KUPO VESA adapter mount
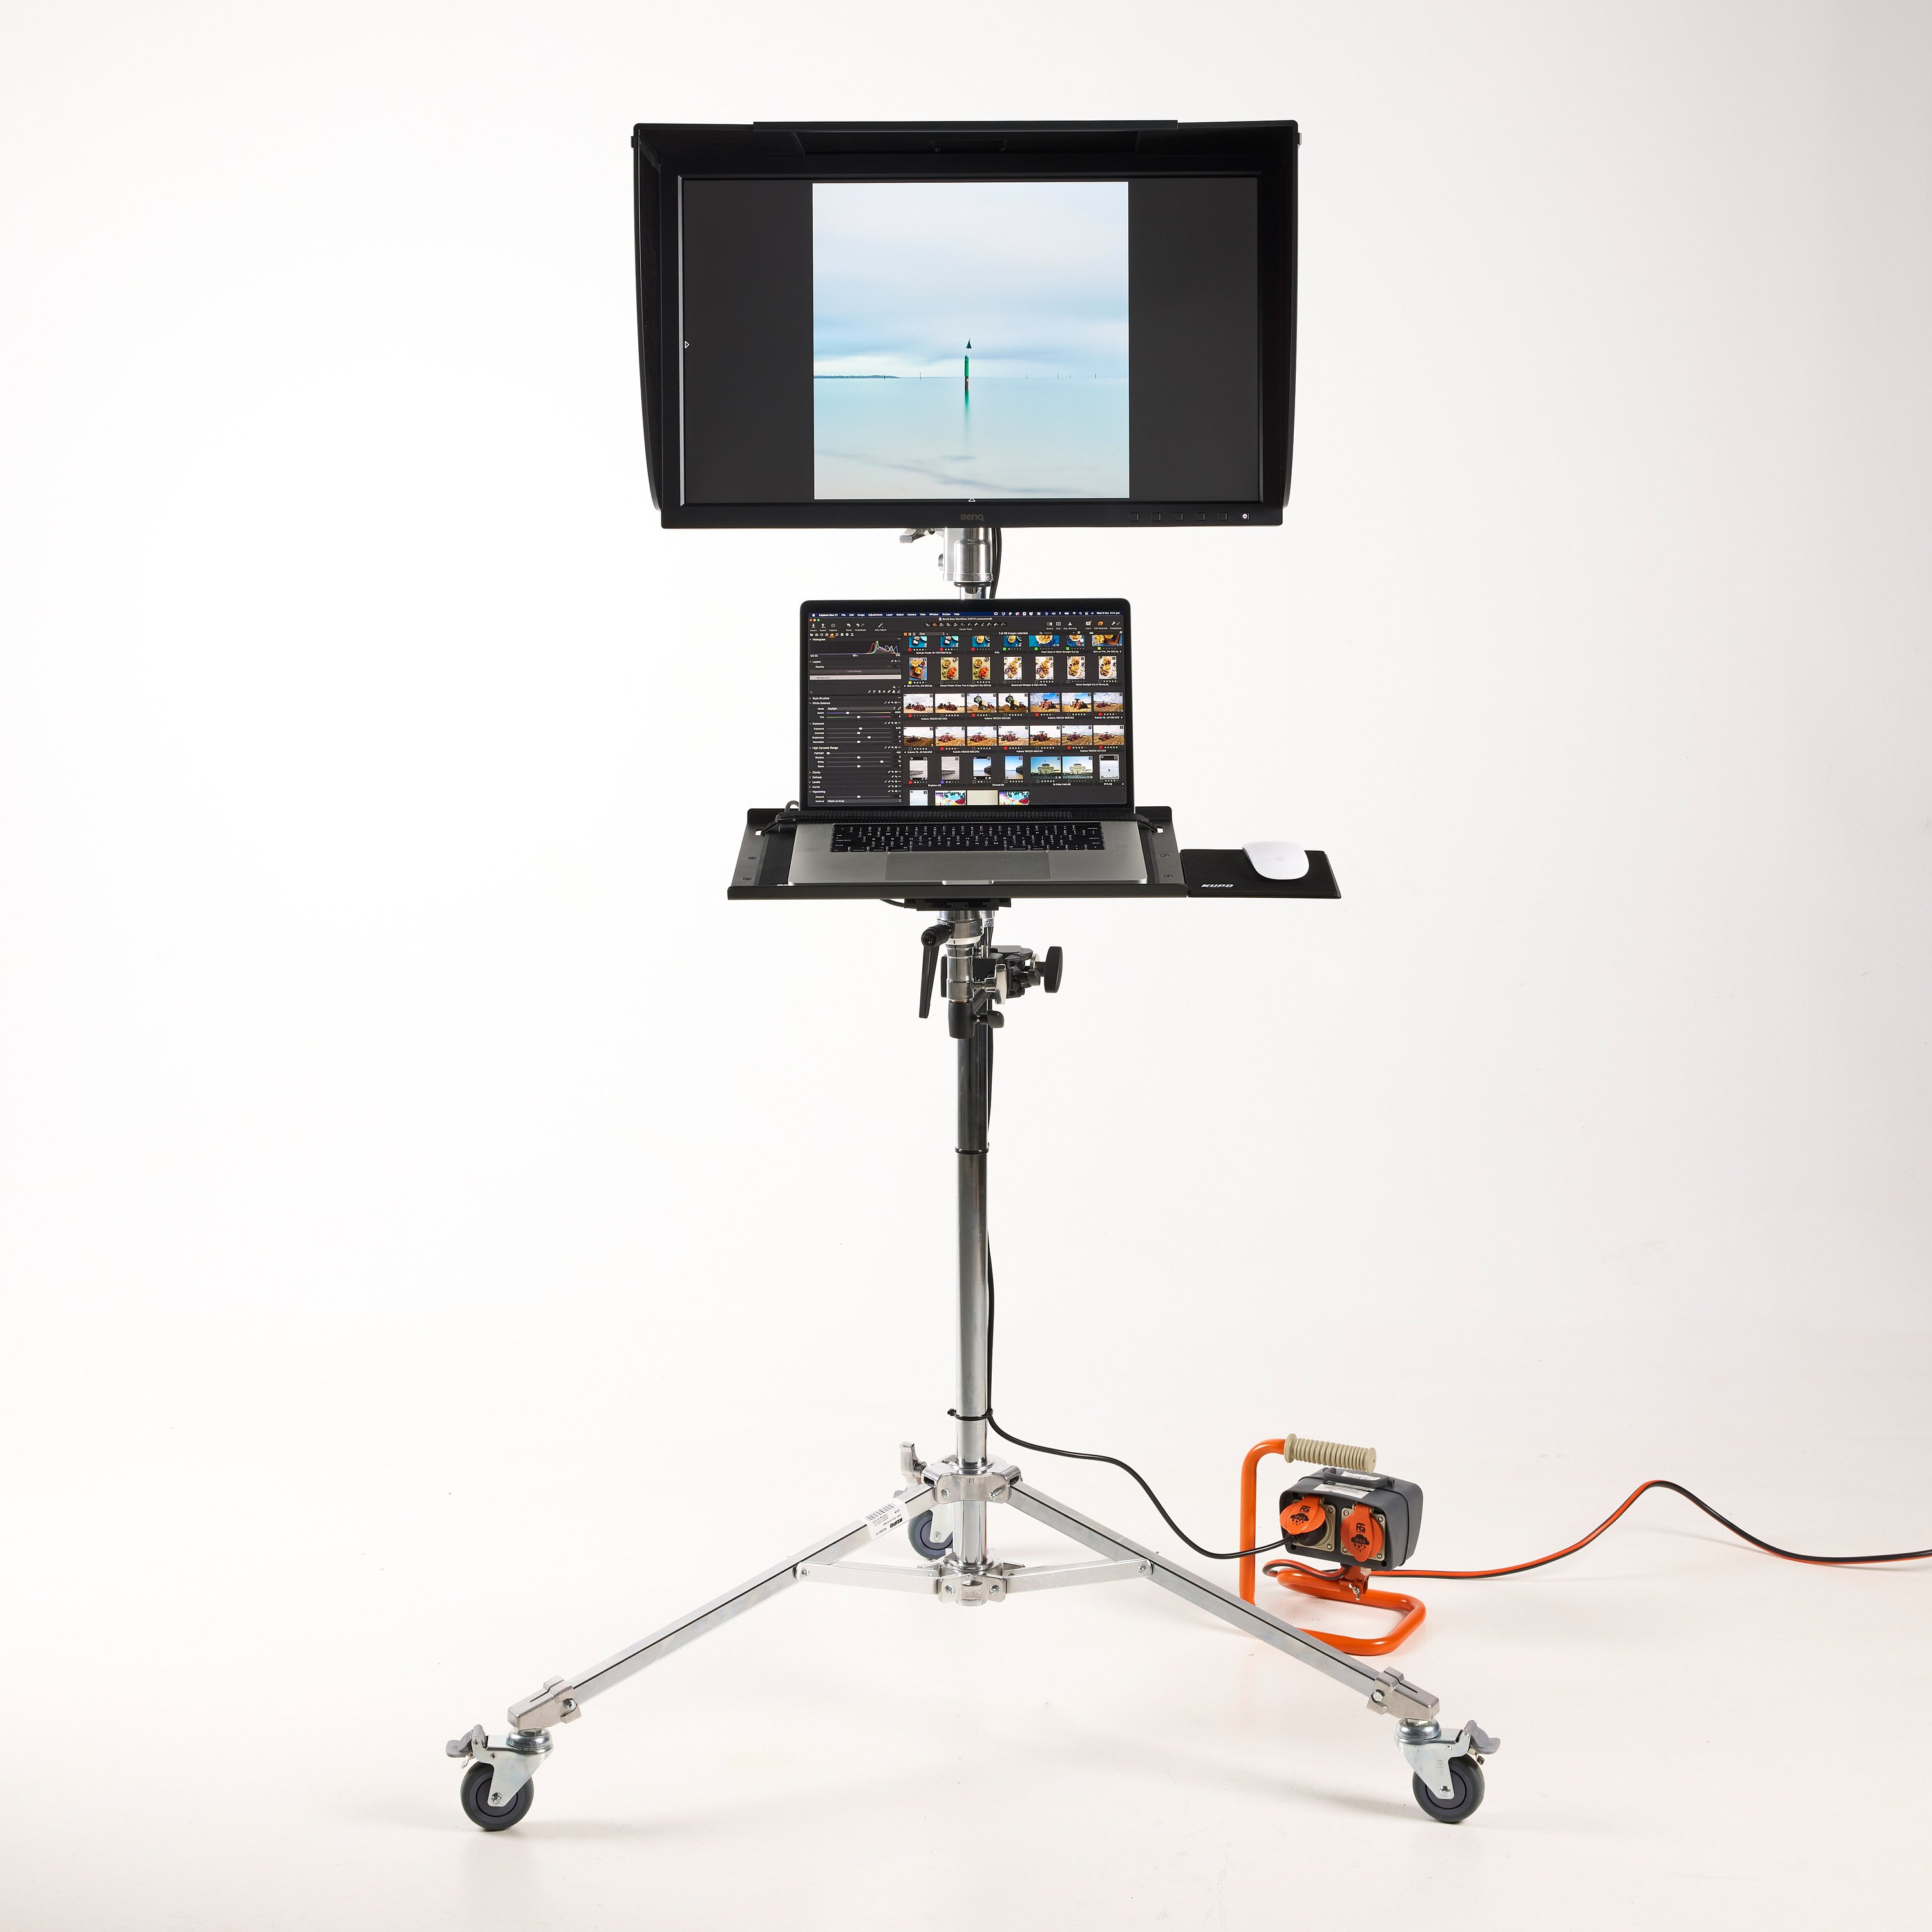
The complete set up of the BenQ SW271C, MacBook Pro and the KUPO 320M Tethermate Monitor Kit
I started with the base, the 2.68m tall Kupo 320M Junior Roller Stand with lockable caster wheels. I selected this stand as it has a load capacity of 12kg’s and extra wide legs to ensure the system remains stable. To this I added a Vesa monitor mounting kit with a Super Knuckle to secure the monitor to the top of the stand using the BenQ’s standard Vesa mount.
To support the MacBook Pro a combination of a Kupo Tethermate table was attached to the shaft of the stand using a Convi Clamp, 15cm Extension and a KCP-414 Supergrip Finger which was added to provide angle adjustment of the table.
Since this collection of components works so well together as a mobile tethered workstation, KUPO’s Australian distributor have decided to put them together as kit called the Kupo 320M Tethermate Monitor Kit (320TMK) which will be made available through all good photographic resellers at a slightly better price than purchasing the components separately.
Now with the system complete, I needed to test it out.
With a small self-commissioned product shoot using a bottle of aftershave lotion that I just happened to have at hand I began setting up the shoot. Firstly, I set up the camera and lighting and then wheeled the monitor into a suitable position close to the camera.
The benefit now is that everything is within reach, and I can view the set and adjust the image on a colour managed screen, all from the camera position without having to take a step. This will result in an increase in my productivity when shooting commissions of this type in the future.
My immediate observation is that the colour of the BenQ SW271C is rendered beautifully, and it’s so sharp.
Sitting directly beneath the monitor is my MacBook Pro and even though profiled and calibrated it becomes extremely evident at how inaccurate the colour is in comparison to the BenQ. This illustrates that not all monitors are designed equally and for image editing a great example of why you should be using a quality colour managed monitor like the SW271C for all your image editing.
The USB-C connection makes it very easy to connect to a laptop, but it also has all the necessary connections to connect to a computer without USB-C or a desktop computer just as easily.
The components from Kupo do an excellent job at supporting the whole system and I originally approached Kupo as I have been using their stands and booms in the studio for quite a few years now and can attest that the quality is second to none.
Well, I declare my little project a complete success. I now have a colour managed workstation that can easily be moved around the studio that will make my life a little easier and increase my productivity for years to come.
The complete set up with monitor moved into position close to the camera
The final product image
The award winning BenQ PhotoVue SW271C really does “punch above” its weight and is a monitor I would highly recommend to anyone looking at investing in a professional colour managed monitor or upgrading from an older one.
If you need a solution for tethering the addition of the Kupo Tethermate Monitor Kit is a no brainer and Kupo Grip should also be at the top of your list for light stands, booms, clamps, or any other grip needs.
Other Monitor Considerations BenQ have a full line up of PhotoVue monitors to suit every budget. The SW271C is a premium product that slots into that line up perfectly and one that that I have no hesitation in recommending. Other monitors within that line up also well worth considering are the larger 30” 4K SW320C which is my preferred monitor for my studio editing suite or the 27” 2K SW270C which I use when I take work home.
About the Author Ian van der Wolde is a commercial photographer based in Melbourne Australia. He is a Master IV, Honorary Fellow and Fellow of the Australian Institute of Professional Photography, Lecturer of Photography at Swinburne University and is a Brand Ambassador for BenQ, Ilford Master, Profoto Light Shaping Ambassador and X-Rite Coloratti.
Find Ian Online At
Photography Website www.alteredimages.com.au
LinkedIn https://www.linkedin.com/in/ian-van-der-wolde-2028a28
Get One Free Year Pantone Connect
{{productsCount}}Result
{{item}}
{{item.productWordingTag}}
{{currency}}{{item.finalPrice| numberThousandsCommas | numberDecimalPoint}} Save {{currency}}{{item.saveAmount | numberThousandsCommas | numberDecimalPoint}} Save {{item.savePercent | numberThousandsCommas | numberDecimalPoint}}%
new device price {{currency}}{{item.regularPrice| numberThousandsCommas | numberDecimalPoint}}
{{item}}
{{itemTag.title}}
Max 4 products to compare reached.