Price Qty

Create BenQ account to get tech-savvy tips & member-exclusive offers.

Create Now

Create BenQ account to get tech-savvy tips & member-exclusive offers.

Skip the Stadium, Spin to win a 10% OFF on BenQ TK860i, HT3560, HT2060, X3100i, X300G, or X500i Projectors

Spin Now

Skip the Stadium, Spin to win a 10% OFF on BenQ TK860i, HT3560, HT2060, X3100i, X300G, or X500i Projectors

Review BenQ SW2700PT Best Calibration Monitor for Photo Editing

Neil Snape
2017/03/03
review-benq-sw2700pt-best-calibration-monitor-for-photo-editing-4

REVIEW OF THE BENQ SW2700PT 27” DISPLAY A HIGH-END GRAPHICS ART EDITING MONITOR

This is my user review of the BenQ SW2700PT 27” display a high-end graphics art editing monitor. From the very first time I saw the monitor at a photography show I was delightfully surprised. Most have heard of BenQ monitors for the general public and gaming type of monitors being high quality for reasonable prices. BenQ has entered the high end niche market of graphic arts monitors for creation and editing with a product line up equalling the very best out there for an exceptional price point for an ultra complete offering.

From delivery until now while writing the review this monitor is a joy. My previous monitor was at the time the highest gamut monitor available (likely still is) the HP 2480zx Dreamworks. Splendid monitor for an extended gamut showing colours not possible on most other monitors had its advantage, yet it is a finicky monitor with problems of uniformity and difficult calibrations, with unsupported software. Over time the Dreamworks lost a lot of its luminosity falling to less than 90cd/m2 that gives a false impression of the documents true appearance.

When digital imaging arrived the need for a display that is calibrated and characterised became a necessity to see into the image like a portal for the information displayed. Without a display corrected to referenced colour knowing what the image really is cannot be realised. In the old days with CRT monitors the variations were extreme, profiling devices and software trying hard to make something out of the monitor that was reliable. Fast forward to today with only flat screen monitors with better consistency yet the problem of making calibrations and characterisation remains. Anyone serious in graphics arts has to be aware of the assurance brought forward with a wide gamut display with a tight tolerance in manufacturing and display controlling electronics. BenQ certainly fulfills this goal with honours.

You can find out more on the BenQ site.

review-benq-sw2700pt-best-calibration-monitor-for-photo-editing-3
HARDWARE:

The specifications tell you from the start the BenQ SW2700PT is one of the best.

27” 16:9 | format 2560 x 1440 native resolution | pixel pitch 109px/inch | 1000:1 contrast

AHVA-IPS | viewing angle up to 178º vertical and horizontal | >99% of Adobe RGB color space

10 bit per channel colour with 14 bit 3D LUT for fine LCD correction < 2∆E

Brightness 350cd/m2 | response grey-to-grey 5ms | frequency 50-76 Hz

Tilt -3.5º +20º Swivel 35/35=70º total pivot 90º rise 130mm

Power consumption 37w standby 0.5w

Inputs DVI-DL Display port HDMI all with the latest standards

USB 3.0 hub 1 up two down SD card reader

Solid hood with velvet non reflective surface, all input cables included

Included software Palette Master Elements downloadable

OUT OF THE BOX

Packing is as it should be, efficient, space saving, and well though out. Considering I have a demo that was repacked that shows you logic, and that indeed it can be packaged up again easily for taking it with you on location.

You only need to assemble the stand to the base which is a simple twist in locking grooved metal plate. The monitor attaches to a locked button release VESA 100mm mount, nice if you want to use one or more monitors in a VESA mount platform. The base has a small footprint, yet is perfectly stable without being intrusive on a desktop. It also has an embossed circle for storing the remote OSD controller. It would have been nice to have a cable holder or groove to keep the remote straight so that the hot keys were always in the same place without looking to see the remote OSD’s rotation.

The hood that is included is one of the best I’ve seen, rigid, with a very good lock tab mount making it elegant without taking up much width at all on the display’s frame. The hood has a velveteen interior surface, which eliminates all reflections.

The printed Quick Guide makes the stand and hood look harder than it is to assemble. Lay out the parts, look at the places where they join and they will fall into place.

After assembly you can download Palette Master Elements software and or any other latest drivers you may need (although they are on the supplied CD).

On Mac the display is Plug’N’Play and likely is with the latest Windows operating systems.

ON CONSTRUCTION, DISPLAY, AND AESTHETICS.

The panel is a fine as the stand. The border is 2cm vertical and top edges only 2.5cm on the bottom edge. This gives the panel strength without sacrificing being compact while maintaining maximum surface area. The panel depth is a surprising 2.5cm at the edges rounding out in the center back for the mount. The compact size also helps in keeping the weight down, 9.3kg with the hood, and more importantly keeps the design sleek and stylish at the same time. Being lighter and taking us less volume permits transporting the SW2700PT with ease. The case, stand and hood are a very neutral charcoal dark grey with a fine finish. The stand is a brushed aluminum look in the same tone. Since the hood is perfectly integrated without space surround, the unit looks great with or without hood in any environment, home or studio.

USB and card reader ports are easily accessible on the left side or bottom in a pivot portrait mode. The hood has a sliding opening for suspending a colorimeter from which closes firmly, enough so to hold an i1Pro closed on its strap on the screen.

On the right bottom there are 5 hot keys to access OSD, a power button and a power mode indicator, very discrete with only small indicators holes on the front side to denote the center of each button. The power mode indicator is very acceptable, not too bright (often a problem with other monitors) and white when the screen is on with a signal, orange in standby/sleep mode, neither being too bright or flashy.

The stand is a solid aluminum piece with a hole for routing the cables through, and has a very practical handle incorporated at the top for lifting the monitor. The height is easily adjusted and there is a scale on both height and tilt so you can quickly set the monitor back to your preferred viewing angles if you have to move the monitor to another location. There are two notches on the base to show swivel however there is no center detent to fall into a zero position.

The back of the monitor is beautiful with its high gloss curved center outwards to the frame. Overall this monitor is wonderful from every angle, in a free standing room or against a wall the finishing is top of the line luxury.

DISPLAY SET UP OCR

There are two independent control sets; a remote OSD connected via mini usb and the hot keys on the bottom right of the panel.

Both have the same controls available through navigation, other than the power button to the right of the OSD hot keys. The remote OSD has 3 hot keys with a home button, 4 navigation keys, and a validation OK button.

There are 5 hot keys on the right bottom under discrete holes indicating their centers on the front frame. There are no lights so you won’t know which button you pressed, yet pressed once and the OSD menu comes up with colour assigned function menus onscreen above each key directly above for function and navigation. Pressing the any key again (outside of the exit button) brings up its respective menu. All keys are use programmable if you so desire. It takes a while to get used to but after a few rounds it becomes clear.

I prefer the using the remote OSD as I can place it beside closer without reaching to the panel.All the keys can be programmed to whichever function you like such as frequently used to come up with a single touch. For me that is calibration 1 which is the calibrated editing space for Lightroom Photoshop and Capture1. Key 2 is B&W for quickly viewing entire filmstrips in B&W without applying any change in the editing application. You could for example set key 2 to a calibration 2 made for a second computer connected via a different port. A real time saver, letting you preview images and film in B&W! Key 3 is for a highly customised Low Blue Light setting for reducing eye strain while browsing or doing anything other than editing. I also found that the settings for low blue light reading are fantastic for viewing video series.

The controls available are vast maybe a few too many in fact. Some of the color modes will have certain settings greyed out and cannot be selected as they are locked by default. There are two forms of customised settings you can save out. The first is; two separate calibration settings. What this means is, customised settings which then are hardware calibrated to which creates a LUT in the monitor and an ICC profile for those settings. You cannot name them, so note the settings for the calibrations 1 or 2. The 2nd customisable settings is custom set ups not necessarily requiring hardware calibrations. This may be useful for video editing or colour matching specific applications such as paper matching, or logo colours and or video, gaming in fact anything outside of calibrated and profiled image editing applications.

The user guide details the BenQ SW2700PT well all the options. Only the Standard and Photo setting are not detailed. I found Standard to be brightness 90 at gamma 2.2 and Photo brightness 100 gamma 2.0. Since I strongly suggest using hardware calibration for any serious editing these two settings are redundant.

Factory calibration is very good to start with. The monitor is supplied with a printed factory certification report showing the how serious BenQ is on quality assurance. While each monitor leaves calibrated, which makes the presets AdobeRGB and sRGB excellent target spaces, each computer will have slightly different video card output. To truly optimise your display you must hardware calibrate.

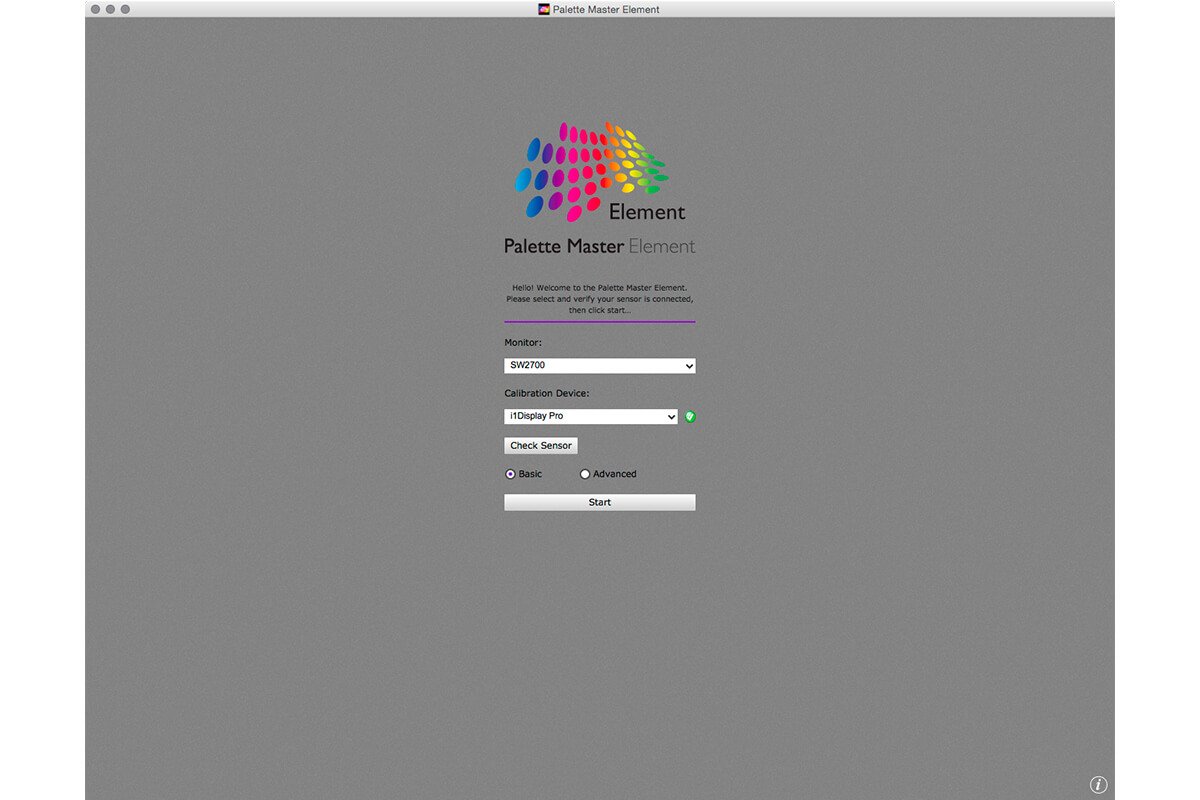
PALETTE MASTER ELEMENTS CALIBRATION AND PROFILE SOFTWARE.
review-of-photo-editing-photography-monitor-benq-sw2700pt/review-of-photo-editing-photography-monitor-benq-sw2700pt-5

​Included with this monitor is proprietary software for calibration and ICC profile creation. You need to download the latest version from BenQ. Palette Master supports X-Rite i1 Display1+2, X-rite i1 Display Pro /Calibrite ColorChecker Display Pro, DataColor Spyder 4+5. Many people purchasing this monitor already have a device to calibrate their monitors thus having the software included without purchasing a redundant device is a huge savings. I have used Palette Master with my older i1 Pro on Yosemite and ElCaptian. An older i1 Display does not however connect even though the Calibrite device alert clearly shows when it is plugged in.

While other software such as i1 Profiler can profile the display, only Palette Master can write the 3D 14 bit LUT into the display hardware. The correction levels at 14 bit are optimised for this type of display which is justifies using it for best performance.

The same can be said for the competitors’ proprietary software, yet Palette Master is included in the purchase price whereas others charge for optional calibration solutions being quite pricey. If you need to profile and calibrate multiple displays, a perfect solution that works with the BenQ SW2700PT is the X-rite i1 Display Pro /Calibrite ColorChecker Display Pro.

Palette Master is all new currently at V1.0.1. As with any V1 software there will be some problems and room for improvement until it becomes tested and true. For seasoned colour management users it will be straight forward and proceeding directly to advanced will take you through the settings which will be very familiar.

For new to colour management and hardware calibration users the Basic mode will lead you through the steps in a fast efficient manner. In Palette Master Elements thus far the user settings are what is needed but nothing beyond. For example, while calibrating you cannot limit gamma for a calibrated state to sRGB. Although the factory calibration is effectively at the highest level of accuracy, for many running the monitor on the factory calibrated state with the sRGB setting should suffice, there will still be the inherent differences between operating systems and video card output, hence hardware calibration will optimise for the computer side of the equation.

The ideal set up for image editing will be around 150-160 cd/m2 at 6500K at L* gamma. Unless you work with press or a lot of print media these settings will be optimised for this monitor. I have always preferred a lower brightness yet below 150cd/m2 introduces more maximum ∆E especially in the grey scale. This is common on the later wide gamut high contrast monitors. You could effectively (as I have) make a second calibration at a lower brightness such as 120cd/m2, save this as calibration 2 just remember to switch ICC profiles if swapping calibrations 1<>2.

One thing to note is even though it is shown on the Quick Guide, you must plug the device into the panel usb hub not directly into a free computer port. It would be nice if an alert would come up if not plugged in to the panel port. I also tried to calibrate with an i1 Display unfortunately the device even when connected ( shown via the Calibrite alerts) is not found.

There are some anomalies yet nothing drastic. The first is after you click start you will need to calibrate the device. This panel is hidden until after you click start measurement. The instrument zeroing calibration is long and it is not clear if you can proceed or not. Give it time the measurement window will eventually come up. When it does, you have the placement image over the measurement plane. Strangely enough after you place your device you’d expect it to turn off the placement image when you click next. It actually writes out a LUT before measurements begin at which point the placement image is removed. This is in fact showing the measurement progress bar while in fact no measurements occur. The write out time of the LUT is very long which will keep you wondering. There is no automatic measurement window detection either nor full screen upon measurement. Be precise in your placement, make sure your screen saver is turned off, and do not disturb the process by doing anything on a secondary screen.

The measurements progress well albeit slowly until what seems to be a cache problem around 80-84% where there is a long pause. After that everything goes smoothly. When measurements are complete, the adjusted LUT is written out, and a target vs measured report is shown. Nice touch with the profile naming as by default naming brightness and temperature where you can easily modify the default naming. The calibrations are labelled SW2700 1_ D65 temperature standard, Luminosity set then the date. If you change the number following the SW2700 to the calibration number and the actual colour temperature set you’ll know which profile corresponds to which calibration. Your settings before creating the calibration can be named and saved out, for example MyBenQ 6000K L* 100cd to have this as a preset for future calibrations. The entire calibration takes around 12 minutes.

If you want to further validate the new LUT/profile combination it is much faster as no LUT is written. Since the process is easy you can go back to the home button, change to calibration2 with the OSD, change your settings and repeat the process. Upon quitting the application I have the Unexpectedly Quit warning, yet it has no effect on the profile or calibration. The validation window is a bit confusing too as the selectors for Matrix or LUT profiles, version level, small patch set-large, etc. are still shown whilst you cannot change the validation after the creation of the calibration and profile. The only thing you can select for validation is Average ∆E and Maximum ∆E which range the error reporting pass or fail within the range set.

Note: the HDMI input source if used with an adapter may or may not have the screen options of full range rub values. The menu bars are also non standard in ElCapitan showing as full gamut icons, bright and colourful but unexpected. This is with a 4kx2k adapter from mini display to HDMI. The only sound through the display’s headphone jack that works. Display port doesn’t seem to pass sound through.

When playback is on mini HDMI to HDMI coming from a Canon 5DMKIII, the playback has some jittery lines happening. The colour on playback is fine, and live view works very well. Strange that there is some scan line jitters on playback mode only. Cable used is quite long, perhaps this has something to do with it.

OVERALL DISPLAY IMAGE QUALITY

A long time ago I was supplied with a then top of the line HP Dreamworks 2480zx ultra wide gamut monitor actually a reference monitor for film montage as much as image editing monitor. It had a wild gamut (102% AdobeRGB) yet was demanding for calibration, and had enormous uniformity problems from the start.

I grew used to this monitor with its capricious nature as well as the very noisy fans.

What I can say about this new monitor is it is one of the very best I have ever seen. It has fine uniformity, neutral in greyness and density all across the screen from center to edge. The finishing of the front lens is a beautiful matte removing all spurious reflections. The sharpness (you can adjust this to user preferences if needed) is spot on text and images alike are very sharp without artefacts.

Day in long run times have to my eye no variance, the gamut is stable, greyness and density as well.

Absolutely no dead or weak pixels.

There is a very slight vertical density and colour change at the edges, yet not distracting enough to be noticed.

With the hot keys on the remote OSD I have the calibrated profiled and validated set up set to key 1 for editing, for everything else the low blue light is a fantastic set up one touch away.

CONCLUSION

The BenQ SW2700PT is with the highest of hopes that BenQ succeeds in bringing excellent monitors to market for a price point that makes it possible for everyone to have display quality at its best while maintaining affordability. It is a small market dominated by well deserved competitors, yet BenQ is already up to bat with the offerings for graphic artists. In every aspect from finishing to image quality it outperforms in many cases the competitors and is one of the best top of the line monitors made for a price that easily justifies why you should have one now.

PROS:

Price point/ quality

Very complete including calibration software, great professional hood, all cables HDMI, DisplayPort, DVi, USB

Latest port standards including USB 3.0, fast card reader, HDMI 1.4, Display port 1.2

Construction build and portability

CONS:

Could have used a mini display port out (pass through Thunderbolt)

Software could use some tweaking

Documentation, online help and FAQs rather minimal

Lacking a colour Preset REC 709 for video.

Get One Free Year
Pantone Connect

Photographer Monitor

Was this article helpful?

Yes No
TOP