{{item.name}}
Price: {{currency}}{{item.price| numberThousandsCommas | numberDecimalPoint}}
Qty: {{item.amount}}
By Series
4K Gaming Projectors Home Cinema Series TV Projector Series Portable Projectors Golf Simulator ProjectorsBy Feature
Home Entertainment Best 4K Projectors Best Gaming Projectors Up to 20% World Soccer Promo GV Series Portable Ceiling Projectors House Mapping ProjectorsBy Trending Word
4K UHD (3840×2160) Short Throw 2D, Vertical/Horizontal Keystone LED Laser With Android TV With Low Input LagExplore Commercial Projector
Professional Installation Simulation Projection Small Business Corporation K12 & Higher EducationBy Feature
Photographer Monitors Designer Monitors Best 4K Monitors Best Monitors for MacBook Pro & Mac Best Monitors for Versatile MacBook Users Best Monitors for ProgrammingRemote Work & Learning
Explore treVolo Speaker
Dialogue Speaker for Learning Electrostatic Bluetooth Speaker Carry Case & StandProjectors
Monitors
Lighting
Remote Work & Learning
Interactive Displays | Signage
Store

The BenQ SW271 is a 27″ 4k monitor aimed at the higher end photography/graphics/video market.
It’s a development of the SW2700PT monitor Keith reviewed ( Originated from here)a while ago, upping resolution to 4k (3840) and expanding input options.
Keith has been looking at it on some of his Apple Mac systems, as well as trying it with HDR 4k Blu-Ray and the new Apple TV 4k
The monitor is superficially similar to the SW2700PT I looked at last year, but represents quite an advance in capabilities. I’ll look at what you get, how to set it up, and calibration, before returning to look at how I’d use such a monitor in my photo work.
I’m connecting the monitor up to my MacBook Pro and Mac Pro via the displayport interface. My Mac kit is however no longer cutting edge, so no Thunderbolt or USB3 connection for me I’m afraid. A friend of mine lent me a Samsung 4k HDR Blu-ray player and some disks, and an Apple TV 4k.
These devices were connected via the two HDMI inputs at the same time as my laptop was connected to the Displayport connection.
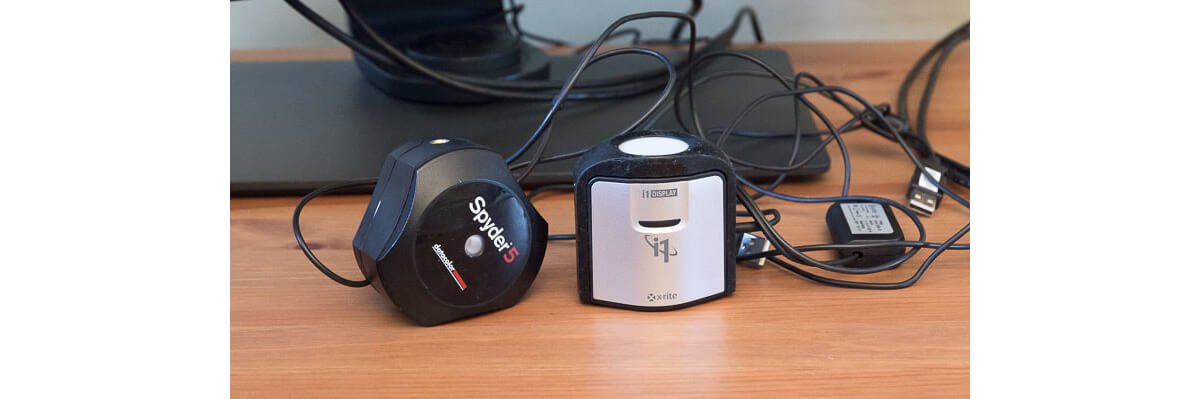
For calibration, with the BenQ Palette Master Element software, I used both the X-rite i1 Display Pro /Calibrite ColorChecker Display Pro and Datacolor Spyder5 colorimeters.
As with other BenQ monitors I’ve looked at, the packing in the box is well thought out, to aid the process of assembly – even with taking the photos to show here, I was up and going in under 20 minutes.
Do have a look at what’s written on the box.Do have a look at what’s written on the box.
The monitor comes with its own calibration certificate.
First out is the support column
Below this, the monitor base, display, box of leads and the parts for the display hood.
The unit comes with a good set of leads…
…and a small (customizable) USB control puck that you can use instead of the display control buttons.
The base unit is simply attached to the column
It twists and locks into place
A securing screw tightens it further.
I’ve now got the display panel out – using the soft bag to avoid any marks.
The stand simply clicks into place.
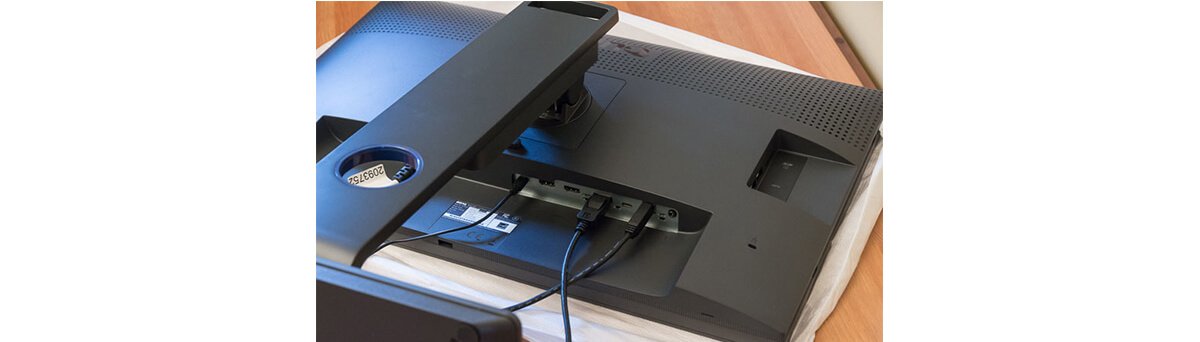
Previous experience reminds me to attach the leads I need at this point
I need the USB control lead (L) for the control unit whilst the Displayport (centre) and USB input lead (R) are for for my MacBook.
You can just see the mains lead through the cable hole in the column.
Here’s the monitor ready to go.
The big difference I note is the thinner bezel. giving an edge to edge feel for the display.
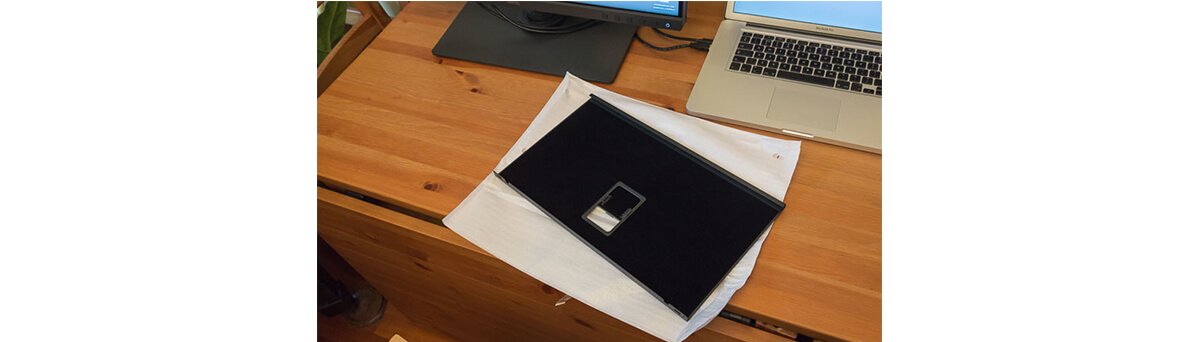
Now for the display hood – all packed in this box.
The top cover has a small hatch in it for hanging your display calibrator through.
There are a lot of parts until you remember that the hood is also for use with the display in portrait mode.
The parts are marked to help assembly (there’s a clear printed guide too).
Here are the two side panels.
They attach easily to the monitor.
There are small slots at the side of the monitor for the hood to attach.
Lastly, I add the top panel – note the carrying handle at the rear.
The monitor is now set up to go.
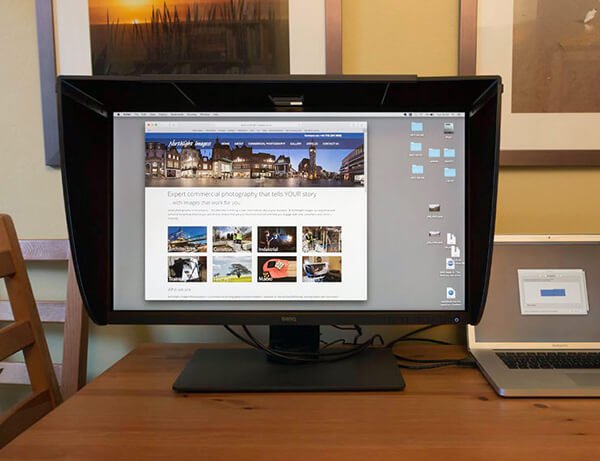
I’m initially testing the monitor on a MacBook Pro, connected via the Displayport connection.
I know that when testing for my SW320 32″ 4k monitor review the 4k resolution caused problems – but for the SW271, no such issues.
The display looked incredibly sharp and clear and very readable… (it’s what you can see in the shot above).
A quick check of the System Prefs showed why.
The display is scaling at 4:1, so I’m seeing a very sharp 1920×1080 screen.
Rotating the screen worked fine (I always have the Mac OSX Dock auto-hide at the left of my screen – its default bottom position is a usability fail in my book).
Look carefully at the display arrangement indication on the laptop – it shows two displays of similar pixel counts. One vertical and one horizontal.
Then I remembered that selecting screen display settings whilst holding the option (alt) key down enabled all display settings.
Changing to 3840×2160 now gives me full 4k.
Look at the laptop display – you can see just how many more pixels there are on the left display.
So, opening up Photoshop, I now have full 4k photo editing on my laptop.
BTW If you are wondering why my room is so yellow, it’s due to the halogen uplighter with a colour temperature of around 2750K whilst both screens are ~6500K. I’ve white balanced shots for the display.
I’ll come back to display scaling and usability in the conclusions, but the screen is working well on my MacBook Pro and Mac Pro (with its updated graphics card I put in to drive the SW320).
This is the full list of resolution/timing options.
A friend of mine recently acquired an AppleTV 4k device, and has a Samsung 4k HDR Blu-Ray player – both devices that would be wasted on our family 42″ 720p plasma TV (SCART inputs only) – the house management tells me that it stays until it fails… ;-)
The Apple TV (the black box at the right) was set up by bluetooth pairing it with my friend’s iPhone – and automatically setting up its connection to our WiFi and connecting it to his iTunes account.
I guess that wouldn’t work with my old iPhone 3Gs either :-)
The AppleTV 4k HDR has some impressive screen savers…
Also plugged in to the second HDMI socket on the monitor was a Samsung 4k HDR blu-ray player
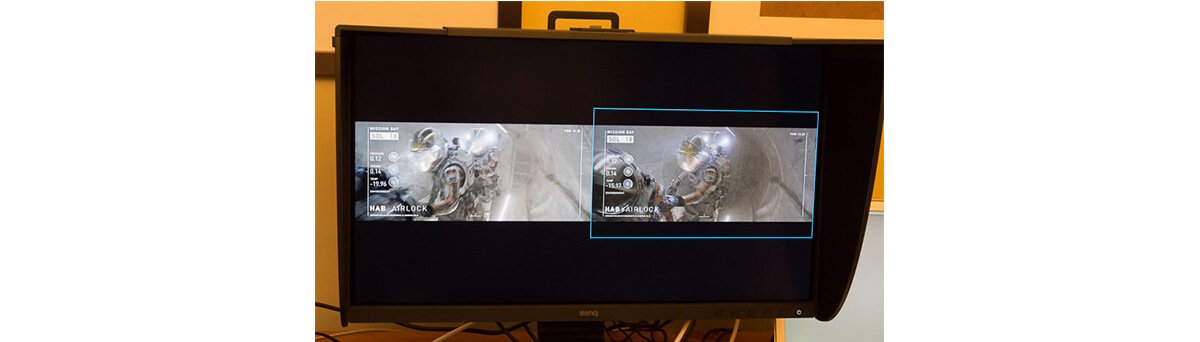
It’s running in PIP (picture in picture) mode whilst I’m editing a photo in Photoshop.
The monitor’s own controls (or OSD) can be seen at the right, where I’m adjusting the PIP window position.
It’s at the top left in this second shot, showing a DVD.
My friend was interested to see any differences between a true 4k HDR blu-ray disk and the streaming version from iTunes.
Note: This is just for our interest – I don’t know enough about the standards/source content and optimal setup to give any firm conclusions here.
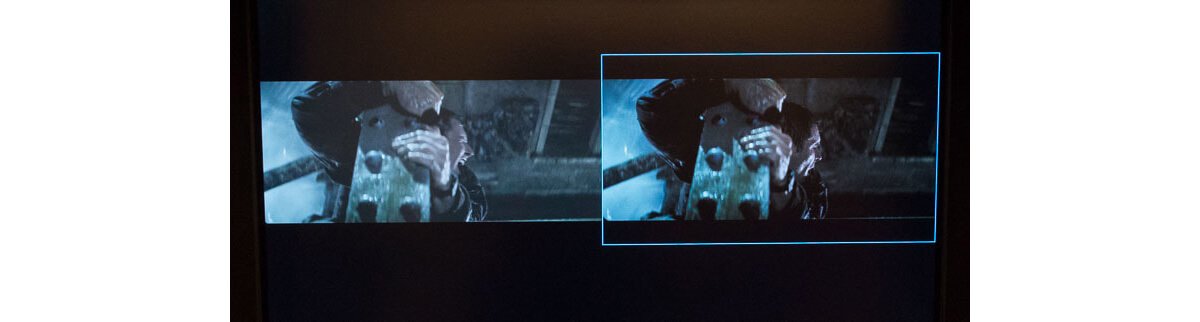
Looking at the 4k remastered Blade Runner, the DVD (right) seemed to show a better depth – however when watching both at full screen we had to check which was which with the remotes…
This is Picture by Picture (PBP) mode.
A copy of ‘The Martian’ looked great on both
Now comes the point where we couldn’t remember which was which and noticed that the Apple TV 4k had decided to go to 16:9 cropped mode
Another split view – near the end of Blade Runner
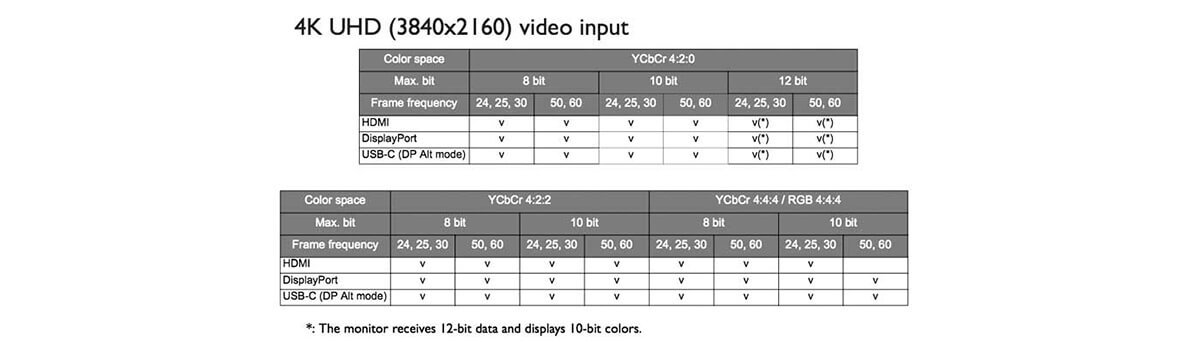
The full list of 4k video options.
My own personal take away from this? I need a way of persuading Karen that we ned a bigger 4k HDR TV in the house, since I don’t like watching movies on small screens ;-) Actually I also realised just how much lens aberration and other technical issues I’d notice (and then ignore) when watching old films at 4k.
One of the advantages of a monitor like this is its near Adobe98 colour gamut and the fact that when you calibrate it, the calibration is carried out using the actual monitor hardware, rather than your video card.
Many screen adjustments are available in the different display modes.
I don’t ever adjust a monitor after I’ve calibrated/profiled it. I’m after consistency with a monitor like this.
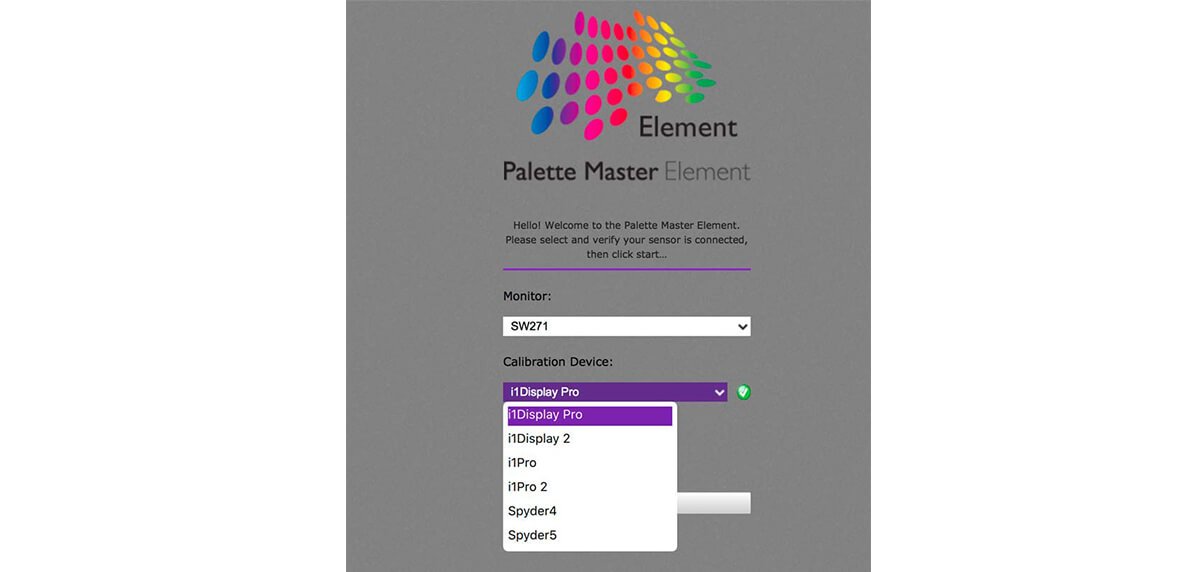
The monitor has an internal 14 bit 3D lookup table which is set up in the calibration, using BenQ’s Palette Master Element software. Whilst you can of course calibrate and profile with other software, this won’t adjust the monitor internally.
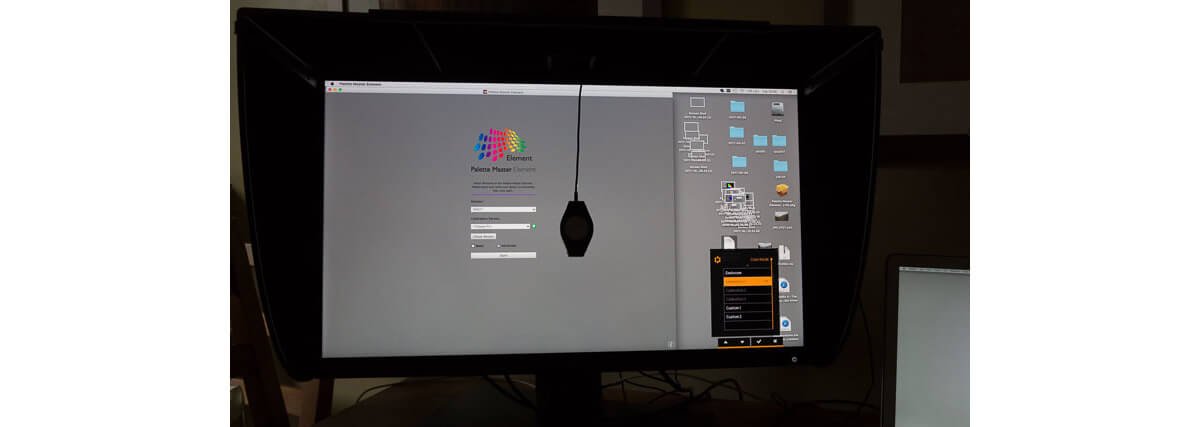
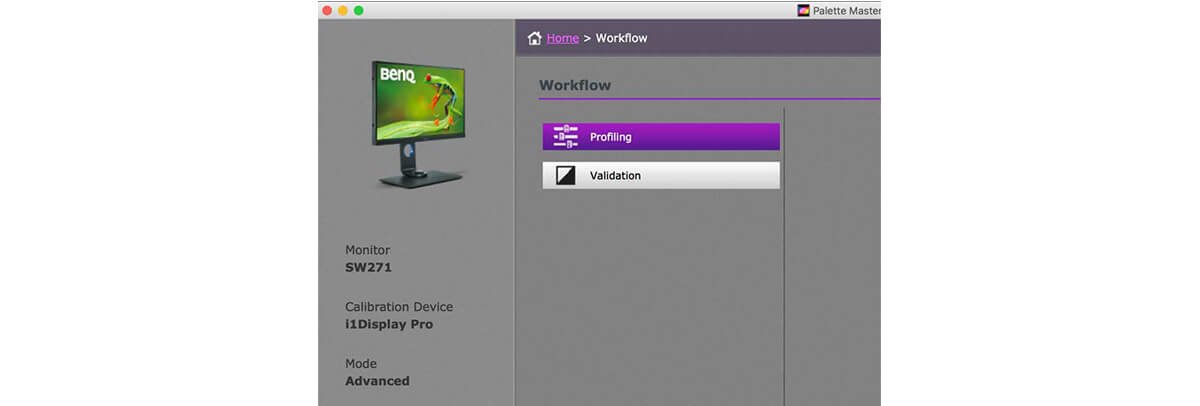
The software installs as an application with two modes of operation, Basic and Advanced.
You’ll need an external calibrator – several are supported:
I used both the Spyder5 and i1Display Pro during my testing. The i1Display 2 is an old device now and I’d personally question its use on a modern wide gamut monitor like the SW271, but it is supported.
Note that the X-Rite ColorMunki Display is -not- supported. It may be effectively the same instrument as the i1Display Pro, but X-Rite does not support its use with third party software (so don’t blame BenQ).
The two colorimeters.
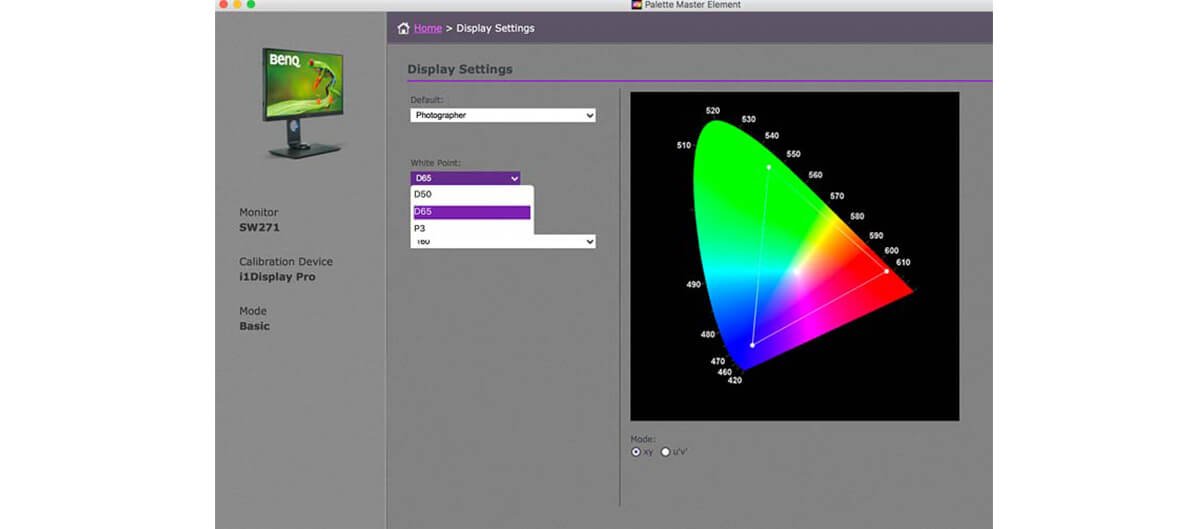
In basic mode your options for altering settings are limited.
The ‘Photographer’ preset suggests D65 for a white point and 160 cd/m2 for brightness.
Whilst the D65 is OK, I’d suggest that 160cd/m2 is a bit high for day to day work, especially if you print. You can set any chosen settings as a preset of your own.
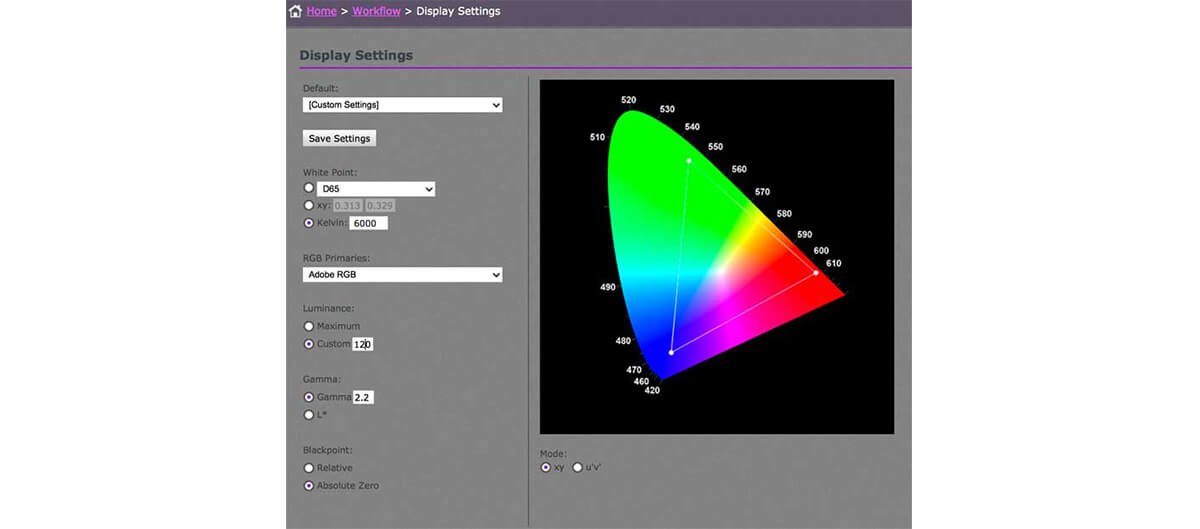
You can change all the settings and more, if you switch to ‘Advanced’ mode.
I’ve written up more details about this software in my SW320 review if you’re curious.
A good range of calibration settings are available
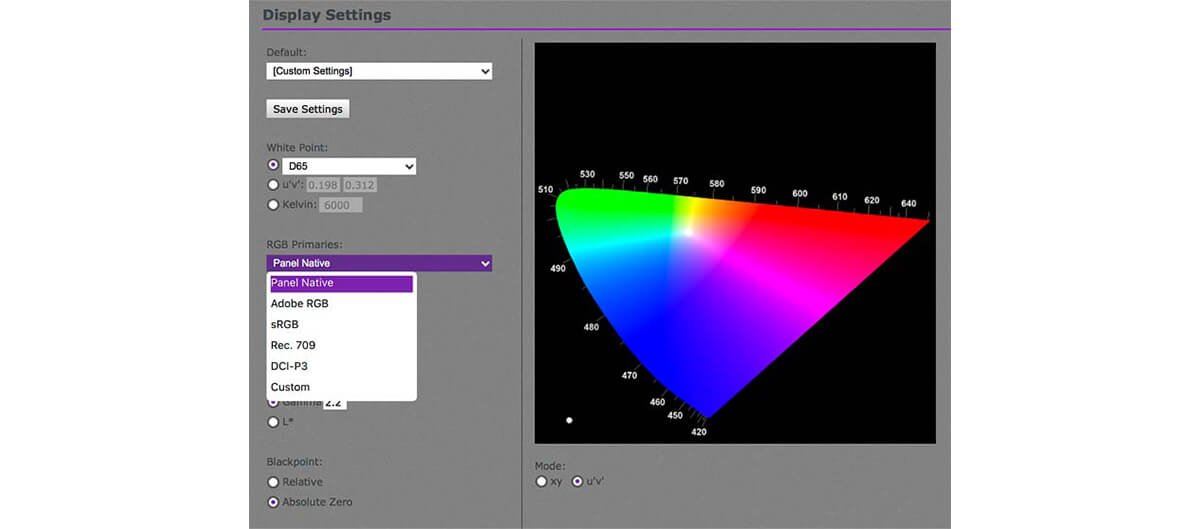
One example would be setting the display primaries or the Red, Green and Blue values defining the display gamut.
For myself I just go for the maximum ‘panel native’.
I’d suggest that if you don’t know why you need Rec. 709 for example, to take it as a hint that it’s not for you…
I select one of the custom calibration ‘slots’ of the monitor for my normal day to day setup.
This is 6500K, Gamma 2.2, 16 bit LUT and a brightness of 100 cd/m2 (relatively dim – I work in fairly low light).
In the past I’ve experimented with lower colour temperatures – say 6000K to see if it improved my print work, but given that many people I send stuff to have fairly bright displays I’ve never seen much use.
You can switch between calibrations via the OSD or with the little USB puck, which can also be customised to allow quick setting of B&W mode or a bright sRGB mode I sometimes use to see how web materials might look on other people’s displays.
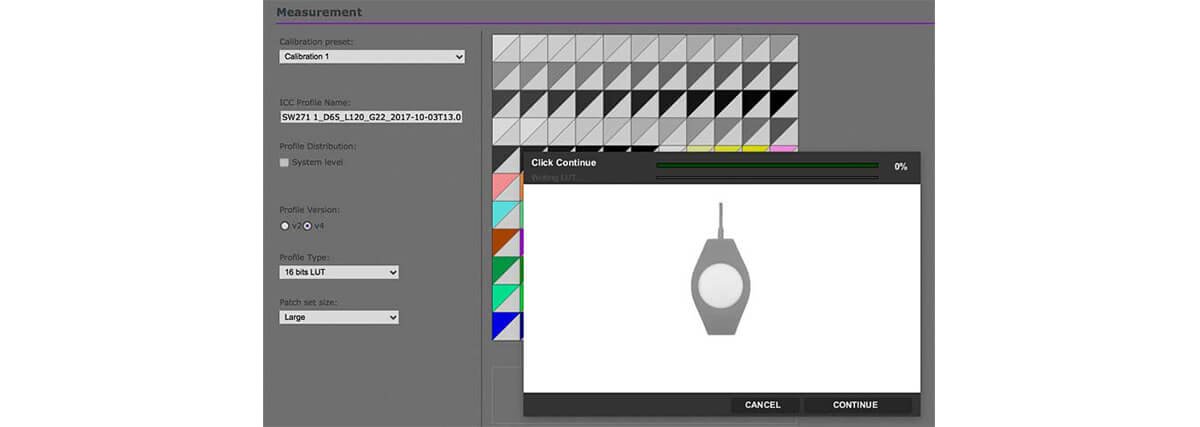
Calibration consists of multiple patches of colour being displayed, which are measured by whatever device you use.
Here’s an i1Display Pro hanging in front of the display (cable goes though the little opening in the hood)
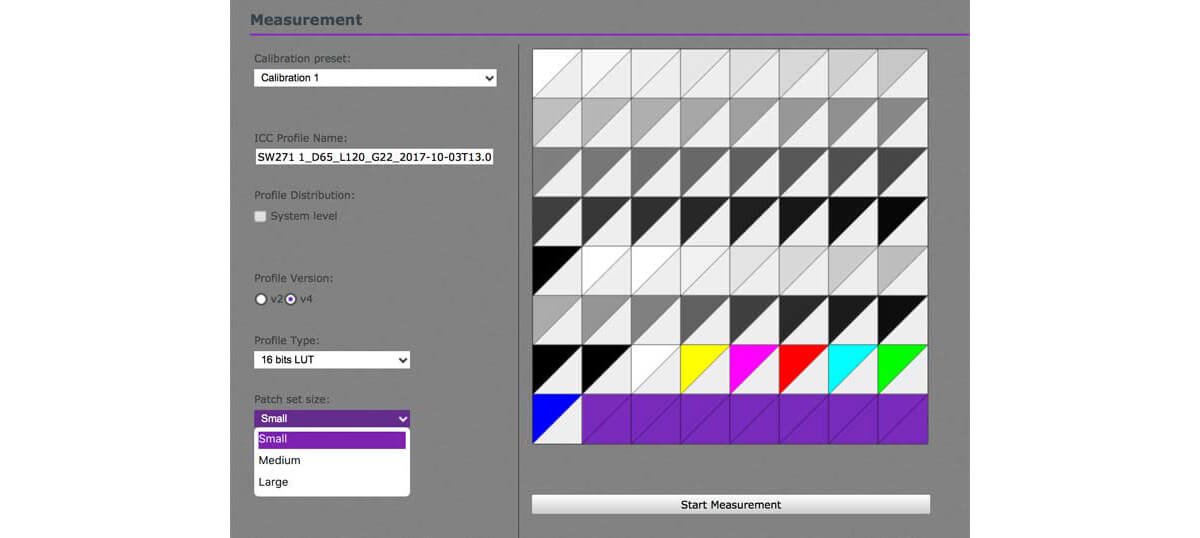
I’m using the large target patch set.
The software prompts you to place the device.
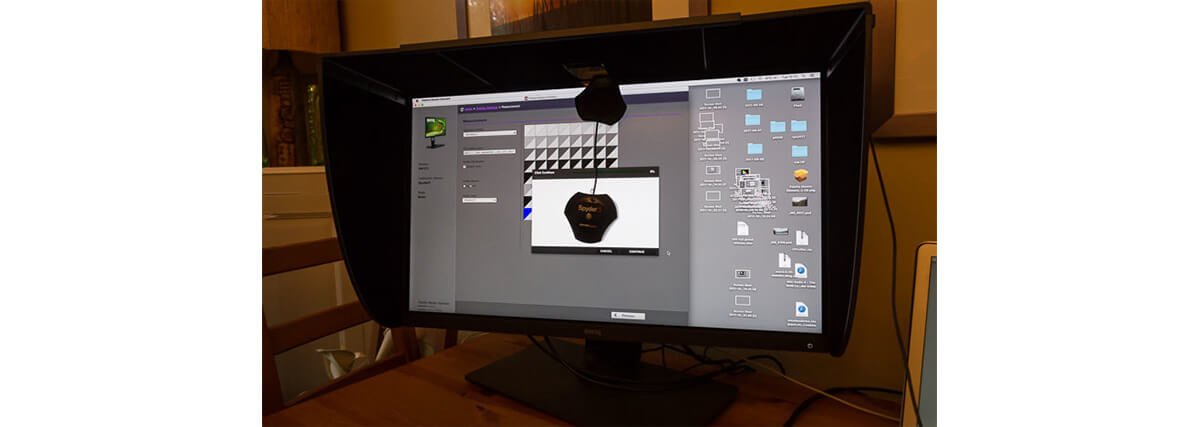
Here’s the Spyder5 (note that the cover/counterweight won’t fit through the hole at the top)
A smaller patch set works fine.
However, given the longest phase of the calibration process is the ‘Writing LUT’ one where nothing much seems to happen for a while, any time savings from using the smaller target are minimal.
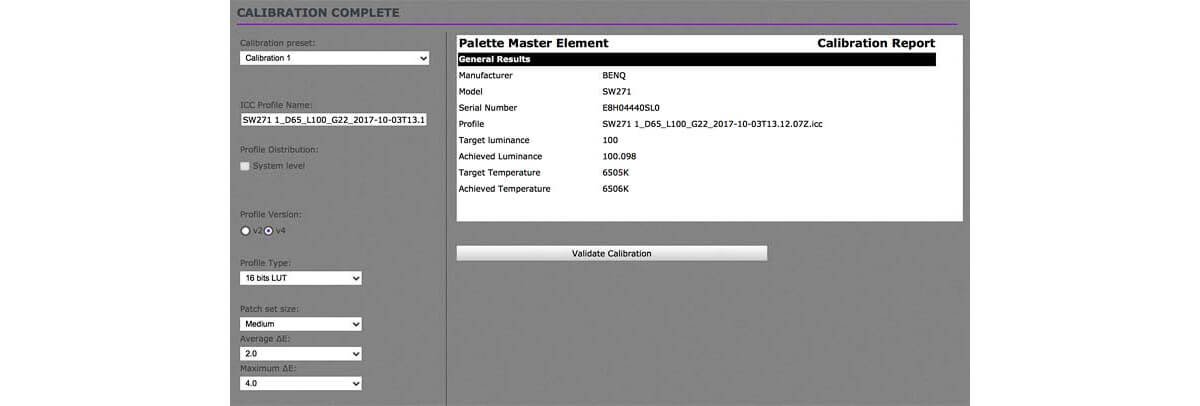
Once finished, I’m presented with a calibration report.
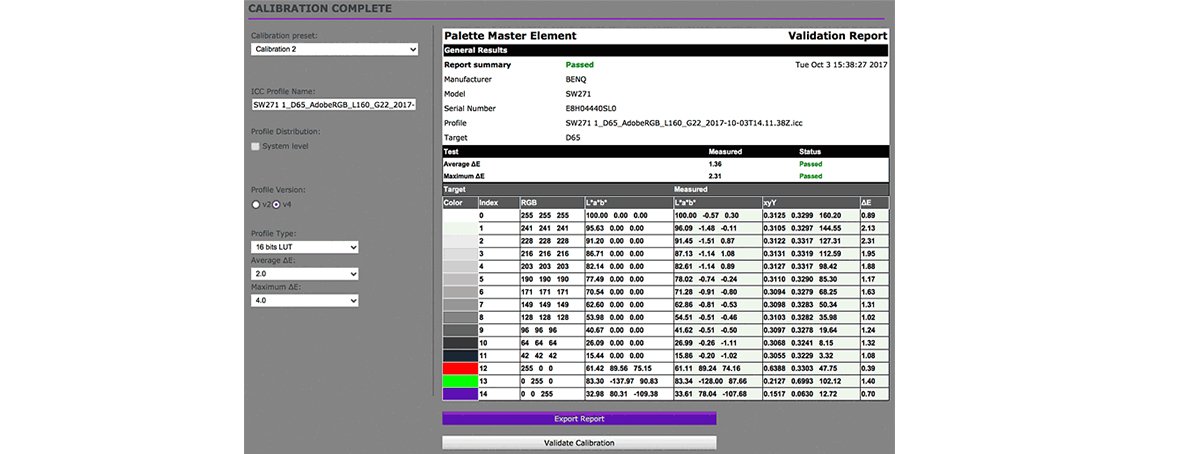
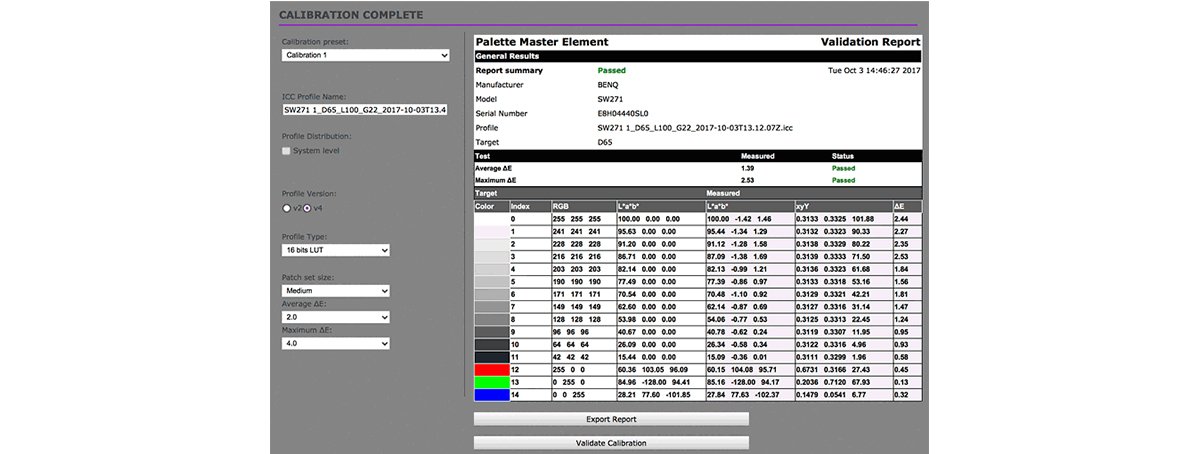
I can validate this calibration either immediately after it is completed, or it’s an option in the advanced mode for the software.
The display is measured again and a basic report produced.
This was with setting the display primaries to Adobe 98
Whilst this one was with native (widest gamut) primaries at a D65 Whitepoint
I’d find this a bit more useful if it covered a range of colours, such as X-Rite ColorChecker card or Datacolor’s version
Physically the SW271 has had a few changes over the SW2700PT, with a thinner bezel and the OSD buttons moved from bottom edge to front.
It’s a good clean design, even with the hood fitted. The monitor hood feels a little more solid too, and is easily assembled.
It comes with a range of leads that should be enough to get you up and running, with multiple input sources.
The hardware calibration works well, with a nice range of sensor options. The range of profiling options and customisation is slightly expanded over the earlier SW320 I tested.
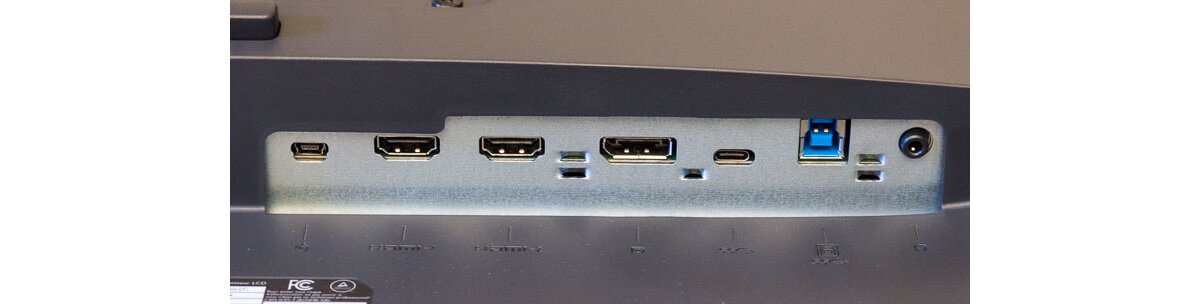
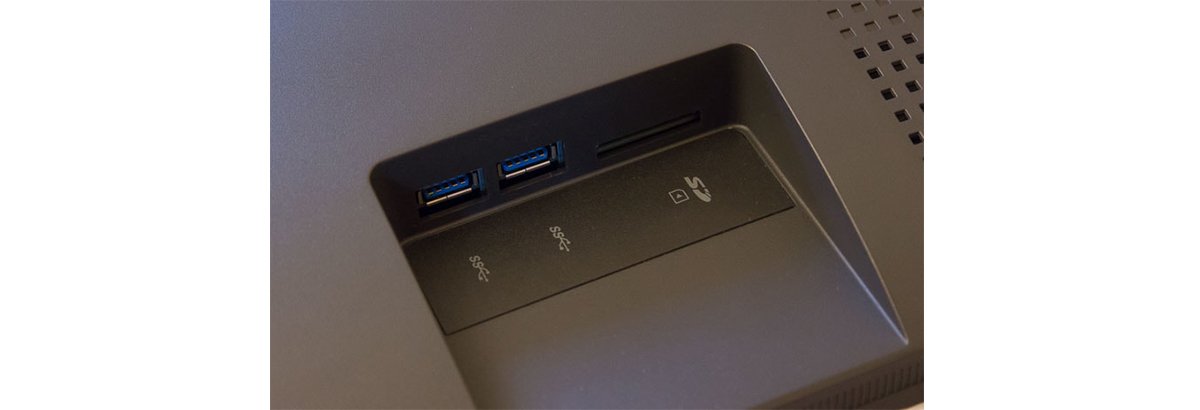
In capabilities, the SW271 is much more like a smaller version of the SW320. It adds an extra HDMI port and the additional USB3 connection.
One feature I liked about the SW2700 and rather less so with the SW320 is the side area with two USB ports and card reader. These were recessed on the SW320 making them much more awkward to use without reaching behind the monitor (I know a lot of people working with no quick access to the back of the monitor).
The SW271 has the recessed style.
Not having used a Windows PC this century, I can only comment on Mac usage…
One of the issues I have, with using older Macs is that I can either have full 4k (3840 x 2160) or 1920 x 1080 scaled HiDPI mode. I don’t get the option to scale UI elements (there are other modes but sharpness does suffer a bit).
4k is a bit small (but usable) for general work on the SW320, but on the SW271 I’m afraid my eyesight isn’t up to prolonged use with text, even with my glasses on. Photo editing looks great, but as I mention below, pay attention to sharpening, whether for print or web use.
The HiDPI mode looks great though. There is some nifty software (SwitchResX) which will swap resolutions on the fly and by application. This lets me use 4k when I need it (with menus/palettes on the MacBook screen) but HiDPI for comfort (it’s still 1920 x 1080).
A screen shot in HiDPI mode at 1:1 showing the crisp text (it displays at half this size).
A screen shot in HiDPI mode at 1:1 showing the crisp text (it displays at half this size).
What this means is that you need to consider just what it is you want 4k for?
I’ve seen people suggest that editing photos in 4k can lead to sharpening issues – well, given that with any new display and display size you need to mentally calibrate what you see on screen with what comes out of the printer in respect of sharpening, I’d suggest this is a user training issue… This also applies to creating web graphics where I’d suggest looking at images at different screen resolutions to get a feel for how images and graphics may look on different devices.
It’s certainly something I’ve had to look at carefully with all the testing I do. My own approach for sharpening is that there is no such thing as a good ‘sharpen for print’ button in software and that all sharpening (or lack of) on larger prints is ‘creative’.
4k video, especially the HDR stuff looked superb on the screen – I could do without the blue line around the PIP image though.(I couldn’t find a way to turn it off). If you connect two input sources, it’s also possible to assign a different gamut to each (youtube example)
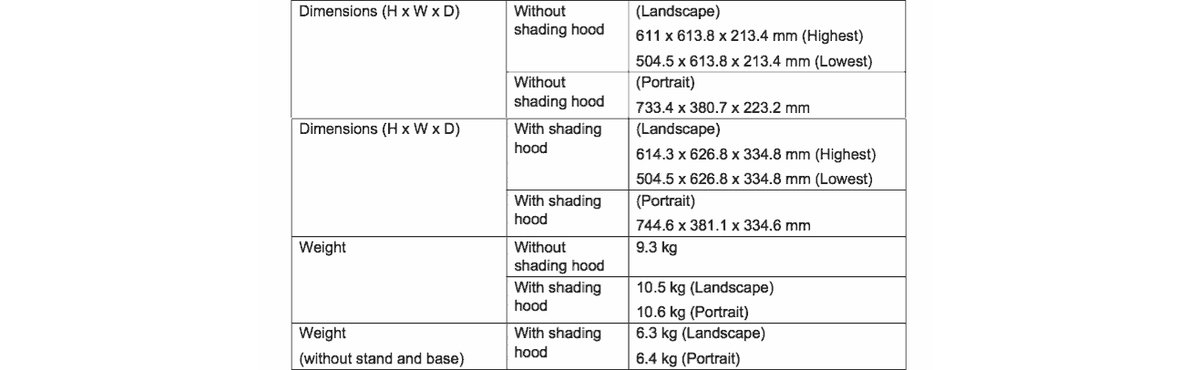
The monitor was tested just prior to its release, so specs are from supplied information. Links will be added once BenQ has a public facing product information page.
For Macs, BenQ add:
” SW271’s Mini DP is compatible with Mac system’s Thunderbolt (1&2) port to transmit video signal. And the user can also transmit video and data via the USB-C port which is compatible with the Thunderbolt 3*. SW271 has the Mini DisplayPort to DisplayPort and USB Type-C cables included in the box, so Mac users can connect the SW271 display to the Mac laptop without concerns of compatibility. *MacBook Pro 2016 series are all embedded with Thunderbolt 3 (USB-C) ports”
The monitor is Technicolor Color Certified
Technicolor Color Certified is a designation reserved for devices — PC monitors, laptops, all-in-ones, and tablets — that satisfy the required Technicolor specifications during the device’s manufacturing process to meet the same strict standards for color accuracy used in Hollywood and throughout the media and entertainment industries. All Technicolor Color Certified devices display colors accurately, consistently and exactly as the content originators intended. Anyone can enjoy shopping, entertainment and gaming experiences with full confidence that the color you see onscreen is accurate.
An excellent wide gamut high resolution monitor with hardware calibration for accuracy and consistency.
A good range of input options make for a very flexible 4k monitor solution.
Info at http://www.benq.co.uk/product/monitor/sw271
Buy the SW271 in the US at B&H
Get One Free Year Pantone Connect
{{productsCount}}Result
{{item}}
{{item.productWordingTag}}
{{currency}}{{item.finalPrice| numberThousandsCommas | numberDecimalPoint}} Save {{currency}}{{item.saveAmount | numberThousandsCommas | numberDecimalPoint}} Save {{item.savePercent | numberThousandsCommas | numberDecimalPoint}}%
new device price {{currency}}{{item.regularPrice| numberThousandsCommas | numberDecimalPoint}}
{{item}}
{{itemTag.title}}
Max 4 products to compare reached.