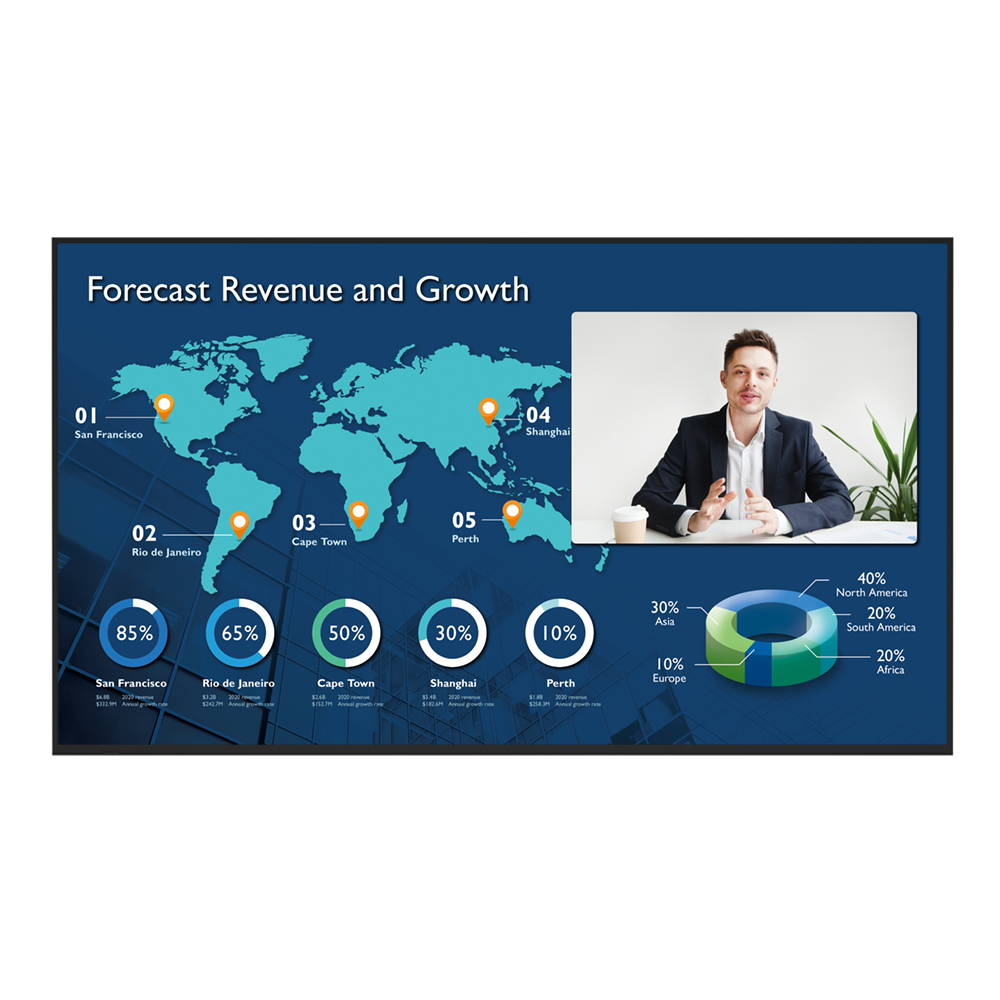
CS8601 86" Corporate Meeting Room Display
The CS8601 is an enterprise-grade 4K UHD display purposely built for highly engaging meetings, presentations, and video conferencing.
Application
 How do I connect and start using DMS local?

The DMS Local software allows you to remotely control/monitor your displays via LAN. It’s an effective way to lower TCO (total cost of ownership) and energy consumption for your operation.
This video will guide you to connect and start using DMS Local.
Learn More
What options/functions can be controlled by DMS Local?
The DMS Local software allows you to remotely control/monitor your displays via LAN. It's an effective way to lower TCO (total cost of ownership) and energy consumption for your operation.
This video will show you the function of DMS Local.
Learn More
Why can't the unit be turned on using DMS Local?
1. Ensure that WOL (Wake-on-LAN) setting is supported by this model and enabled on the display.
2. Ensure that the display is connected to the network via the LAN (RJ-45) port. Wake-on-LAN does not work over a Wi-Fi connection. Learn More
2. Ensure that the display is connected to the network via the LAN (RJ-45) port. Wake-on-LAN does not work over a Wi-Fi connection. Learn More
How do I add a device by using unique ID for DMS Cloud?
A device must be added first in order to remotely monitor, control, and configure devices individually or as groups. Please follow the demo video to add a device using unique ID for DMS Cloud.
Learn More
How do I add a device by using QR code for DMS Cloud?
A device must be added first in order to remotely monitor, control, and configure devices individually or as groups. Please follow the demo video to add device using QR code for DMS Cloud.
Learn More
How do I use DMS Cloud to control the device remotely?
Devices can be controlled remotely in DMS Cloud. Please follow the demo video for detail steps.
Learn More
How do I upgrade apps for EZWrite 5.0 and X-Sign?
Most BenQ apps can be upgraded online. Please refer to the demo video for the upgrade process of EZWrite 5.0 and X-Sign.
Learn More
Why does it show "Display ID is invalid" when I tried to register EasySetting with my device?
Please make sure to check the followings:
(1) Is the network working properly? Make sure to use LAN instead of Wi-Fi for internet access.
(2) Make sure EasySetting whitelist is set up already. Learn More
(1) Is the network working properly? Make sure to use LAN instead of Wi-Fi for internet access.
(2) Make sure EasySetting whitelist is set up already. Learn More
Where can I find the log for X-Sign player 2.x in Windows?
Please follow the path below to find the log file:
(1) Go to C:\Users\User name\AppData\Local\BenQ\XSignPlayer
(2) Select \BenQ\
(3) Select \cache\
(4) Select \crash\
(5) Select \data\
(6) Select \log\
(7) Select "XSign.env" Learn More
(1) Go to C:\Users\User name\AppData\Local\BenQ\XSignPlayer
(2) Select \BenQ\
(3) Select \cache\
(4) Select \crash\
(5) Select \data\
(6) Select \log\
(7) Select "XSign.env" Learn More
How do I unbind the IFP from AMS?
The IFP must be unbound from AMS first before it can be bound to another account. Please follow the demo video on how to unbind the IFP.
Learn More
How do I bind the IFP to AMS?
The IFP must be bound to the AMS first in order to access a personal account. Please follow the demo video on how to bind the IFP.
Learn More
How can I link/unlink an AMS (Account Management System) account from cloud storage like Google Drive, Dropbox, or One Drive?
With BenQ AMS, users only have to log into their cloud storage accounts once during setup/account creation, and can then start accessing data without having to login ever again on the IFP (Interactive Flat Panel). AMS automatically sets permissions for personal and network folders, providing another way for users to easily find and organize their data. AMS makes accessing various storage spaces more secure and easily accessible.
Please refer to the below tutorial for the setup: Learn More
Please refer to the below tutorial for the setup: Learn More
How do I setup and configure Active Directory (AD) integration with IAM?
Please refer to this video for a step-by-step tutorial:
https://youtu.be/t6dS4-wJ3Ok
Learn More
https://youtu.be/t6dS4-wJ3Ok
Learn More
Why can't I cast to an InstaShare 2 Host?
Please kindly check the following:
1. Make sure the client app/software is for InstaShare 2.
2. Make sure to enable the ports which are needed for InstaShare 2.
3. Make sure the client app/software and the host on BenQ display are connected to the same
network.
4. When the client app/software and the host on BenQ display are in different VLANs, make sure that
the network of the school/enterprise supports inter-vLAN connection.
Does InstaShare 2 support Miracast?
Yes, InstaShare 2 supports Miracast.
Learn More
Why can't I access InstaShare 2 when I select the Wireless Projection icon from the launcher or the shortcut in the OSD menu?
Wireless Projection in the launcher and the shortcut in the OSD menu are still linked to InstaShare even after InstaShare 2 is downloaded and installed. Please go to the app list and select InstaShare 2 to use this.
Can I download the original InstaShare app to a BenQ device if InstaShare 2 is preloaded? Will the shortcut also change?
If you would like to use the first generation of InstaShare, you can always download the app via BenQ Suggest. The shortcut for InstaShare 2 won't change, as the two versions can be co-installed.
How can I add a SAMBA server to AMS Files?
Please follow our demo video on how to add a SAMBA server to AMS Files. The video can be found here:
Link
Learn More
How can I copy specific files and upload them to a cloud drive with AMS Files?
We have a demo video explaining how to select files, copy them, and upload these files to the cloud. View the video here:
Link
Learn More
How do I delete/unbind the device from DMS Cloud?
BenQ DMS (Device Management Solution), combined with DMS Cloud and DMS Local, featuring leading technologies and intuitive interface, is your ultimate solution for device management.
This video will guide you on how to unbind a display from DMS. Learn More
This video will guide you on how to unbind a display from DMS. Learn More
How to bind your display to X-Sign Broadcast?
X-Sign Broadcast is a wireless broadcast system that can push alerts, messages and announcements during class.
This video will guide you on how to bind your display to X-Sign Broadcast.
Learn More
How to manage tags in X-Sign Broadcast?
X-Sign Broadcast is a wireless broadcast system that can push alerts, messages and announcements during class.
This video will guide you on how to manage tags in X-Sign Broadcast.
Learn More
How to push real-time messages from X-Sign Broadcast?
X-Sign Broadcast is a wireless broadcast system that can push alerts, messages and announcements during class.
This video will guide you on how to push real-time messages from X-Sign Broadcast.
Learn More
How to wirelessly display content from a laptop
How to install InstaShare 2?
How to display content from an iPhone or iPad
How to display content from an Android tablet or smartphone
How to display content from a laptop
How to connect the display to the internet?
How to access files from a USB storage device?
What is the difference between InstaShare 1 and InstaShare 2?
For the InstaShare 2, we provide the below features:
1. Smart spliter
2. Remote host mode
3. Improve User Experience
1. Smart spliter
2. Remote host mode
3. Improve User Experience
Where can I download InstaShare 2 client for my device?
For all client devices, there are 2 ways that provide you to download our app:
For mobile users, you can search "InstaShare2" on Google Play or the App store; laptop users can download the executable file through our website. You can always find a link that provides the proper version for all OS on the InstaShare2 IFP screen for all users.
For mobile users, you can search "InstaShare2" on Google Play or the App store; laptop users can download the executable file through our website. You can always find a link that provides the proper version for all OS on the InstaShare2 IFP screen for all users.
How to use Miracast to cast my Windows screen to the BenQ device?
You need to connect your Windows device to the BenQ device before projecting your screen via Miracast. Follow the below steps from connecting to projecting.
1. Connect to the same network as the projection.
2. Press Miracast icon in the control windows on the IFP.
3. On your Windows PC, navigate to Start -> Settings -> Devices -> Connected Devices.
4. Click on ‘Add a Device’ and wait for the adapter to appear in the list. Select the display device as "InstaShare2xxx" (the full name shows on the mainpage of the projection).
5. After connecting successfully, press Windows key + P on your keyboard at the same time.
6. You will be presented options on the right to cast your screen if Miracast is supported.
7. Select Duplicate to start sharing your screen on the projection.
1. Connect to the same network as the projection.
2. Press Miracast icon in the control windows on the IFP.
3. On your Windows PC, navigate to Start -> Settings -> Devices -> Connected Devices.
4. Click on ‘Add a Device’ and wait for the adapter to appear in the list. Select the display device as "InstaShare2xxx" (the full name shows on the mainpage of the projection).
5. After connecting successfully, press Windows key + P on your keyboard at the same time.
6. You will be presented options on the right to cast your screen if Miracast is supported.
7. Select Duplicate to start sharing your screen on the projection.
What should I pay attention to if there're both InstaShare and InstaShare 2 installed on my BenQ device?
You can have both InstaShare and InstaShare2 on your BenQ device at the same time. But please notice:
1. Wireless Projection in the launcher and the shortcut in the OSD menu are still linked to the same app.
2. Apps on the client devices are different, so users can only use the InstaShare2 app to control InstaShare2 on the BenQ device, and so does the InstaShare.
3. The original setting of the device name for both InstaShare 1 & InstaShare 2 are not the same and please keep the device name different for both apps.
1. Wireless Projection in the launcher and the shortcut in the OSD menu are still linked to the same app.
2. Apps on the client devices are different, so users can only use the InstaShare2 app to control InstaShare2 on the BenQ device, and so does the InstaShare.
3. The original setting of the device name for both InstaShare 1 & InstaShare 2 are not the same and please keep the device name different for both apps.
How to display content from an iPhone or iPad?
How to install InstaShare2 without the virtual sound driver?
If you wish to install InstaShare 2 without the virtual sound driver (Instashare2Vad), please follow the steps in the video to install without it.
Learn MoreSpecification
Is there any minimum bandwidth requirement when using AMS to access cloud storage?
There's no minimum bandwidth requirement for accessing cloud storage via AMS.
Further Query
Is there any minimum bandwidth requirement when using AMS to access cloud storage?
There's no minimum bandwidth requirement for accessing cloud storage via AMS.
Why isn't "Display ID" shown on the device?
"Display ID" will not be shown if the network is not available. Please make sure your device is successfully connected to the Internet.
Learn More
Why can't I pair my IAM (Identity and Access Management) account with AMS (Account Management System), DMS (Device Management Solution), or X-Sign Broadcast?
Currently, AMS, DMS, and X-Sign Broadcast may all only be paired to one unified IAM admin account. If different IAM admin accounts are used, pairing will fail. For example, if DMS is paired already to an IAM account, you won't be able to pair AMS or X-Sign Broadcast with a new IAM account unless other BenQ services (EX: DMS) are deleted. In essence, AMS, DMS, and X-Sign go together with one IAM account and all need to be unpaired to switch IAM account association.
If you would like to pair software with a new IAM account, please delete the devices in associated BenQ services (DMS, AMS, Broadcast) from the corresponding web site. If other BenQ services are deleted but still encounter a pairing issue, please record the MAC address and contact your local BenQ service center for further assistance.
Why can't I use the YouTube apk to watch videos anymore?
The following error messages may be encountered as YouTube has stopped support for smart devices on some older apps.
Alternatively, you can use a browser to view YouTube videos or try other YouTube TV apps you may have.
Learn More
How do I connect and start using DMS local?
The DMS Local software allows you to remotely control/monitor your displays via LAN. It’s an effective way to lower TCO (total cost of ownership) and energy consumption for your operation.
This video will guide you to connect and start using DMS Local.
Learn More
What options/functions can be controlled by DMS Local?
The DMS Local software allows you to remotely control/monitor your displays via LAN. It's an effective way to lower TCO (total cost of ownership) and energy consumption for your operation.
This video will show you the function of DMS Local.
Learn More
Why can't the unit be turned on using DMS Local?
1. Ensure that WOL (Wake-on-LAN) setting is supported by this model and enabled on the display.
2. Ensure that the display is connected to the network via the LAN (RJ-45) port. Wake-on-LAN does not work over a Wi-Fi connection. Learn More
2. Ensure that the display is connected to the network via the LAN (RJ-45) port. Wake-on-LAN does not work over a Wi-Fi connection. Learn More
How do I add a device by using unique ID for DMS Cloud?
A device must be added first in order to remotely monitor, control, and configure devices individually or as groups. Please follow the demo video to add a device using unique ID for DMS Cloud.
Learn More
How do I add a device by using QR code for DMS Cloud?
A device must be added first in order to remotely monitor, control, and configure devices individually or as groups. Please follow the demo video to add device using QR code for DMS Cloud.
Learn More
How do I use DMS Cloud to control the device remotely?
Devices can be controlled remotely in DMS Cloud. Please follow the demo video for detail steps.
Learn More
How do I upgrade apps for EZWrite 5.0 and X-Sign?
Most BenQ apps can be upgraded online. Please refer to the demo video for the upgrade process of EZWrite 5.0 and X-Sign.
Learn More
Why does it show "Display ID is invalid" when I tried to register EasySetting with my device?
Please make sure to check the followings:
(1) Is the network working properly? Make sure to use LAN instead of Wi-Fi for internet access.
(2) Make sure EasySetting whitelist is set up already. Learn More
(1) Is the network working properly? Make sure to use LAN instead of Wi-Fi for internet access.
(2) Make sure EasySetting whitelist is set up already. Learn More
Where can I find the log for X-Sign player 2.x in Windows?
Please follow the path below to find the log file:
(1) Go to C:\Users\User name\AppData\Local\BenQ\XSignPlayer
(2) Select \BenQ\
(3) Select \cache\
(4) Select \crash\
(5) Select \data\
(6) Select \log\
(7) Select "XSign.env" Learn More
(1) Go to C:\Users\User name\AppData\Local\BenQ\XSignPlayer
(2) Select \BenQ\
(3) Select \cache\
(4) Select \crash\
(5) Select \data\
(6) Select \log\
(7) Select "XSign.env" Learn More
How do I unbind the IFP from AMS?
The IFP must be unbound from AMS first before it can be bound to another account. Please follow the demo video on how to unbind the IFP.
Learn More
How do I bind the IFP to AMS?
The IFP must be bound to the AMS first in order to access a personal account. Please follow the demo video on how to bind the IFP.
Learn More
How can I link/unlink an AMS (Account Management System) account from cloud storage like Google Drive, Dropbox, or One Drive?
With BenQ AMS, users only have to log into their cloud storage accounts once during setup/account creation, and can then start accessing data without having to login ever again on the IFP (Interactive Flat Panel). AMS automatically sets permissions for personal and network folders, providing another way for users to easily find and organize their data. AMS makes accessing various storage spaces more secure and easily accessible.
Please refer to the below tutorial for the setup: Learn More
Please refer to the below tutorial for the setup: Learn More
How do I setup and configure Active Directory (AD) integration with IAM?
Please refer to this video for a step-by-step tutorial:
https://youtu.be/t6dS4-wJ3Ok
Learn More
https://youtu.be/t6dS4-wJ3Ok
Learn More
Why can't I cast to an InstaShare 2 Host?
Please kindly check the following:
1. Make sure the client app/software is for InstaShare 2.
2. Make sure to enable the ports which are needed for InstaShare 2.
3. Make sure the client app/software and the host on BenQ display are connected to the same
network.
4. When the client app/software and the host on BenQ display are in different VLANs, make sure that
the network of the school/enterprise supports inter-vLAN connection.
Does InstaShare 2 support Miracast?
Yes, InstaShare 2 supports Miracast.
Learn More
Why can't I access InstaShare 2 when I select the Wireless Projection icon from the launcher or the shortcut in the OSD menu?
Wireless Projection in the launcher and the shortcut in the OSD menu are still linked to InstaShare even after InstaShare 2 is downloaded and installed. Please go to the app list and select InstaShare 2 to use this.
Can I download the original InstaShare app to a BenQ device if InstaShare 2 is preloaded? Will the shortcut also change?
If you would like to use the first generation of InstaShare, you can always download the app via BenQ Suggest. The shortcut for InstaShare 2 won't change, as the two versions can be co-installed.
How can I add a SAMBA server to AMS Files?
Please follow our demo video on how to add a SAMBA server to AMS Files. The video can be found here:
Link
Learn More
How can I copy specific files and upload them to a cloud drive with AMS Files?
We have a demo video explaining how to select files, copy them, and upload these files to the cloud. View the video here:
Link
Learn More
How do I delete/unbind the device from DMS Cloud?
BenQ DMS (Device Management Solution), combined with DMS Cloud and DMS Local, featuring leading technologies and intuitive interface, is your ultimate solution for device management.
This video will guide you on how to unbind a display from DMS. Learn More
This video will guide you on how to unbind a display from DMS. Learn More
How to bind your display to X-Sign Broadcast?
X-Sign Broadcast is a wireless broadcast system that can push alerts, messages and announcements during class.
This video will guide you on how to bind your display to X-Sign Broadcast.
Learn More
How to manage tags in X-Sign Broadcast?
X-Sign Broadcast is a wireless broadcast system that can push alerts, messages and announcements during class.
This video will guide you on how to manage tags in X-Sign Broadcast.
Learn More
How to push real-time messages from X-Sign Broadcast?
X-Sign Broadcast is a wireless broadcast system that can push alerts, messages and announcements during class.
This video will guide you on how to push real-time messages from X-Sign Broadcast.
Learn More
How to wirelessly display content from a laptop
How to install InstaShare 2?
How to display content from an iPhone or iPad
How to display content from an Android tablet or smartphone
How to display content from a laptop
How to connect the display to the internet?
How to access files from a USB storage device?
What is the difference between InstaShare 1 and InstaShare 2?
For the InstaShare 2, we provide the below features:
1. Smart spliter
2. Remote host mode
3. Improve User Experience
1. Smart spliter
2. Remote host mode
3. Improve User Experience
Where can I download InstaShare 2 client for my device?
For all client devices, there are 2 ways that provide you to download our app:
For mobile users, you can search "InstaShare2" on Google Play or the App store; laptop users can download the executable file through our website. You can always find a link that provides the proper version for all OS on the InstaShare2 IFP screen for all users.
For mobile users, you can search "InstaShare2" on Google Play or the App store; laptop users can download the executable file through our website. You can always find a link that provides the proper version for all OS on the InstaShare2 IFP screen for all users.
How to use Miracast to cast my Windows screen to the BenQ device?
You need to connect your Windows device to the BenQ device before projecting your screen via Miracast. Follow the below steps from connecting to projecting.
1. Connect to the same network as the projection.
2. Press Miracast icon in the control windows on the IFP.
3. On your Windows PC, navigate to Start -> Settings -> Devices -> Connected Devices.
4. Click on ‘Add a Device’ and wait for the adapter to appear in the list. Select the display device as "InstaShare2xxx" (the full name shows on the mainpage of the projection).
5. After connecting successfully, press Windows key + P on your keyboard at the same time.
6. You will be presented options on the right to cast your screen if Miracast is supported.
7. Select Duplicate to start sharing your screen on the projection.
1. Connect to the same network as the projection.
2. Press Miracast icon in the control windows on the IFP.
3. On your Windows PC, navigate to Start -> Settings -> Devices -> Connected Devices.
4. Click on ‘Add a Device’ and wait for the adapter to appear in the list. Select the display device as "InstaShare2xxx" (the full name shows on the mainpage of the projection).
5. After connecting successfully, press Windows key + P on your keyboard at the same time.
6. You will be presented options on the right to cast your screen if Miracast is supported.
7. Select Duplicate to start sharing your screen on the projection.
What should I pay attention to if there're both InstaShare and InstaShare 2 installed on my BenQ device?
You can have both InstaShare and InstaShare2 on your BenQ device at the same time. But please notice:
1. Wireless Projection in the launcher and the shortcut in the OSD menu are still linked to the same app.
2. Apps on the client devices are different, so users can only use the InstaShare2 app to control InstaShare2 on the BenQ device, and so does the InstaShare.
3. The original setting of the device name for both InstaShare 1 & InstaShare 2 are not the same and please keep the device name different for both apps.
1. Wireless Projection in the launcher and the shortcut in the OSD menu are still linked to the same app.
2. Apps on the client devices are different, so users can only use the InstaShare2 app to control InstaShare2 on the BenQ device, and so does the InstaShare.
3. The original setting of the device name for both InstaShare 1 & InstaShare 2 are not the same and please keep the device name different for both apps.
How to display content from an iPhone or iPad?
How to install InstaShare2 without the virtual sound driver?
If you wish to install InstaShare 2 without the virtual sound driver (Instashare2Vad), please follow the steps in the video to install without it.
Learn More