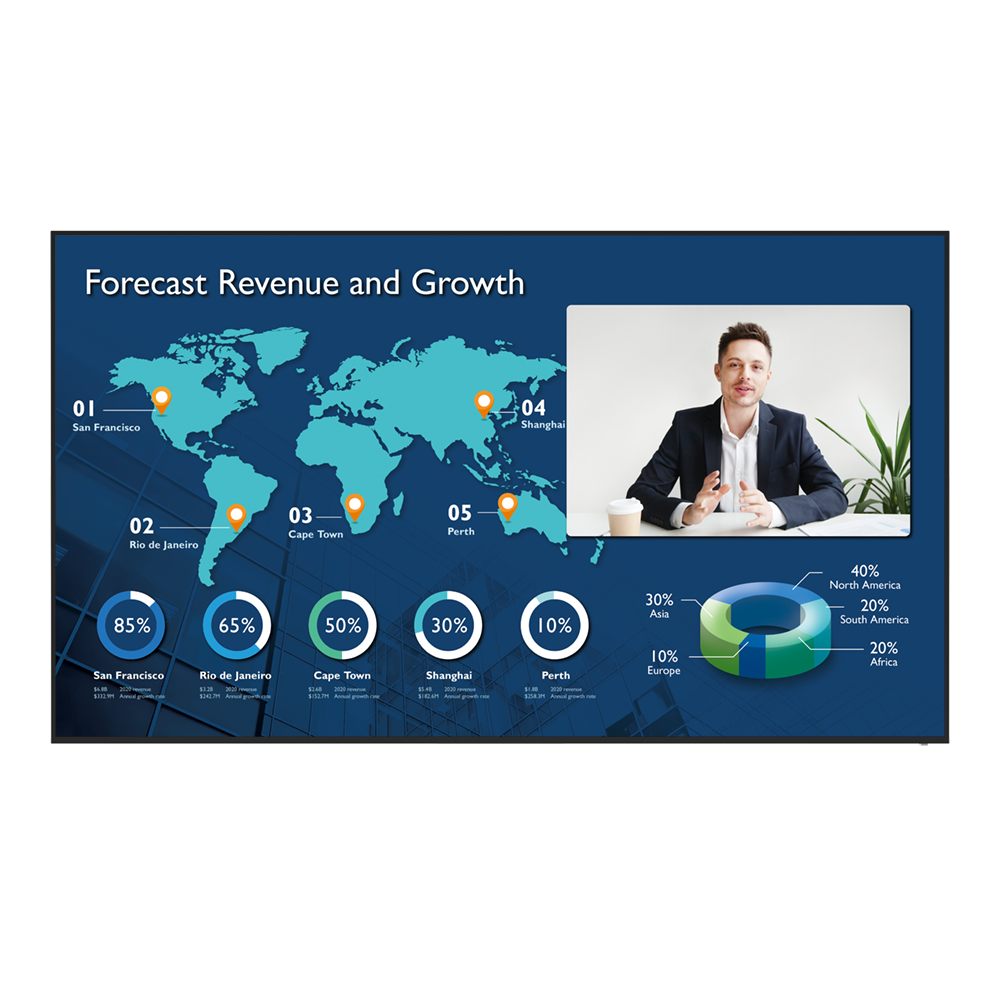
CS7501 75" Corporate Meeting Room Display
The CS7501 is an enterprise-grade 4K UHD display purposely built for highly engaging meetings, presentations, and video conferencing.
Application
 Why can't I cast to an InstaShare 2 Host?

Please kindly check the following:
1. Make sure the client app/software is for InstaShare 2.
2. Make sure to enable the ports which are needed for InstaShare 2.
3. Make sure the client app/software and the host on BenQ display are connected to the same
network.
4. When the client app/software and the host on BenQ display are in different VLANs, make sure that
the network of the school/enterprise supports inter-vLAN connection.
Does InstaShare 2 support Miracast?
Yes, InstaShare 2 supports Miracast.
Learn More
What languages are available in the InstaShare 2 interface currently?
InstaShare 2 support 28 languages as listed below.
Learn More
Can I download the original InstaShare app to a BenQ device if InstaShare 2 is preloaded? Will the shortcut also change?
If you would like to use the first generation of InstaShare, you can always download the app via BenQ Suggest. The shortcut for InstaShare 2 won't change, as the two versions can be co-installed.
How do I upgrade apps for EZWrite 5.0 and X-Sign?
Most BenQ apps can be upgraded online. Please refer to the demo video for the upgrade process of EZWrite 5.0 and X-Sign.
Learn More
Where can I find the log for X-Sign player 2.x in Windows?
Please follow the path below to find the log file:
(1) Go to C:\Users\User name\AppData\Local\BenQ\XSignPlayer
(2) Select \BenQ\
(3) Select \cache\
(4) Select \crash\
(5) Select \data\
(6) Select \log\
(7) Select "XSign.env" Learn More
(1) Go to C:\Users\User name\AppData\Local\BenQ\XSignPlayer
(2) Select \BenQ\
(3) Select \cache\
(4) Select \crash\
(5) Select \data\
(6) Select \log\
(7) Select "XSign.env" Learn More
How to install InstaShare 2?
How to display content from a laptop
How to wirelessly display content from a laptop?
How to display content from an Android tablet or smartphone
How to connect the display to the internet?
How to access files from a USB storage device?
How to use Agent Mode in BenQ DMS (Device Management Solution)?
BenQ DMS (Device Management Solution), combined with DMS Cloud and DMS Local, featuring leading technologies and intuitive interface, is your ultimate solution for device management.
This video will guide you on how to use Agent Mode in DMS.
Learn More
How to install Apps through BenQ DMS (Device Management Solution)?
BenQ DMS (Device Management Solution), combined with DMS Cloud and DMS Local, featuring leading technologies and intuitive interface, is your ultimate solution for device management.
This video will guide you on how to install Apps through DMS.
Learn More
How to bind your display to BenQ DMS (Device Management Solution)?
BenQ DMS (Device Management Solution), combined with DMS Cloud and DMS Local, featuring leading technologies and intuitive interface, is your ultimate solution for device management.
This video will guide you on how to bind your display to DMS.
Learn More
How to manage groups in BenQ DMS (Device Management Solution)?
BenQ DMS (Device Management Solution), combined with DMS Cloud and DMS Local, featuring leading technologies and intuitive interface, is your ultimate solution for device management.
This video will guide you on how to manage groups in DMS.
Learn More
How to push OTA updates through BenQ DMS (Device Management Solution)?
BenQ DMS (Device Management Solution), combined with DMS Cloud and DMS Local, featuring leading technologies and intuitive interface, is your ultimate solution for device management.
This video will guide you on how to push OTA updates through DMS.
Learn More
How to set a power schedule through BenQ DMS (Device Management Solution)?
BenQ DMS (Device Management Solution), combined with DMS Cloud and DMS Local, featuring leading technologies and intuitive interface, is your ultimate solution for device management.
This video will guide you on how to set a power schedule through DMS.
Learn More
How do I delete/unbind the device from DMS Cloud?
BenQ DMS (Device Management Solution), combined with DMS Cloud and DMS Local, featuring leading technologies and intuitive interface, is your ultimate solution for device management.
This video will guide you on how to unbind a display from DMS. Learn More
This video will guide you on how to unbind a display from DMS. Learn More
How to create user accounts in BenQ IAM (Identify and Access Management)?
With BenQ IAM (Identify and Access Management), you can manage all of your BenQ services (X-Sign, AMS, DMS) in one account.
This video will guide you on how to create user accounts in IAM.
Learn More
How to manage user roles in BenQ IAM (Identify and Access Management)?
With BenQ IAM (Identify and Access Management), you can manage all of your BenQ services (X-Sign, AMS, DMS) in one account.
This video will guide you on how to manage user roles in IAM.
Learn More
How to bind your display to X-Sign Broadcast?
X-Sign Broadcast is a wireless broadcast system that can push alerts, messages and announcements during class.
This video will guide you on how to bind your display to X-Sign Broadcast.
Learn More
How to push real-time messages from X-Sign Broadcast?
X-Sign Broadcast is a wireless broadcast system that can push alerts, messages and announcements during class.
This video will guide you on how to push real-time messages from X-Sign Broadcast.
Learn More
How to schedule messages in X-Sign Broadcast?
X-Sign Broadcast is a wireless broadcast system that can push alerts, messages and announcements during class.
This video will guide you on how to schedule messages in X-Sign Broadcast.
Learn More
How to manage tags in X-Sign Broadcast?
X-Sign Broadcast is a wireless broadcast system that can push alerts, messages and announcements during class.
This video will guide you on how to manage tags in X-Sign Broadcast.
Learn More
How to manage users in X-Sign Broadcast?
X-Sign Broadcast is a wireless broadcast system that can push alerts, messages and announcements during class.
This video will guide you on how to manage users in X-Sign Broadcast.
Learn More
What is the difference between InstaShare 1 and InstaShare 2?
With InstaShare 2, we added these important features:
1. Smart splitter
2. Remote host mode
3. Improved user experience
1. Smart splitter
2. Remote host mode
3. Improved user experience
Where can I download the InstaShare 2 for my client device?
For all client devices, there are two ways to download the InstaShare 2 app:
Mobile users can search for "InstaShare 2" on Google Play or the Apple App store. Laptop and desktop users can download the executable file through our website. Also, you can always find a link that provides the correct version for your OS on the InstaShare 2 on screen instruction of your BenQ device.
Mobile users can search for "InstaShare 2" on Google Play or the Apple App store. Laptop and desktop users can download the executable file through our website. Also, you can always find a link that provides the correct version for your OS on the InstaShare 2 on screen instruction of your BenQ device.
How can I use Miracast to cast my Windows screen to a BenQ device?
You need to connect your Windows device to the BenQ device before projecting your screen via Miracast. Follow the below steps, which cover connecting to projecting.
1. Connect to all devices to the same wireless network.
2. Press the Miracast icon in the control window on the IFP.
3. On your Windows PC, navigate to Start -> Settings -> Devices -> Connected Devices.
4. Click on ‘Add a Device’ and wait for the adapter to appear on the list. Select the display device shown as "InstaShare2xxx" (the full name shown on the main page of the projection device).
5. After connecting successfully, press Windows key + P on your keyboard.
6. You will be presented with options on the right of the screen to cast your screen if Miracast is supported.
7. Select Duplicate to start sharing your screen on the projection device.
1. Connect to all devices to the same wireless network.
2. Press the Miracast icon in the control window on the IFP.
3. On your Windows PC, navigate to Start -> Settings -> Devices -> Connected Devices.
4. Click on ‘Add a Device’ and wait for the adapter to appear on the list. Select the display device shown as "InstaShare2xxx" (the full name shown on the main page of the projection device).
5. After connecting successfully, press Windows key + P on your keyboard.
6. You will be presented with options on the right of the screen to cast your screen if Miracast is supported.
7. Select Duplicate to start sharing your screen on the projection device.
What options/functions can be controlled by DMS Local?
The DMS Local software allows you to remotely control/monitor your displays via LAN. It's an effective way to lower TCO (total cost of ownership) and energy consumption for your operation.
This video will show you the function of DMS Local.
Learn More
How do I connect and start using DMS local?
The DMS Local software allows you to remotely control/monitor your displays via LAN. It’s an effective way to lower TCO (total cost of ownership) and energy consumption for your operation.
This video will guide you to connect and start using DMS Local.
Learn More
How do I delete/unbind the device from DMS Cloud?
If you would like to delete/unbind the device from DMS Cloud, please follow the demo video for detailed steps.
Learn More
Why can't a display be added into DMS Local?
Please update the device definition (JSON) under setting in DMS Local.
Learn More
Why can't the unit be turned on using DMS Local?
1. Ensure that WOL (Wake-on-LAN) setting is supported by this model and enabled on the display.
2. Ensure that the display is connected to the network via the LAN (RJ-45) port. Wake-on-LAN does not work over a Wi-Fi connection. Learn More
2. Ensure that the display is connected to the network via the LAN (RJ-45) port. Wake-on-LAN does not work over a Wi-Fi connection. Learn More
How do I add a device by using QR code for DMS Cloud?
A device must be added first in order to remotely monitor, control, and configure devices individually or as groups. Please follow the demo video to add device using QR code for DMS Cloud.
Learn More
How do I use DMS Cloud to control the device remotely?
Devices can be controlled remotely in DMS Cloud. Please follow the demo video for detail steps.
Learn More
How to display content from an iPhone or iPad?
How to change brightness and volume and open app thru DMS automation?
Please follow the detailed one-by-one steps for changing the brightness and volume, and open the app through DMS automation.
Learn MoreFurther Query
A USB device or adapter dongle doesn’t work or interferes with other USB devices randomly. How can I make them work properly?
USB 3.0 has been found to cause interference that may hinder the performance of nearby wireless devices in the 2.4GHz band, including RF devices, Wi-Fi, and Bluetooth.
For wireless devices in the 2.4GHz range, we suggest using the USB port on the front I/O. If the connected device's manual recommends a different USB port, do follow those guidelines.
For more details, please refer to the below white paper from Intel.
Why can't I use the YouTube apk to watch videos anymore?
The following error messages may be encountered as YouTube has stopped support for smart devices on some older apps.
Alternatively, you can use a browser to view YouTube videos or try other YouTube TV apps you may have.
Learn More
Why isn't "Display ID" shown on the device?
"Display ID" will not be shown if the network is not available. Please make sure your device is successfully connected to the Internet.
Learn More
Why can't I cast to an InstaShare 2 Host?
Please kindly check the following:
1. Make sure the client app/software is for InstaShare 2.
2. Make sure to enable the ports which are needed for InstaShare 2.
3. Make sure the client app/software and the host on BenQ display are connected to the same
network.
4. When the client app/software and the host on BenQ display are in different VLANs, make sure that
the network of the school/enterprise supports inter-vLAN connection.
Does InstaShare 2 support Miracast?
Yes, InstaShare 2 supports Miracast.
Learn More
What languages are available in the InstaShare 2 interface currently?
InstaShare 2 support 28 languages as listed below.
Learn More
Can I download the original InstaShare app to a BenQ device if InstaShare 2 is preloaded? Will the shortcut also change?
If you would like to use the first generation of InstaShare, you can always download the app via BenQ Suggest. The shortcut for InstaShare 2 won't change, as the two versions can be co-installed.
How do I upgrade apps for EZWrite 5.0 and X-Sign?
Most BenQ apps can be upgraded online. Please refer to the demo video for the upgrade process of EZWrite 5.0 and X-Sign.
Learn More
Where can I find the log for X-Sign player 2.x in Windows?
Please follow the path below to find the log file:
(1) Go to C:\Users\User name\AppData\Local\BenQ\XSignPlayer
(2) Select \BenQ\
(3) Select \cache\
(4) Select \crash\
(5) Select \data\
(6) Select \log\
(7) Select "XSign.env" Learn More
(1) Go to C:\Users\User name\AppData\Local\BenQ\XSignPlayer
(2) Select \BenQ\
(3) Select \cache\
(4) Select \crash\
(5) Select \data\
(6) Select \log\
(7) Select "XSign.env" Learn More
How to install InstaShare 2?
How to display content from a laptop
How to wirelessly display content from a laptop?
How to display content from an Android tablet or smartphone
How to connect the display to the internet?
How to access files from a USB storage device?
How to use Agent Mode in BenQ DMS (Device Management Solution)?
BenQ DMS (Device Management Solution), combined with DMS Cloud and DMS Local, featuring leading technologies and intuitive interface, is your ultimate solution for device management.
This video will guide you on how to use Agent Mode in DMS.
Learn More
How to install Apps through BenQ DMS (Device Management Solution)?
BenQ DMS (Device Management Solution), combined with DMS Cloud and DMS Local, featuring leading technologies and intuitive interface, is your ultimate solution for device management.
This video will guide you on how to install Apps through DMS.
Learn More
How to bind your display to BenQ DMS (Device Management Solution)?
BenQ DMS (Device Management Solution), combined with DMS Cloud and DMS Local, featuring leading technologies and intuitive interface, is your ultimate solution for device management.
This video will guide you on how to bind your display to DMS.
Learn More
How to manage groups in BenQ DMS (Device Management Solution)?
BenQ DMS (Device Management Solution), combined with DMS Cloud and DMS Local, featuring leading technologies and intuitive interface, is your ultimate solution for device management.
This video will guide you on how to manage groups in DMS.
Learn More
How to push OTA updates through BenQ DMS (Device Management Solution)?
BenQ DMS (Device Management Solution), combined with DMS Cloud and DMS Local, featuring leading technologies and intuitive interface, is your ultimate solution for device management.
This video will guide you on how to push OTA updates through DMS.
Learn More
How to set a power schedule through BenQ DMS (Device Management Solution)?
BenQ DMS (Device Management Solution), combined with DMS Cloud and DMS Local, featuring leading technologies and intuitive interface, is your ultimate solution for device management.
This video will guide you on how to set a power schedule through DMS.
Learn More
How do I delete/unbind the device from DMS Cloud?
BenQ DMS (Device Management Solution), combined with DMS Cloud and DMS Local, featuring leading technologies and intuitive interface, is your ultimate solution for device management.
This video will guide you on how to unbind a display from DMS. Learn More
This video will guide you on how to unbind a display from DMS. Learn More
How to create user accounts in BenQ IAM (Identify and Access Management)?
With BenQ IAM (Identify and Access Management), you can manage all of your BenQ services (X-Sign, AMS, DMS) in one account.
This video will guide you on how to create user accounts in IAM.
Learn More
How to manage user roles in BenQ IAM (Identify and Access Management)?
With BenQ IAM (Identify and Access Management), you can manage all of your BenQ services (X-Sign, AMS, DMS) in one account.
This video will guide you on how to manage user roles in IAM.
Learn More
How to bind your display to X-Sign Broadcast?
X-Sign Broadcast is a wireless broadcast system that can push alerts, messages and announcements during class.
This video will guide you on how to bind your display to X-Sign Broadcast.
Learn More
How to push real-time messages from X-Sign Broadcast?
X-Sign Broadcast is a wireless broadcast system that can push alerts, messages and announcements during class.
This video will guide you on how to push real-time messages from X-Sign Broadcast.
Learn More
How to schedule messages in X-Sign Broadcast?
X-Sign Broadcast is a wireless broadcast system that can push alerts, messages and announcements during class.
This video will guide you on how to schedule messages in X-Sign Broadcast.
Learn More
How to manage tags in X-Sign Broadcast?
X-Sign Broadcast is a wireless broadcast system that can push alerts, messages and announcements during class.
This video will guide you on how to manage tags in X-Sign Broadcast.
Learn More
How to manage users in X-Sign Broadcast?
X-Sign Broadcast is a wireless broadcast system that can push alerts, messages and announcements during class.
This video will guide you on how to manage users in X-Sign Broadcast.
Learn More
What is the difference between InstaShare 1 and InstaShare 2?
With InstaShare 2, we added these important features:
1. Smart splitter
2. Remote host mode
3. Improved user experience
1. Smart splitter
2. Remote host mode
3. Improved user experience
Where can I download the InstaShare 2 for my client device?
For all client devices, there are two ways to download the InstaShare 2 app:
Mobile users can search for "InstaShare 2" on Google Play or the Apple App store. Laptop and desktop users can download the executable file through our website. Also, you can always find a link that provides the correct version for your OS on the InstaShare 2 on screen instruction of your BenQ device.
Mobile users can search for "InstaShare 2" on Google Play or the Apple App store. Laptop and desktop users can download the executable file through our website. Also, you can always find a link that provides the correct version for your OS on the InstaShare 2 on screen instruction of your BenQ device.
How can I use Miracast to cast my Windows screen to a BenQ device?
You need to connect your Windows device to the BenQ device before projecting your screen via Miracast. Follow the below steps, which cover connecting to projecting.
1. Connect to all devices to the same wireless network.
2. Press the Miracast icon in the control window on the IFP.
3. On your Windows PC, navigate to Start -> Settings -> Devices -> Connected Devices.
4. Click on ‘Add a Device’ and wait for the adapter to appear on the list. Select the display device shown as "InstaShare2xxx" (the full name shown on the main page of the projection device).
5. After connecting successfully, press Windows key + P on your keyboard.
6. You will be presented with options on the right of the screen to cast your screen if Miracast is supported.
7. Select Duplicate to start sharing your screen on the projection device.
1. Connect to all devices to the same wireless network.
2. Press the Miracast icon in the control window on the IFP.
3. On your Windows PC, navigate to Start -> Settings -> Devices -> Connected Devices.
4. Click on ‘Add a Device’ and wait for the adapter to appear on the list. Select the display device shown as "InstaShare2xxx" (the full name shown on the main page of the projection device).
5. After connecting successfully, press Windows key + P on your keyboard.
6. You will be presented with options on the right of the screen to cast your screen if Miracast is supported.
7. Select Duplicate to start sharing your screen on the projection device.
What options/functions can be controlled by DMS Local?
The DMS Local software allows you to remotely control/monitor your displays via LAN. It's an effective way to lower TCO (total cost of ownership) and energy consumption for your operation.
This video will show you the function of DMS Local.
Learn More
How do I connect and start using DMS local?
The DMS Local software allows you to remotely control/monitor your displays via LAN. It’s an effective way to lower TCO (total cost of ownership) and energy consumption for your operation.
This video will guide you to connect and start using DMS Local.
Learn More
How do I delete/unbind the device from DMS Cloud?
If you would like to delete/unbind the device from DMS Cloud, please follow the demo video for detailed steps.
Learn More
Why can't a display be added into DMS Local?
Please update the device definition (JSON) under setting in DMS Local.
Learn More
Why can't the unit be turned on using DMS Local?
1. Ensure that WOL (Wake-on-LAN) setting is supported by this model and enabled on the display.
2. Ensure that the display is connected to the network via the LAN (RJ-45) port. Wake-on-LAN does not work over a Wi-Fi connection. Learn More
2. Ensure that the display is connected to the network via the LAN (RJ-45) port. Wake-on-LAN does not work over a Wi-Fi connection. Learn More
How do I add a device by using QR code for DMS Cloud?
A device must be added first in order to remotely monitor, control, and configure devices individually or as groups. Please follow the demo video to add device using QR code for DMS Cloud.
Learn More
How do I use DMS Cloud to control the device remotely?
Devices can be controlled remotely in DMS Cloud. Please follow the demo video for detail steps.
Learn More
How to display content from an iPhone or iPad?
How to change brightness and volume and open app thru DMS automation?
Please follow the detailed one-by-one steps for changing the brightness and volume, and open the app through DMS automation.
Learn More