Fine Art and Commercial Photographer / UK
Photographer Mark Wood splits his time between commercial work and teaching, whilst ensuring he makes time for his personal projects. Mark trained as a printmaker, utilizing the traditional techniques of etching and lithography to create fine art print, before moving to digital print in the mid 90’s.
This is the second part of a tutorial, Pro Tips For Using BenQ Colour Critical Displays. For the first part, please refer to this link: Pro Tips For Using BenQ Colour Critical Displays I: How to switch between custom calibrated Colour Modes In this post I explain how to assign keys on the OSD Hotkey Puck, this will make swapping between Colour Modes very quick and easy. This is necessary because in our multitasking, interdisciplinary, world we often have to assess the tone and colour, in Colour Modes such as Adobe RGB (ARGB), sRGB, Rec.709, and HDR. If you haven’t read through part one this tutorial may not make sense, it would also help if you understand how to use BenQ’s Palette Master Software my full tutorial on Calibrating Colour Critical Displays can be found on this link: How to Set up the Workflow of Color Management.
The aim of this Pro Tip Tutorial is to explain how you can switch between custom calibrated Colour Modes, principally between ARGB and sRGB using the OSD Hotkey Puck. Part One covered how to create Custom Calibrations, now I’ll explain how to assign those to the OSD Hotkey Puck.
Use the physical keys on your BenQ Colour Critical Monitor. Pressing any of those keys will open the On Screen Display (OSD), see Figure 01.

Figure 01: The opening buttons of the On Screen Display (OSD)
Use the fourth physical button from the left to activate system menu, see Figure 02. The OSD indicates which physical buttons to use to select the OSD Controller Settings. Figure 02 show the System menu, and Controller key 1 being assigned to Calibration 1, which in the first part of this tutorial was used for the Adobe RGB Colour Mode.
With the OSD System Menu open now assign Calibration 2 to Controller key 2. The default for the third key is the BenQ generic black and white mode, I prefer to set this to generic sRGB. I’ll explain my rationale of setting the keys to a calibrated Adobe RGB, calibrated sRGB, and a generic sRGB later in the post.
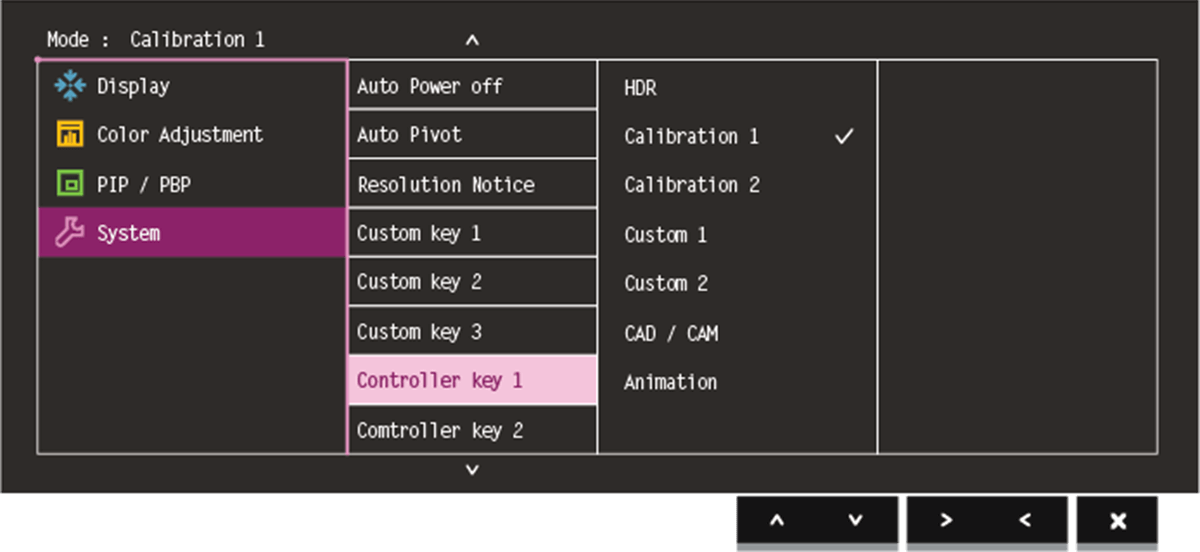
Figure 02: The System Menu of the OSD
This tip may appear simple, but if you are struggling with the concept send us your feedback. I think swapping between Colour Modes in essential and I regularly swap between Colour Modes, as well as making good use of Soft Proofing. With a BenQ Colour Critical Monitor calibrated and profiled, using Soft Proofing and the OSD to swap between Colour Modes means I rarely get any surprises in my colour output, whether onscreen or in print.
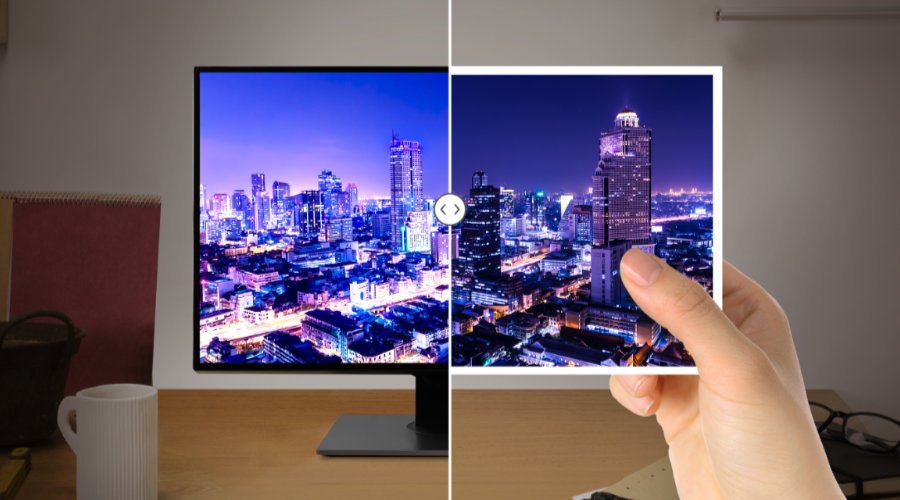
Being able to swap between Colour Modes can make a huge difference with some photographs, and with others there is no perceptible difference.
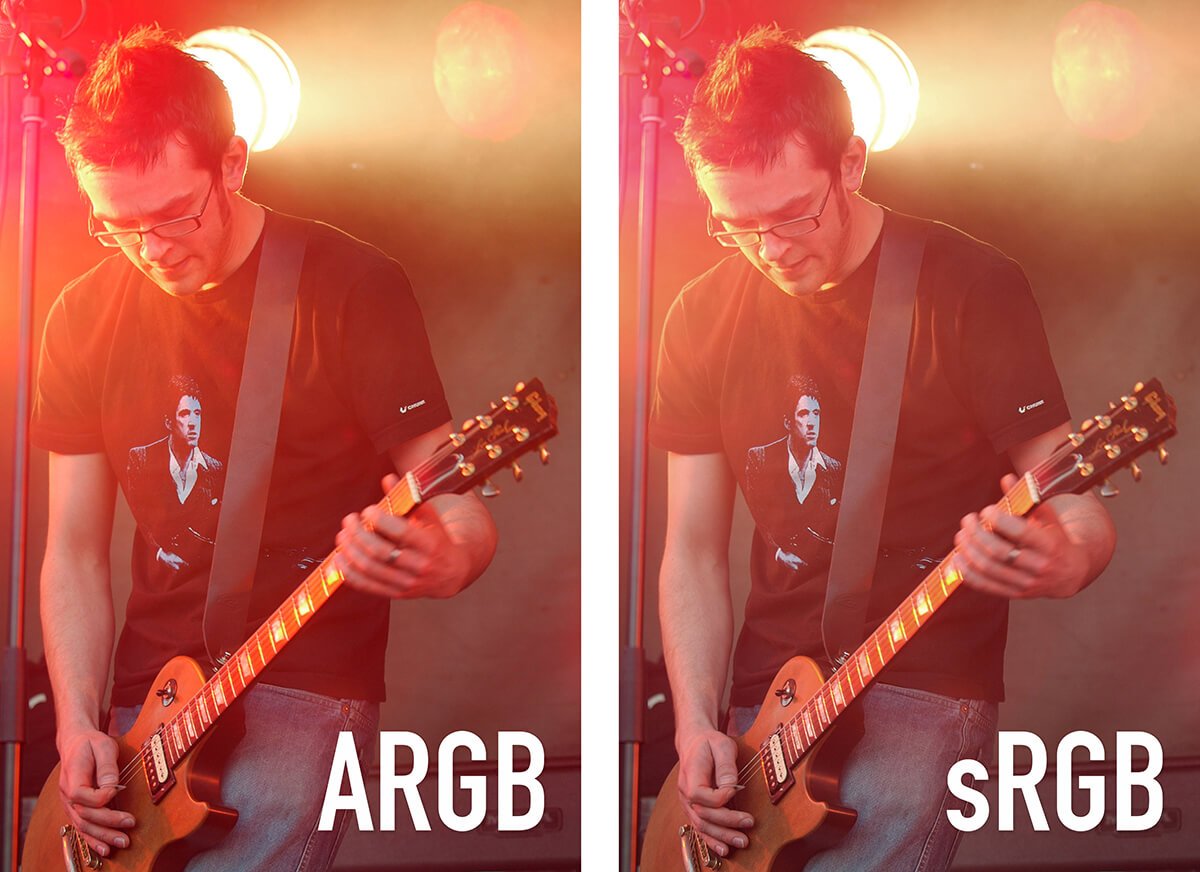
Figure 03: From Part One of this post, the difference in colour saturation between ARGB and sRGB is clear.

Inconsistent Color?
Upsets more than you'd expect
Sticking with sRGB, choosing different luminance values when calibrating will change the perception of tone which can make a huge difference; taking a subtly toned black and white photograph and making either come alive or flat and lifeless.

Figure 04: This photograph has been divided, horizontally into thirds. The top third is a little washed out. The middle section holds detail in the shadows (if your monitor is calibrated). The bottom part has compressed blacks, which can be a powerful processing choice.
By using a BenQ Colour Critical Monitor, and calibrating it, you can fine tune your image adjustments in Adobe RGB, or for general online viewing in sRGB. The OSD Hotkey Puck is a great and efficient way to test your output.